Owner's Manual BYD M6 EV — Isi Lengkap 194 Halaman
Contents
Halaman 1
Foreword
Thank you for choosing BYD. To better use and maintain the vehicle, please read this
manual carefully and keep it for future reference.
Special instructions: BYD Auto Industry Co., Ltd. recommends that you choose genuine
spare parts and use, maintain, and repair the vehicle in accordance with this manual.
The use of non-genuine spare parts to replace or modify the vehicle will affect the
performance of the entire vehicle, especially its safety and durability. Vehicle damage
and performance issues caused thereby will not be covered by the warranty. In addition,
vehicle modifications may also violate national laws and regulations and local government
regulations.
Thank you again for choosing BYD. Your valuable comments and suggestions are welcome.
To enjoy better services, please provide your accurate contact information. If there is any
change to the information, contact a BYD authorized dealer or service provider in a timely
manner to update the information in the system.
The descriptions marked with the asterisk (*) in this manual are specific to some model
configurations, and applicable only when the vehicle has these configurations. If there is
any difference with the vehicle you purchased, the configuration of the actual vehicle shall
prevail.
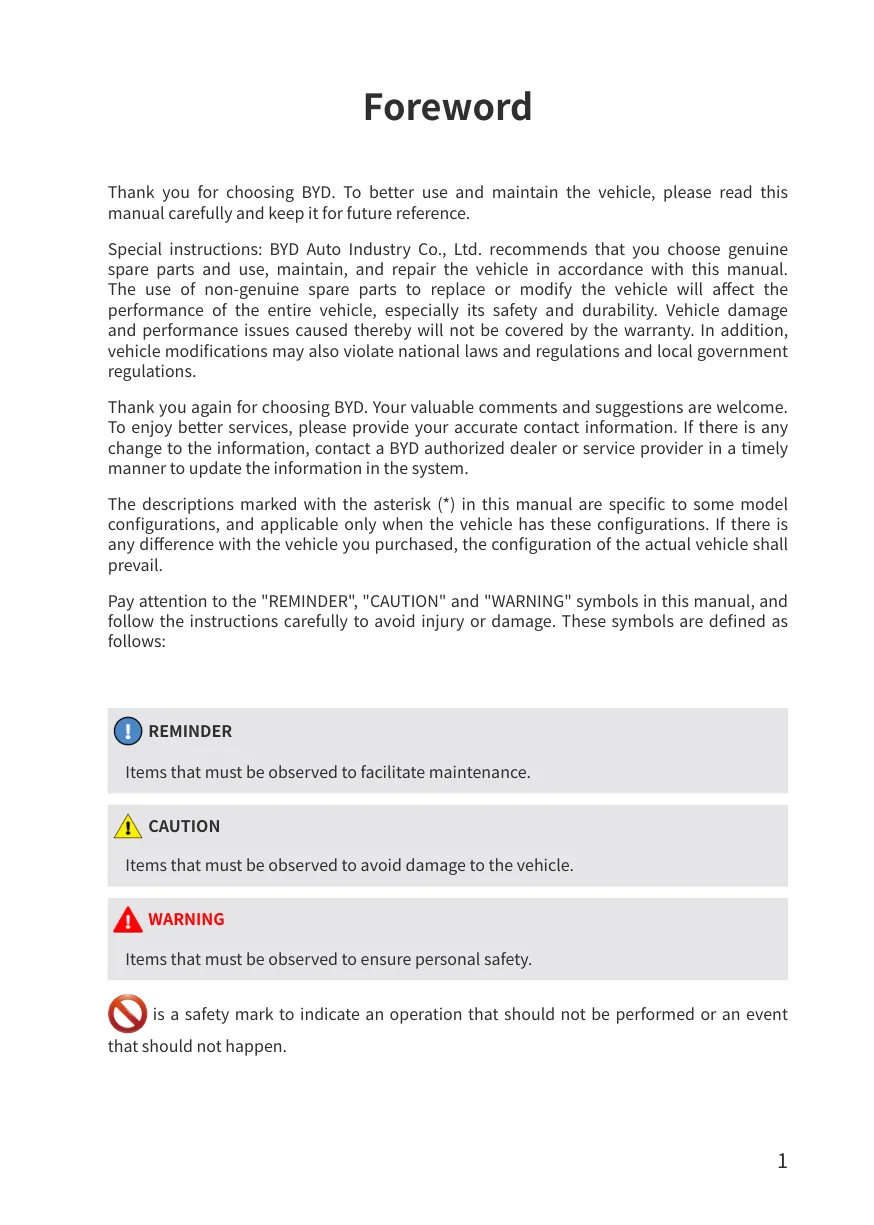
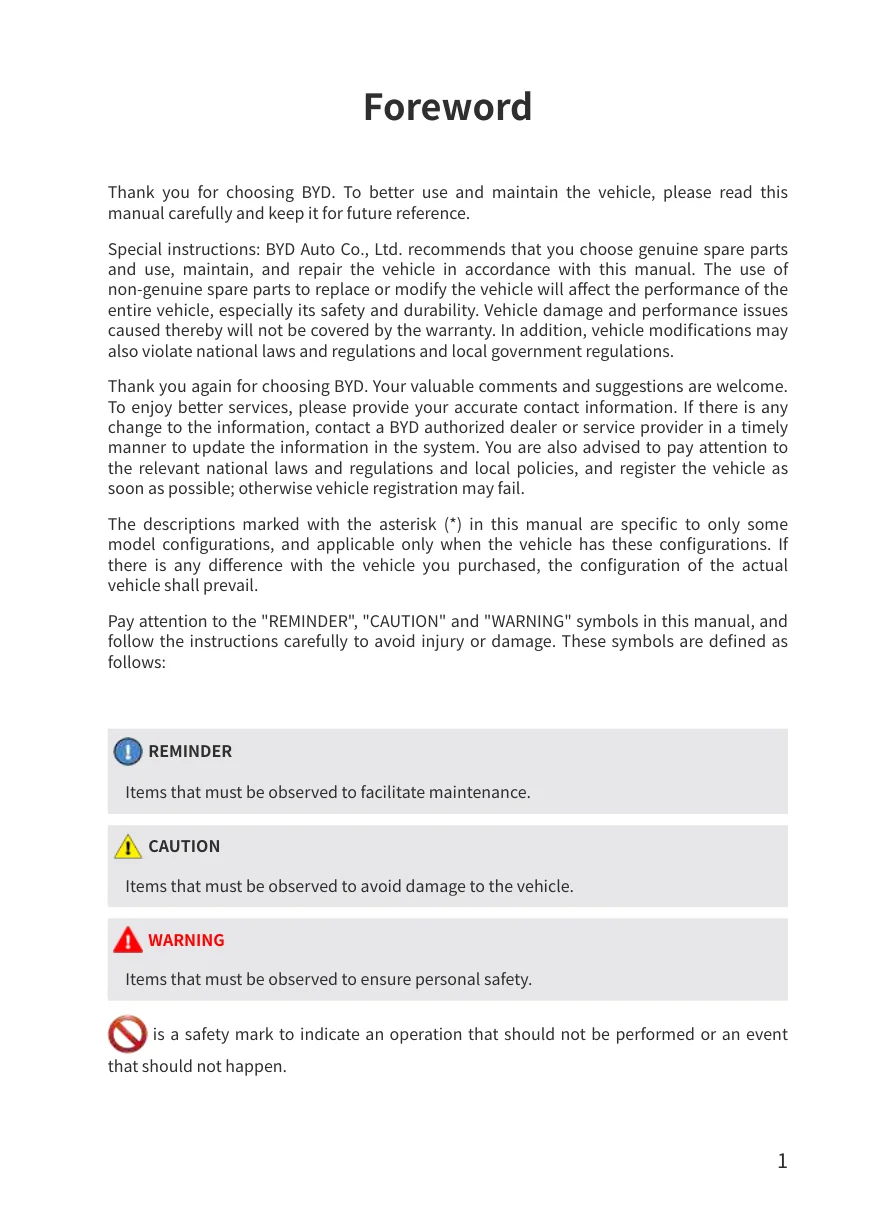
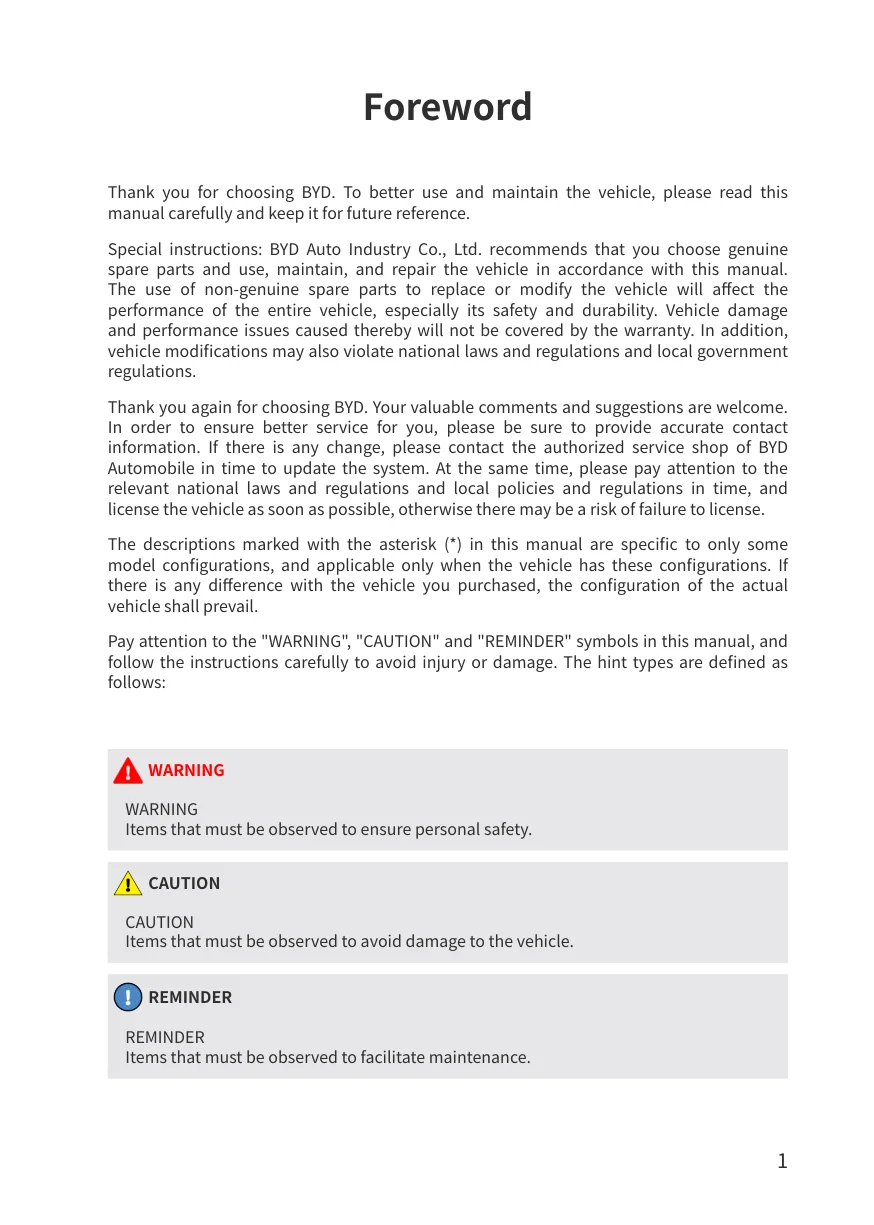
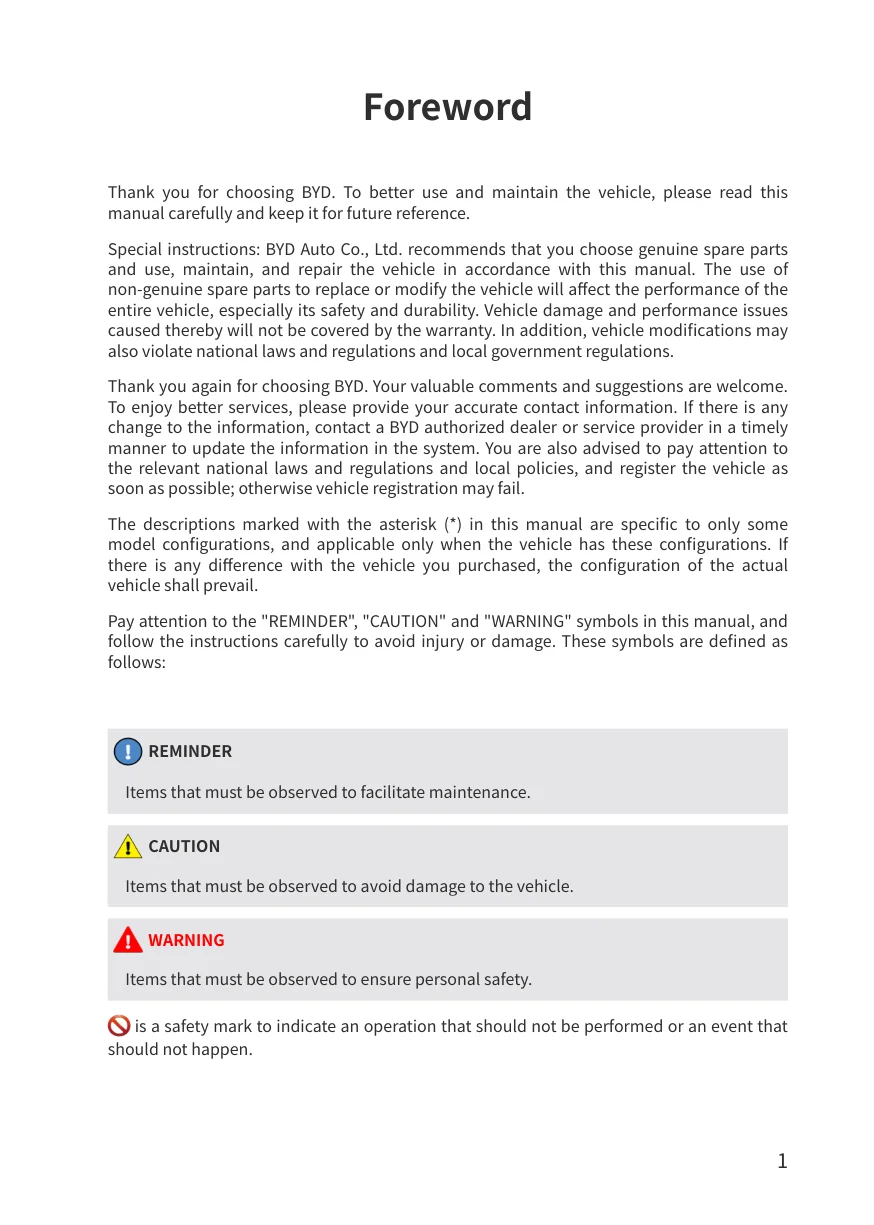
Pay attention to the "REMINDER", "CAUTION" and "WARNING" symbols in this manual, and
follow the instructions carefully to avoid injury or damage. These symbols are defined as
follows:
REMINDER
Items that must be observed to facilitate maintenance.
CAUTION
Items that must be observed to avoid damage to the vehicle.
WARNING
Items that must be observed to ensure personal safety.
is a safety mark to indicate an operation that should not be performed or an event
that should not happen.
Contents
Halaman 2
This manual is expected to help you use the product correctly, and does not provide any
description of the configuration and software version of this product. For details about the
product configuration and software version, please refer to the contract (if any) related to
this product, or consult the dealer who sold the product to you.
Copyright © BYD Auto Industry Co., Ltd. All rights reserved.
No part of this document may be reproduced or transmitted in any form or by any
means without prior written consent of BYD Auto Industry Co., Ltd.
All rights reserved
Contents
Halaman 3
Figure Index
Exterior..............................................7
Dashboard......................................... 8
Doors.................................................9
Interior............................................ 10
Safety
Seat Belts.........................................12
Seat Belt Overview.................................. 12
Using Seat Belts.......................................13
Airbags............................................ 15
Airbag Overview...................................... 15
Driver and Front Passenger Airbags....... 16
Front Passenger Side Airbags................. 17
Side Curtain Airbags................................17
Airbag Triggering Conditions and
Precautions..............................................17
Child Restraint Systems.................... 21
Child Restraint System Classification.....21
Installing Child Restraint Systems.......... 22
Anti-theft System............................. 26
Anti-theft System.....................................26
Event Data Recorder System............. 27
Event Data Recorder (EDR)......................27
Instrument Cluster
Instrument Cluster........................... 30
Instrument Cluster View..........................30
Instrument Cluster Indicators.................31
Controller Operation
Keys and Doors.................................40
Keys..........................................................40
Locking/Unlocking Doors....................... 42
Smart Access and Start System.............. 47
Child Protection Lock..............................48
Seats................................................49
Seat Precautions..................................... 49
Adjusting Front Seats.............................. 50
Adjusting Second-Row Seats.................. 51
Adjusting Rear Seats................................52
Head Supports.........................................53
Steering Wheel................................. 54
Adjusting the Steering Wheel..................54
Steering Wheel Switches.........................54
Switches.......................................... 59
Light Switches......................................... 59
Wiper Switch............................................61
Driver's Door Switches............................ 62
Window Control Switch on
Passenger Side........................................ 64
Driver Assistance Switches..................... 64
Mode Switches........................................ 65
Hazard Warning Light Switch..................65
Odometer Switch.................................... 65
Interior Light Switch................................66
Sunshade Switch*................................... 67
Using and Driving
Charging/Discharging.......................70
Charging Instructions..............................70
Charging...................................................74
Discharging Instructions.........................80
Intelligent Charging.................................81
Charge Port Anti-theft Lock.................... 82
Battery.............................................83
Contents
Halaman 4
High-Voltage Battery............................... 83
Low-Voltage Battery................................85
Usage Precautions............................87
Break-in Period........................................87
Trailer Towing..........................................87
Driving Safety Precautions......................87
Suggestions for Vehicle Use....................88
Saving Energy and Extending
Vehicle Service Life..................................89
Carrying Luggage.................................... 89
Fire Prevention........................................ 90
Wading into Water...................................91
Starting and Driving......................... 92
Starting the Vehicle................................. 92
Gear Shift Controls..................................94
Electronic Parking Brake (EPB)...............95
Automatic Vehicle Hold (AVH).................97
Driving Precautions.................................98
Driver Assistance.............................. 99
Cruise Control*........................................99
Adaptive Cruise Control (ACC)*.............100
Intelligent Cruise Control (ICC)*........... 104
Forward Collision Warning (FCW)* &
Automatic Emergency Braking (AEB)*..106
Traffic Sign Recognition (TSR)*.............109
Intelligent High Beam Control (IHBC)*.110
Lane Departure Assist (LDA)*................111
Emergency Lane Keeping Assist
(ELKA)*...................................................113
Blind Spot Assist (BSA)*........................ 114
Panoramic View System........................116
Parking Assist System*..........................118
Driving Safety Systems..........................121
Tire Pressure Monitoring System..........124
Acoustic Vehicle Alerting System
(AVAS).....................................................125
Other Main Functions......................126
Interior Rearview Mirror........................126
Power Side Mirrors................................ 127
Wipers.................................................... 127
Snow Chains*.........................................128
In-Vehicle Devices
Infotainment System...................... 130
Infotainment Touchscreen....................130
Navigation Bar.......................................131
Gestures and Responses.......................131
BYD Assistant.........................................131
Bluetooth Call........................................131
File Management...................................132
External Applications............................ 132
A/C System..................................... 132
A/C Buttons............................................132
A/C Operation Interface........................ 133
Air Purification System*........................ 135
A/C Settings........................................... 136
Function Definition............................... 136
Vents...................................................... 138
Usage Precautions.................................138
BYD App......................................... 139
About BYD App.......................................139
Account Registration............................. 139
Vehicle Condition and Control..............140
Individual Center and Vehicle
Management..........................................140
Storage.......................................... 140
Glove Box...............................................140
Center Console Storage
Compartment........................................141
Front Center Console Cubby.................141
Door Bins............................................... 141
Contents
Halaman 5
Bill Box................................................... 141
Cup Holder.............................................141
Other Devices................................. 142
Sun Visor................................................142
Grab Handles.........................................142
12V Auxiliary Power...............................143
USB Ports...............................................143
SD Card Slot*......................................... 144
Wireless Phone Charger*...................... 144
Maintenance
Maintenance Information................148
Maintenance Cycle and Items...............148
Regular Maintenance...................... 153
Regular Maintenance............................ 153
Vehicle Corrosion Prevention............... 154
Paint Maintenance Tips.........................155
Vehicle Cleaning.................................... 155
Interior Cleaning....................................156
Self-Maintenance............................158
Self-Maintenance.................................. 158
Hood...................................................... 161
Cooling System......................................161
Washer................................................... 162
Braking System......................................162
A/C System.............................................163
Wiper Blades..........................................163
Tires....................................................... 164
Fuses...................................................... 167
When Faults Occur
When Faults Occur.......................... 174
Reflective Vest....................................... 174
If Smart Key Battery Is Exhausted.........174
Emergency Shutdown System..............174
Vehicle Fire Rescue................................175
If a Collision Occurs...............................175
If the Vehicle Needs Towing..................176
If a Tire Goes Flat...................................177
Technical Data
Vehicle Data................................... 182
Vehicle Data...........................................182
Information....................................185
Vehicle Identification............................ 185
Warning Labels......................................186
Declarations of Conformity............. 187
Declarations of Conformity...................187
Abbreviations
Abbreviations.................................193
Contents
Halaman 6
6
Contents
Halaman 7
Figure Index
Exterior
1
Locking/Unlocking the Trunk P44
2
Power Side Mirrors* P127
3
Charging P72
4
Wiper Blades P163
Wiper Switch P61
Replacing Wiper Blades P127
5
Locking/Unlocking with Smart Key
P42
6
Tire P164
If a Tire Goes Flat P177
7
Lights P159
Light Switches P59
8
Tow Eye P176
9
Hood P161
Cooling System P161
Braking System P162
Washer P162
Contents
Halaman 8
Dashboard
1
Side Vents P138
2
Infotainment System P130
3
Instrument Cluster P30
4
Adjusting the Steering Wheel P54
Steering Wheel Switches P54
5
Start-up P47
6
A/C Buttons P132
7
Mode Switches P65
8
Driver Assistance Switches P64
9
Gear Shift Controls P94
10
Center Vent P138
Contents
Halaman 9
Doors
1
Light Switches P59
2
Interior Door Handle P42
3
Power Window Switches P62
Window Lock Button P63
Central Locking P63
4
Door Bins P141
5
Opening the Hood P161
6
Bill Box P141
Contents
Halaman 10
Interior
1 Interior Rearview Mirror *P126*
2 Sun Visor *P142*
3 Adjusting Front Seat *P50*
Adjusting Head Supports *P53*
4 Using Seat Belt *P13*
5 Center Console Storage Compartment
*P141*
6 Center Console Cubby *P141*
7 Cup Holder *P141*
8 Automatic Vehicle Hold (AVH) Switch
*P97*
9 Glove Box *P140*
10 Wireless Phone Charger *P144*
11 Wiper Switch *P61*
10
Safety
Halaman 11
# 01 SAFETY
* Seat Belts....................................... 12
* Airbags............................................ 15
* Child Restraint Systems................... 21
* Anti-theft System............................ 26
* Event Data Recorder System.............. 27
Pretensioner and Force Limiter Function*
Halaman 12
Seat Belts
Seat Belt Overview
Studies have shown that proper use
of seat belts can significantly reduce
casualties in emergency braking, sudden
steering or collisions. Please read the
following information carefully and
observe it strictly.
WARNING
●BYD has highly emphasized that
all occupants should always
fasten their seat belts while in the
vehicle. Failure to do so increases
the risk of injury in case of an
accident.
●Before driving, make sure all
occupants are properly buckled
up to prevent serious injury or
death in emergency braking or in
a collision.
●It is recommended that children
be seated in rear seats and always
use seat belts and suitable child
restraints.
●Do not allow children to travel
standing or kneeling on either the
front or rear seats. In case of
emergency braking or a collision,
unprotected children may be
seriously injured and their lives
may be endangered. Likewise,
do not allow children to ride
on someone's lap. This will
render the children inadequately
protected.
●When driving, make sure all
occupants have their seat belts
properly fastened to prevent
serious injury or death in
WARNING
emergency braking or in a
collision.
CAUTION
●The seat belts are designed
primarily for adults and are not
intended for children. Make sure
to choose an appropriate child
restraint system according to the
child's age and size.
●If a seat belt is damaged
or malfunctions, immediately
contact a BYD authorized
dealer or service provider
for confirmation and handling.
Until then, do not use the
corresponding seat.
Emergency Locking Retractor (ELR)
Function
●When the driver turns sharply or
brakes suddenly, when there is a
collision, or when the occupant
leans forward too quickly, the seat
belt automatically locks to effectively
restrain and protect the occupant.
●When the vehicle travels smoothly,
seat belts are pulled out and retracted
as the occupants move slowly and
smoothly, allowing the occupants to
move freely.
●If the seat belt locks due to sudden
retraction, pull on the seat belt
webbing to create retractable slack in
order to pull out the seat belt.
Pretensioner and Force Limiter
Function*
When a severe front collision occurs
and the triggering conditions of the
pretensioner are met, the pretensioner
Using Seat Belts
Halaman 13
quickly retracts part of the seat belt and
locks it to improve the protection of the
occupant. The force limiter limits the
seat-belt restraint force to the occupant's
body to a certain extent so as to avoid
injury to the occupant due to an excessive
restraint force.
REMINDER
●In the event of abnormality
or function failure, contact
a BYD authorized dealer or
service provider. Do not use
the corresponding seat until the
functions return to normal.
Using Seat Belts
1.
1. Adjust the seat position and seatback
angle (see P50).
2. Pull out the shoulder belt diagonally
across the entire shoulder without
contacting the neck or falling from the
shoulder. Position the lap belt as low
as possible around the hip.
3. Insert the latch into the buckle until it
clicks, and then pull it back to make
sure it is firmly locked. Do not fasten
the belt with any part of the strap
twisted.
01
SAFETY
4. Adjust the height of the (front)
seat belts for optimum comfort and
protection. When the seat belt is
fastened across the middle of the
shoulder, it provides the best level of
protection. Do not allow it to touch the
neck or slip off the shoulder.
5. Pull the belt firmly to check that the
adjuster is locked.
WARNING
●The shoulder belt should cross
the center of the shoulder. The
seat belt should be far from the
neck and not liable to slip from
the shoulder; otherwise, it cannot
function well in the event of
emergency braking or accident
and may even cause severe injury.
●The lap belt should be positioned
as low as possible across the hip
to prevent any injury caused by
pressing against the abdomen in
case of an accident.
Seat Belt Reminders
Halaman 14
WARNING
●The seat belt should be fitted tight
to the body for better protection.
●For normal functioning of the rear
seat belt, ensure that its latch is
inserted into the corresponding
buckle during use. The driver
should remind occupants to wear
seat belts properly.
6. Unlock the seat belt.
●Press the red unlock button on the
buckle. The latch plate pops out, and
the seat belt automatically retracts.
If the seat belt does not retract
automatically, pull it out and check
whether it is twisted.
CAUTION
●One seat belt is for one occupant
only. Do not allow multiple
occupants (including children) to
share one seat belt.
●Avoid traveling with the seatback
leaning too far back. The seat belt
protection performs best when
the seatback is upright.
●Make sure that no seat belt or
its spring bolt/buckle becomes
pressed by the door; otherwise,
the seat belt may be damaged.
●Check the seat belts regularly
for cuts, wear, looseness, and
CAUTION
other abnormalities. If any
problem is found, contact a
BYD authorized dealer or service
provider for confirmation and
handling. Until then, do not use
the corresponding seat.
●Do not remove, disassemble or
modify the seat belts without
permission.
●Use an approved model whenever
you replace the seat belt.
●After an accident, have the seat
belts checked at a BYD authorized
dealer or service provider. If the
pretensioner function is activated,
the seat belt must be replaced.
●In the event of a serious
accident, even if there is no
apparent damage, the seat belt
should be replaced along with
the seat assembly. The airbag
system should also be thoroughly
inspected.
●Pregnant women should also
fasten their seat belt properly.
Particularly, be sure to position
the lap belt as low across the
hip as possible to prevent serious
injury.
●Do not insert foreign objects such
as coins and clips into the buckle
as they prevent proper connection
between the latch and buckle.
Seat Belt Reminders
If the driver or front passenger has not
buckled up after the vehicle is started,
visual and audible alarms go on and
continue until the corresponding seat belt
is properly fastened.
●Seat belt reminder indicator
Supplemental Restraint System (SRS) Overview
Halaman 15
Any unfastened seat belt will trigger
this indicator to light up and flash as
required.
●Display of unfastened belt's seat
The indicator for the seat with
unfastened seat belt lights up.
●Unfastened seat belt reminder
If any vehicle occupant has not
buckled up after the ignition is
switched on, the seat belt reminder
indicator and the indicator associated
with the corresponding seat light up. If
the seat belt remains unfastened while
driving, in addition to the reminder
indicator, an audible alarm is given to
alert the driver and the occupant.
●When the driver and all the passengers
fasten their seat belts, the seat
belt reminder indicator turns off
and all indicators displayed for the
corresponding seats turn off.
CAUTION
●In the event of abnormality
or function failure, contact
a BYD authorized dealer or
service provider. Do not use
the corresponding seat until the
functions return to normal.
Airbags
Airbag Overview
●Supplemental restraint system (SRS) is
a part of auxiliary restraint system and
also a supplement to seats and seat
belts. When the vehicle is involved in a
serious collision and the airbag system
meets its deployment conditions,
relevant airbags will rapidly deploy
and, along with seat belts, provide
additional protection for heads and
chests of the driver and occupants, to
reduce likelihood of personal injury or
even death.
●Airbags are divided into front and
side types*, according to the type of
collision. The front airbags include a
driver airbag and a front passenger
airbag, while the side airbags include
front seat side airbags* and side
curtain airbags*.
01
SAFETY
●As an integral part of the vehicle's
passive safety protection system,
the airbag system does not replace
seat belts, and must be used in
combination with seat belts to
maximize protection. To ensure the
safety of you and your family, please
pay special attention to the warnings
and precautions in this section.
WARNING
●Never seat a child in the front
passenger seat.
●Always have the seat belts
fastened while the vehicle is in
motion.
●Occupants must sit in a
proper position to maximize the
protection provided by seat belts
and the airbag system.
●Do not disassemble or assemble
airbag components without
authorization.
●Use seat covers designed by BYD.
Non-BYD genuine covers may
worsen the airbag performance or
result in injury.
●Do not place anything between
the side airbag and the occupant.
●Do not apply excessive force to the
side of seats equipped with side
airbags.
Airbag fault warning light
Driver and Front Passenger Airbags
Halaman 16
●With the ignition switched on, this
warning light turns on and then
goes off in a few seconds if the
airbag system is working properly. This
warning light is used to monitor the
airbag ECU, collision sensors, inflation
device, warning lights, connections,
and power supply.
●If any of the following cases occurs, it
means there is a fault in components
monitored by the warning light system.
In that case, contact a BYD authorized
dealer or service provider for vehicle
inspection as soon as possible.
●When the ignition is switched on, this
warning light remains off or is solid
on after the ignition is switched on.
●This warning light turns on or flashes
during driving.
WARNING
●If the vehicle is ingressed with
water (wet carpet or vehicle
submerged in water) or damaged
by water, do not start the vehicle
and the low-voltage battery needs
to be disconnected. Otherwise,
the airbags may deploy, resulting
in serious injury or death.
Driver and Front
Passenger Airbags
If your vehicle is equipped with driver
and front passenger airbags, when the
electronic control unit (ECU) of the airbag
system detects a moderate to severe
front impact during driving and the
triggering conditions are met, the airbags
deploy to help protect you and the front
passenger's head and chest from injury.
Front airbag deployment
●In moderate to severe frontal crashes,
a sensor detects a sharp deceleration
and sends a signal to the ECU to trigger
the front airbags.
●When there is a frontal crash, the seat
belt secures the occupant's lower body
and torso in place. The airbag cushions
and protects the occupant's head and
chest.
●When the severity of the impact
does not reach the airbag deployment
threshold, seat belts provide enough
protection.
●The front airbag deflates immediately
after inflation, without affecting the
driver's vision and ability to operate
the steering wheel or other controls.
●Airbags can inflate rapidly when
triggering conditions are satisfied to
further protect drivers and occupants
in an accident.
●A loud noise will be heard when the
airbag deploys. It will not cause injury,
but it may cause tinnitus or temporary
deafness.
●A cloud of dust from the airbag surface
may come off when the airbag deploys.
Although such powder is non-toxic,
individuals with respiratory problem
might experience some temporary
discomfort.
Airbag Triggering Conditions and Precautions
Halaman 17
WARNING
●No accessories, such as telephone
holders, cups, ashtrays, may
be installed on airbag covers
or within their action range.
Otherwise, airbag deployment will
increase the risk of injury in an
accident.
Front Passenger Side
Airbags
The vehicle is equipped with side airbags
for the left and right front seats. If the
triggering conditions are met, the airbags
will deploy in an accident to help protect
the body of the driver and passengers
(side airbags are installed in the outer
edges of the front-row seatbacks and
marked with "AIRBAG").
Side Curtain Airbags
●The vehicle is equipped with left and
right-side curtain airbags (with the
A-pillar, B-pillar, and C-pillar shields
marked with "AIRBAG", as shown in the
illustration).
●When a moderate to severe side
impact is detected by the ECU during
vehicle travel, and the triggering
conditions are met, the side airbag
deploys to protect the head of the
occupant on the side of collision.
01
SAFETY
●Generally, only the airbag on the
impacted side deploys in the event of
a side impact.
●For optimum curtain airbag protection,
the occupant must have their seat belt
fastened and sit in an upright position.
Airbag Triggering
Conditions and
Precautions
●Airbag triggering conditions: In the
event of a vehicle collision, whether an
airbag will be triggered is decided by
factors such as the amount of collision
energy, accident type, collision angle,
obstacles and vehicle speed. The
airbag system may be triggered in
special collisions.
●Generally, the airbag system will
not be triggered in the event of a
minor frontal collision, rear collision
or rollover. In this case, the driver
and passengers are protected by their
properly fastened seat belts.
●The ECU of the BYD airbag system
has been set up with considerations of
common misuse and road conditions.
However, due to the increasing
changes in causes and forms of vehicle
collisions, for your safety, please
strictly follow this user manual, use the
vehicle correctly, and avoid its misuse.
Otherwise, there is no guarantee that
Airbag Triggering Conditions and Precautions
Halaman 18
the airbags will achieve their expected
effect.
Cases When Airbags May Be Deployed
The vehicle's nose hits the ground when
crossing a deep groove.
The vehicle hits a bump or curbstone.
The vehicle's nose hits the ground when
going down a steep slope.
One side of the vehicle is hit by another
vehicle.
Cases When Airbags May Not Be
Deployed
The vehicle hits a concrete column, tree,
or other slim objects.
The vehicle goes under a truck or another
large vehicle.
The tail of the vehicle is hit by another
vehicle.
Airbag Triggering Conditions and Precautions
Halaman 19
The vehicle rolls over.
The vehicle hits a wall or a vehicle at a
side other than the front side.
Parts other than the passenger
compartment receive side impact.
The lateral side of the vehicle is hit
diagonally.
01
SAFETY
The lateral side of the vehicle hits a
columnar object.
It is recommended that you contact
a BYD authorized dealer or service
provider immediately if any of the
following situations occurs.
●The airbag has deployed.
●Instrument cluster airbags warning
light
lights up abnormally.
●There is a collision with the front of the
vehicle (highlighted area shown), but
the airbags do not deploy.
Airbag Triggering Conditions and Precautions
Halaman 20
●The airbag cover has been scratched,
cracked or otherwise damaged.
●Airbags need to be removed,
disassembled, installed or repaired.
●Side airbags and curtain airbags (if
equipped) have deployed.
●There is a collision with the vehicle
door (highlighted area shown), but
the airbags do not deploy.
●The surface of the seat with a
side airbag (highlighted area shown)
is scratched, cracked or damaged
similarly.
●Decorative (liner) parts at A-pillar with
built-in curtain airbags, roof beam
and C-pillar are scratched, cracked or
damaged similarly.
WARNING
●Airbags are designed for
specific models. Any changes to
suspension, tire size, bumpers,
chassis and factory-equipped
WARNING
devices may adversely affect the
airbag system. Users must not use
any parts of the airbag system
on other car models; doing so
may lead to failure of the airbag
system.
●Fasten your seat belt and sit
properly while the vehicle is
in motion. If the seat belt is
not fastened, if the occupant
is leaning forward or sitting
improperly, airbag deployment
can increase the severity of injury.
●Do not paste stickers, cover or
decorate the hub cover of the
steering wheel, the right side
surface of the dashboard or the
surface of A, B, and C-pillar trims.
Clean these surfaces with a dry or
damp cloth, without applying too
much pressure.
●A child is not to be seated in
the front passenger seat, nor
are they to ride sitting on a
front passenger's lap, to prevent
serious injury or even casualty
caused by airbag deployment.
●Do not modify or replace seats
or trims of the seats with
side airbags. These changes
may prevent normal deployment
of side airbags, and thereby
cause airbag system failure or
unintended deployment of side
airbags, resulting in serious injury
or death.
●After a collision, even if the
airbag did not deploy, and the
pretensioner did not lock the
seat belt, to ensure the normal
operation of the airbag system,
contact a BYD authorized dealer
or service provider for inspection
as soon as possible.
Child Restraint Systems
Halaman 21
WARNING
●Drivers should maintain a distance
of at least 25 cm between their
chest and the steering wheel,
in order for the system to
provide the most effective driver
protection.
●Airbags can only provide one-time
accident protection. Once the
airbag is triggered or damaged,
the airbag system must be
replaced.
●The airbag system of this vehicle
is designed with full consideration
of domestic common misuses
and road conditions. However, in
order to avoid accidents, do not
have the bottom of the vehicle
impacted or drive roughly in harsh
road conditions.
●When transferring car ownership,
make sure to pass on all
of the vehicle's documents
and keep the new ownership
informed of airbag conditions and
replacement dates.
CAUTION
●Do not change any component
of the airbag system, including
any corresponding label. It is
recommended that any operation
done to the airbags be performed
by a BYD authorized dealer or
service provider.
●The airbag system has
strong anti-interference and
anti-disturbance resistance to
surrounding electromagnetic
interference and disturbance.
However, to avoid accidents,
do not use the vehicle in an
electromagnetic environment that
violates national regulations.
CAUTION
●This vehicle's airbag system has
been fully verified to seamlessly
match the vehicle's original
wiring harness system. Any wiring
harness modification or alteration
may cause the airbags to
deploy mistakenly under normal
conditions or fail to deploy in the
event of a collision.
01
SAFETY
REMINDER
●Follow safety regulations and
procedures related to the
scrapping of parts of the vehicle
or its airbag system.
Child Restraint
Systems
Child Restraint System
Classification
●Choose a suitable child restraint
system for your children according to
their ages and statures. A child who
cannot use a protection device for size
reason must sit in the rear seat and
have the seat belt fastened properly.
●Please correctly fix the child restraint
system not used to a seat. Do not place
it on a passenger seat or in the trunk
arbitrarily.
WARNING
●Be sure to use a seat belt or child
restraint system for a child based
on his/her age and size, so as to
effectively protect the child in an
accident or emergency stop.
Installing Child Restraint Systems
Halaman 22
WARNING
●Holding a child in arms is not
a substitute for a child restraint
system. In an accident, the child
may be crushed against the
windshield or between you and
the cabin, resulting in serious or
even fatal injury to the child.
●If side airbags are equipped, even
though a child is in the child
restraint system, do not allow
his/her head or any other body
part against any door, seat, front/
rear pillar or roof side beam
(which will be affected when
side airbags deploy). Otherwise,
the considerable impact force
generated when the curtain
airbags deploy will cause serious
or even fatal injury to the child.
REMINDER
●BYD strongly suggests you to
install child restraint systems.
Researches indicate that it is safer
to install child restraints on the
rear seats than the front seats.
●The seat belts are designed
primarily for adults and are not
intended for children. Make sure
to choose an appropriate child
restraint system according to your
child's age and size.
●Please follow the installation
instructions provided by the child
restraint manufacturer to make
sure the child restraint it is
properly installed in the vehicle.
Otherwise, emergency parking or
an accident may result in serious
or even fatal injury to the child.
Installing Child Restraint
Systems
●Please follow the installation
instructions provided by the child
restraint manufacturer to make sure
the child restraint is properly secured
to the seats in the second row.
●The second-row seats are equipped
with ISOFIX anchors for child
restraints. Make sure to fasten the top
tether when installing a child restraint.
Installing Child Restraint Systems with
ISOFIX Rigid Anchor
1. Check the ISOFIX anchorage provided
on a second row seat and secure the
child restraint to the seat according to
the labeled anchoring position.
Seven seaters*
Six seaters*
Installing Child Restraint Systems
Halaman 23
REMINDER
●The anchorages are located in the
gap between the seat cushion and
the seatback.
2. Fasten the snap hook of the top
tether strap to the anchor support, and
tighten the top tether to ensure the
strap is secure.
●Second-row seat (seven seaters)
installation position:
① Top tether
② Snap hook
③ Anchor support
●Second-row seat (six seaters*)
installation position:
① Top tether
② Snap hook
③ Anchor support
3. Reinstall the head support.
REMINDER
●If the child restraint system is
equipped with a top tether,
secure the tether to the anchoring
device.
01
●If the driver's seat obstructs the correct
installation of the child restraint, install
it on the left-hand seat of the second
row.
SAFETY
Seven seaters*
Six seaters*
●Never install a rear-facing child
restraint on the seat protected by
a front airbag (in the active state),
otherwise in the event of an accident,
the force of rapid deployment of the
front passenger airbag will result in
death or serious injury to the child.
Installing Child Restraint Systems
Halaman 24
WARNING
●Push/Pull the child restraint in
different directions to ensure it is
securely installed.
●When using the lower anchoring
device, make sure that no foreign
objects are around the anchoring
device and that the seat belt
is not stuck behind the child
restraint; make sure that the
child restraint is securely fixed,
otherwise emergency parking or
an accident may result in serious
even fatal injury to a child.
●Do not install a child restraint on
the front passenger seat.
Installing Child Restraint Systems
Halaman 25
Recommended seating positions for
installing child restraint systems
Seat (or Other Positions)
Weight Group
Front passenger
seat
Group 0
X
U
X
(up to 10 kg)
Group 0+
X
U
X
(up to 13 kg)
Group 1
X
U/UF
X
(9-18 kg)
Group 2
X
UF
X
(15-25kg)
Group 3
X
UF
X
(22-36 kg)
Note: Table definitions:
U: seat suitable for installing a universal
child restraint certified for this weight
group
UF: seat suitable for installing a front-
facing universal child restraint certified
for this weight group
X: seat position not suitable for installing
a child restraint for this weight group.
Second row
outboard seat
Second row middle
seat*
01
SAFETY
Anti-theft System
Halaman 26
Suitability of ISOFIX seating positions
for ISOFIX child restraint systems:
Weight
Group
Size
Fixed
Module
F
ISO/L1
X
X
X
Carrycot
G
ISO/L2
X
X
X
Group 0
E
ISO/R1
X
X
X
(up to 10 kg)
E
ISO/R1
X
X
X
Group 0+
D
ISO/R2
X
X
X
(up to 13 kg)
C
ISO/R3
X
X
X
D
ISO/R2
X
X
X
C
ISO/R3
X
X
X
Group 1
B
ISO/F2
X
IUF
X
(9-18 kg)
B1
ISO/F2X
X
IUF
X
A
ISO/F3
X
IUF
X
Note 1: For child restraint systems not
identified with ISO/XX size classes (A-G),
the vehicle manufacturer shall specify the
in-vehicle ISOFIX child restraint systems
recommended for each seating position
with respect to their applicable weight
groups.
Note 2: Table definitions:
IUF: seat position suitable for installing
a front-facing universal ISOFIX child
restraint certified for this weight group
X=ISOFIX seating position not suitable for
installing an ISOFIX child restraint system
for this weight group and/or this size
class.
Seat (or Other Positions)
Front
passenger
seat
Second row
outboard
seat
Second row
middle seat*
Anti-theft System
Anti-theft System
When armed, the system sounds an alarm
and triggers turn signal to flash when any
door is opened to prevent the vehicle
from being stolen.
Event Data Recorder (EDR)
Halaman 27
Arming the system
1. Switch the ignition off.
2. All occupants get off the vehicle.
3. Lock all doors. This makes the
anti-theft indicator steady on. The
anti-theft alarm system will arm
automatically after eight seconds, and
the anti-theft indicator will then begin
to flash.
4. You can leave the vehicle after
confirming that the indicator begins to
flash. Since unlocking the door from
inside the vehicle will activate the
system, never let anyone stay in the
vehicle with the system enabled.
Activating the system
●The system will raise an alarm in any of
the following situations:
●Any door or hood is unlocked or open
if without using the smart key access
function.
●The vehicle is powered on without
using the smart key start function.
Cancelling the system
●Anti-theft alarm can be stopped by:
●Unlocking the doors or the trunk with
a smart key.
●Use of the microswitch to unlock the
vehicle.
●Starting the vehicle remotely with a
smart key.
●Pressing the START/STOP button
inside the vehicle while carrying a
smart key.
WARNING
●Do not modify the anti-theft alarm
system by means of alteration or
WARNING
addition, otherwise the system
may fail.
Anti-theft Indicator
01
●When the alarm is armed, the anti-
theft indicator is solid on for eight
seconds.
SAFETY
●When the alarm is armed, the anti-
theft indicator flashes slowly.
●When the vehicle is powered on, the
anti-theft indicator turns off.
Event Data
Recorder System
●This vehicle is equipped with an
event data recorder (EDR) system.
EDR mainly records data in the
event of a crash or near-crash
(for example, airbag deployment or
hitting on a roadside obstacle) to
help comprehend the vehicle system
operation, such as:
●Vehicle velocity
●Tire pressure condition
●Adaptive cruise control (ACC) system*
status
●Whether the seat belt is fastened
Event Data Recorder (EDR)
Halaman 28
●The vehicle records EDR data only
when there is a crash or when a
near-crash event reaches a certain
extent. The EDR does not record any
data during the normal driving of the
vehicle.
●The data recorded by the EDR system
provides an understanding of the
state of the vehicle's safety-related
systems when an accident occurs, so
that relevant parties can analyze the
accident.
●The EDR data needs to be accessed
and read by special equipment. BYD
discloses your personal data to third
parties only if this is legally permissible
or you have consented to it. In
addition to the vehicle manufacturer,
third-party agencies with professional
equipment (such as government
agencies) can also read the EDR data
if they have access to the vehicle EDR
and equipment (for example, they can
read the data of SRS control unit to
clarify the accident).
Instrument Cluster
Halaman 29
02
INSTRUMENT
CLUSTER
Instrument Cluster............................30
Instrument Cluster View
Halaman 30
Instrument Cluster
Instrument Cluster View
1
Working mode
2
Time
3
Outside temperature
4
Direction
5
Regenerative braking intensity
WARNING
●When you turn on the A/C or
switch to different sport modes,
the driving range displayed will
6
Speedometer
7
Odometer
8
Driving range
9
State of charge (SOC)
10
Power meter
WARNING
be different, which is a normal
phenomenon.
Indicators and Warning Lights
Halaman 31
Instrument Cluster
Indicators
Indicators and Warning Lights
Turn signal indicator
Front fog light indicator*
ECO indicator
ACC indicator*
LDA indicator*
BSD fault indicator*
Main alarm indicator
Headlight fault warning light
Rear fog light indicator
Smart key warning light
ESC fault warning light
High-voltage battery low SOC
warning light
Position light indicator
02
OK indicator
INSTRUMENT CLUSTER
High beam indicator
BSD indicator*
ICC indicator*
LDA fault warning light*
Tire pressure fault warning light
ABS fault warning light
ESC OFF warning light
Snow mode indicator
Driving power limit warning
light
Airbag fault warning light
Warning Lights/Indicators Description
Halaman 32
Parking system fault warning
light
Seat belt reminder indicator
EPB indicator
Powertrain fault warning light
Motor coolant overheating
indicator
Warning Lights/Indicators Description
Smart key warning light
●If the key is not in the vehicle when
the START/STOP button is pressed, the
warning light will light up for a few
seconds, a beep will be heard, and a
"Key not detected" message will be
displayed.
●If you carry the electronic smart key
and press the START/STOP button, this
warning light will not light up and the
vehicle can be powered on.
●This warning light will disappear and
the vehicle can be powered on if the
key is taken into the vehicle within a
few seconds after the light turns on.
●If the warning light flashes when
the START/STOP button is pressed, it
indicates low battery of the key.
ABS fault warning light
●This warning light comes on when the
ignition is on. If the anti-lock braking
Steering system fault warning
light
Low-voltage power system fault
warning light
High-voltage battery
overheating warning light
High-voltage battery charging
connection indicator
High-voltage battery fault
warning light
system (ABS) is working properly, the
light goes out in a few seconds.
Thereafter, if the system fails, the
light lights up again until the fault is
cleared.
●When the ABS fault warning light is on
(with the parking system fault warning
light off), the braking system continues
to operate whereas the ABS does not.
●When the ABS fault warning light is on
(with the parking system fault warning
light off), since the anti-lock braking
system does not operate, the wheels
will be locked in case of emergency
braking or braking on a slippery road.
●If any of the following cases occurs, it
means there is a fault in components
monitored by the warning light system.
In that case, contact a BYD authorized
dealer or service provider for vehicle
inspection as soon as possible.
●This warning light does not come on
or is steady on when the ignition is
on.
●This warning light turns on during
driving.
Warning Lights/Indicators Description
Halaman 33
REMINDER
●A warning light that lights up
briefly during operation does not
indicate a problem.
●If the ABS fault warning light is
still on while the braking system
warning light is on, immediately
park the vehicle in a safe place.
It is recommended to contact a
BYD authorized dealer or service
provider. In this case, if brakes are
applied, the ABS will not work and
the vehicle will become extremely
unstable.
●If both the ABS fault warning light and
EPB indicator go on after the EPB is
released, the braking force distribution
system of front and rear wheels has
also failed.
●Lightly depress the brake pedal to see
whether it is normal. If it is normal,
check the brake fluid level. If the
liquid level is low, it is recommended
to contact a BYD authorized dealer
or service provider to check whether
there is leakage in the brake system
and the wear degree of the brake pads.
●If the brake pedal feels abnormal,
take measures immediately. It is
recommended to bring the vehicle to
a BYD authorized dealer or service
provider for repair.
Tire pressure fault warning
light
If any of the following cases occurs,
it is recommended to contact a BYD
authorized dealer or service provider for
inspection as soon as possible.
●With the ignition switched on, this
warning light turns on and then goes
off in a few seconds if the tire pressure
monitoring system is working properly.
If the system fails, this warning light
turns on again.
●When the tire pressure fault warning
light comes on or flashes, and the
message "Please check TPMS" is
displayed on the instrument cluster, it
indicates that the tire pressure system
is faulty.
●When the tire pressure fault warning
light is solid on and one or more
values indicate low tire pressure on the
tire pressure screen on the instrument
cluster, the corresponding tire is in
under-pressure condition.
02
INSTRUMENT CLUSTER
ESC fault warning light
●This warning light comes on when the
ignition is on. If electronic stability
control (ESC) functions properly, the
light goes out in a few seconds. If the
system fails, this warning light turns on
again until the system fault is cleared.
●If the ESC warning light flashes
temporarily while the vehicle is in
motion, it indicates the ESC system is
working.
●When the ESC warning light turns on
(with the ABS fault warning light and
the parking system fault warning light
off), the ESC fails, but the ABS and
the braking system continue to operate
normally.
●When the ESC warning light turns on
(with the ABS fault warning light and
the parking system fault warning light
off), the ESC system does not work.
This means the vehicle is extremely
unstable at sharp turns or when the
driver steers away from obstacles
ahead.
●If any of the following cases occurs, it
means there is a fault in components
monitored by the warning light system.
In that case, contact a BYD authorized
Warning Lights/Indicators Description
Halaman 34
dealer or service provider for vehicle
inspection as soon as possible.
●When the ignition is switched on, this
warning light remains off or is solid
on after the ignition is switched on.
●This warning light is steady on while
driving.
REMINDER
●A flashing warning light during
driving indicates that the ESC
system is working.
●A warning light that lights up
briefly during operation does not
indicate a problem.
●If the ABS fault warning light,
parking system fault warning light
and ESC fault warning light are
on at the same time, immediately
park the vehicle in a safe place.
It is recommended to contact a
BYD authorized dealer or service
provider. This is because braking
at this time can render the vehicle
extremely unstable, and the anti-
lock braking system does not
work at all.
ESC OFF warning light
●With the ignition on, this warning light
turns on for a few seconds and then
disappears.
●When the ESC OFF switch is pressed,
this warning light should remain
steady on and the ESC system will
not operate. When the ESC OFF switch
is pressed again, this warning light
should turn off and the ESC system
resumes normal operation.
REMINDER
●While the ESC OFF warning light
is on, the driver must stay alert
and keep driving at a lower
speed when making a sharp turn
and when avoiding an obstacle
which appears suddenly, because
ESC system is malfunctioned at
this time and braking will cause
instability.
Headlight fault warning light
●A yellow warning light means one
failed headlight, while a red warning
light means both have failed.
●When this indicator is on, it is
recommended to bring the vehicle to
a BYD authorized dealer or service
provider for inspection.
Main alarm indicator
If this indicator goes on, check the fault
prompt on the instrument cluster.
Driving power limit warning
light
When the power of the vehicle is limited,
this warning light will come on. In this
case, contact a BYD authorized dealer or
service provider in time.
High-voltage battery low SOC
warning light
This indicator is on the state of charge
meter. If this warning light is on, it
indicates low SOC of the high-voltage
battery. Charge as soon as possible.
Parking system fault warning
light
Warning Lights/Indicators Description
Halaman 35
If any of the following conditions occurs,
immediately park the vehicle in a safe
place. It is recommended to contact a BYD
authorized dealer or service provider.
●This warning light comes on when the
ignition is switched on and the brake
fluid level is low.
REMINDER
●When the brake fluid level is low,
park the vehicle because it is
dangerous to continue driving.
●This warning light is solid on if
the drive motor is running, the
brake fluid level and EPB system
operation are normal (the EPB is
engaged and released normally, and
the message "Please check the EPB" is
not displayed).
●The brake system warning light stays
on with the ABS fault warning light.
REMINDER
●A warning light that lights up
briefly during operation does not
indicate a problem.
Seat belt reminder
When the ignition is switched on, if any
occupant seat belt is not fastened, the
seat belt reminder lights up. It remains on
until the seat belt is fastened.
Low-voltage power system
fault warning light
●In charging state, this warning light
indicates failure of the charging
system.
●This light is used to warn about the
operating state of the DC module and
the low-voltage battery module when
the vehicle is not being charged.
SRS fault warning light
●With the ignition switched on, this
warning light turns on and then
goes off in a few seconds if the
airbag system is working properly. This
warning light is used to monitor the
airbag ECU, collision sensors, inflation
device, warning lights, connections,
and power supply.
02
INSTRUMENT CLUSTER
●If any of the following cases occurs, it
means there is a fault in components
monitored by the warning light system.
In that case, contact a BYD authorized
dealer or service provider for vehicle
inspection as soon as possible.
●When the ignition is switched on, this
warning light remains off or is solid
on after the ignition is switched on.
●This warning light turns on or flashes
during driving.
Steering system fault warning
light
REMINDER
●The steering system features an
electric motor to reduce the force
required to turn the steering
wheel.
●When turning the steering wheel,
a hum may be heard from the
running motor. This does not
indicate that the motor is faulty.
●Do not turn the steering wheel
to its limit position for more
than five seconds, otherwise the
temperature protection will be
activated and the steering system
Warning Lights/Indicators Description
Halaman 36
REMINDER
will be damaged or steering will
become heavy.
●If you have turned the steering wheel
frequently with the vehicle staying put
for a long time, the steering wheel may
become difficult to turn even if the
warning light does not turn on. This is
not a fault.
●To prevent steering system
overheating, the power assist effect
will be reduced if the steering wheel
has been frequently turned with the
vehicle staying put for a long time. As
a result, the steering wheel become
difficult to turn. In this case, reduce
steering frequency or power off the
vehicle. The system will recover
within 10 minutes.
WARNING
●If the steering system warning
light goes on, immediately park
the vehicle safely, and contact a
BYD authorized dealer or service
provider.
Powertrain fault warning light
●If the powertrain fails, this warning
light turns on.
●If any of the following cases occurs, it
means there is a fault in components
monitored by the warning light system.
In that case, contact a BYD authorized
dealer or service provider for vehicle
inspection as soon as possible.
●This warning light is steady on when
the ignition is switched on.
●This warning light turns on during
driving.
CAUTION
●A warning light that lights up
briefly during operation does not
indicate a problem.
●Try not to drive the vehicle when
the warning light is on. Contact a
BYD authorized dealer or service
provider to check the problem as
soon as possible.
High-voltage battery
overheating warning light
●If this indicator is on, it indicates that
the high-voltage battery temperature
is too high and the vehicle must be
stopped to cool down.
●The high-voltage battery may overheat
under the following operating
conditions:
●Driving up a slope for a long time in
hot weather.
●Long period of stop-and-go
traffic condition, frequent rapid
acceleration, frequent hard braking,
or vehicle running for a long time
without pause.
High-voltage battery fault
warning light
●This warning light comes on when
the ignition has just been switched
on. If the high-voltage battery system
is working properly, this warning
light will turn off in a few seconds.
Thereafter, if the system fails, this light
will light up again. Contact a BYD
authorized dealer or service provider
for inspection as soon as possible.
●If any of the following cases occurs,
it means that there is a fault in
the components monitored by the
warning light system. In such case,
it is recommended to contact a BYD
Other Instrument Cluster Fault Prompts
Halaman 37
authorized dealer or service provider
for vehicle inspection as soon as
possible.
●This warning light is steady on when
the ignition is on.
●This warning light is steady on or
occasionally turns on while driving.
Symbol
Error message
Response
Please check the OBC system
Vehicle network error, please
pull over safely and contact
BYD service
EV power limited
Please check the headlight
The headlight is faulty. Contact a BYD
authorized dealer or service provider.
AEB limited*
BSD limited*
LDP function limited*
Intelligent-camera is not
available due to poor
condition*
Please check the gear*
Other Instrument Cluster Fault
Prompts
The instrument cluster may display the
following fault prompts. Handle them as
recommended:
02
The on-board charging system is faulty. Check
the charging connection, and reconnect the
charging equipment. If the fault persists,
contact a BYD authorized dealer or service
provider.
INSTRUMENT CLUSTER
The vehicle may be disconnected from the
data network. Park the vehicle immediately
at a safe place, and contact a BYD authorized
dealer or service provider.
The EV function is limited. Contact a
BYD authorized dealer or service provider
immediately.
The AEB system is faulty. Park the vehicle, and
contact a BYD authorized dealer or service
provider.
The blind spot assist system is faulty. Park the
vehicle, and contact a BYD authorized dealer
or service provider.
The lane departure assist (LDA) system is
faulty. Park the vehicle, and contact a BYD
authorized dealer or service provider.
The intelligent camera is unusable. Check
whether the visual field of the camera on the
front windshield is blocked by foreign objects
or is foggy. If not, contact a BYD authorized
dealer or service provider.
The shifter controller is faulty. Park the
vehicle immediately, and contact a BYD
authorized dealer or service provider.
Other Instrument Cluster Fault Prompts
Halaman 38
38
Controller Operation
Halaman 39
03
CONTROLLER
OPERATION
Keys and Doors.................................40
Seats..................................................49
Steering Wheel..................................54
Switches............................................59
Smart Key
Halaman 40
Keys and Doors
Keys
The vehicle is equipped with
keys, including electronic smart key,
mechanical key (installed in the
electronic smart key), bluetooth digital
key* and NFC key*.
Smart Key
Lock or unlock all doors by pressing the
driver's door microswitch while carrying
the electronic smart key. Buttons on the
key help you lock or unlock doors, open
the trunk, and start the vehicle remotely.
①Indicator
②Lock button
③Unlock button
④Trunk release button
⑤Start/Stop button
⑥Mechanical key
WARNING
●The button (coin) battery in the
smart key is hazardous and both
new and used batteries are to be
kept away from children at all
times.
WARNING
●If swallowed or placed inside any
part of the body, a lithium button
battery can cause severe or fatal
injuries in two hours or less.
●Medical attention should be
sought immediately if it is
suspected the button battery has
been swallowed or placed inside
any part of the body.
CAUTION
●The smart key is an
electronic component. Observe
the following instructions to
prevent damage to the key:
●Do not expose the smart key to
high temperatures, such as on
the dashboard.
●Do not disassemble the smart
key without authorization.
●Do not let the smart key hit
other objects or fall down.
●Do not immerse the key in water
or clean it in the ultrasonic
scrubber.
●Do not place smart keys
with devices that emit
electromagnetic waves, such as
the mobile phone.
●Do not attach to the smart
key any objects (such as a
metal seal) capable of cutting off
electromagnetic wave signals.
●You can register a spare key for
the same vehicle. In this case,
contact a BYD authorized dealer
or service provider immediately.
●If the electronic smart key cannot
operate the door within the
Mechanical Key
Halaman 41
CAUTION
normal distance, or the key
indicator light is dim or off:
●Check for nearby radio stations
or airport radio transmitters
that interfere with the normal
operation of electronic smart
keys.
●The smart key battery may be
exhausted. Check the battery
inside the electronic smart key.
It is recommended to contact a
BYD authorized dealer or service
provider for inspection as soon
as possible.
●If the smart key is lost, contact a
BYD authorized dealer or service
provider as soon as possible to
prevent theft or accidents.
●Do not change the transmission
frequency arbitrarily, increase the
transmission power (including
additional transmission frequency
amplifier), or arbitrarily connect
the external detection antenna
or switch other transmitting
detection antennas.
●Do not generate harmful
interference to legal radio
communication services when
using the smart key. Once any
interference is found, stop using
the smart key immediately, and
take measures to eliminate the
interference before continuing to
use it.
●The use of micropower radio
equipment must be free from
interference of all radio services
or from radiation of devices for
industrial, scientific and medical
applications.
●Do not use it near aircraft or
airports.
CAUTION
●People implanted with
pacemakers or defibrilators
should stay away from the
detection antennas of intelligent
entry and start systems, as
electromagnetic waves can affect
the normal use of such devices.
●In addition to people
implanted with pacemakers
or defibrilators, those who
use other electronic medical
devices should also consult the
manufacturer on the use of
such devices under the influence
of electromagnetic waves.
Electromagnetic waves may bring
unknown consequences to the
use of such medical devices.
03
CONTROLLER OPERATION
●When leaving the vehicle, always
carry your key and lock the
vehicle. Never leave anyone
(especially children) alone in the
vehicle.
Mechanical Key
Use the mechanical key (inside the smart
key) to lock or unlock the driver's door.
Insert the mechanical key back into the
smart key when it is not in use.
Taking out the mechanical key
Press the "PUSH" button ② on the smart
key, and take out the mechanical key in
the direction indicated by ①.
Locking/Unlocking with Smart Key
Halaman 42
●Press the "PUSH" button and insert the
mechanical key back into the smart
key when it is not in use.
Locking/Unlocking Doors
Locking/Unlocking with Mechanical
Key
Insert the key into the lock hole and turn
it.
●Unlocking: Turn the key
counterclockwise.
●Locking: Turn the key clockwise.
Opening with Interior Door Handle
●When the vehicle is unlocked, pull the
handle once to open the door from
inside the vehicle.
●When the vehicle is locked, pull the
handle twice to open the door from
inside the vehicle.
Locking/Unlocking with Smart Key
●The wireless remote control is used
to lock or unlock all doors at a close
distance, and complete additional
functions. The key indicator flashes
once when either switch is pressed
once.
●In the active area, press the associated
button on the registered smart key to
lock or unlock all doors.
Locking:
●When the ignition is switched off and
all the doors and the hood are closed,
press the lock button to lock all the
doors with turn signals flashing once.
Check whether all doors are securely
locked.
●If any door or the trunk is not closed
properly, the turn signals do not flash,
and the vehicle sounds once.
●When the car is locked at night, the
owner can conveniently and quickly
find the lock button on the electronic
smart key by touching the blind spots
on the key.
Unlocking:
●When the ignition is switched off, press
the unlock button to unlock all the
doors at the same time. The turn
signals flash twice.
Raising/Lowering Windows with Microswitch
Halaman 43
●If the ignition is in a status other than
OFF, doors cannot be unlocked/locked
with the unlock/lock button.
●If DOOR option is selected and the anti-
theft alarm system is armed, when you
unlock the vehicle with the smart key,
even if no door is opened, the interior
lights stay on for 15 seconds and then
go out.
●If the anti-theft alarm system is armed,
open any door within 30 seconds
after unlocking with the smart key,
Otherwise, all the doors will lock
automatically.
Finding the Vehicle with Smart Key
●With the anti-theft alarm system
armed, pressing the lock button
sounds a long beep and makes turn
signals flash 15 times. Use this function
to locate the vehicle when it cannot be
found.
●When the vehicle is in car search
mode, press the lock button again.
The vehicle enters the next car search
mode.
Locking/Unlocking with Microswitch
Locking
●When the ignition is switched off and
all doors are closed but not locked,
press the microswitch on the exterior
door handle while carrying the smart
key. All the doors are locked. and turn
signals flash once.
●If any door, the hood, or the trunk lid
is not closed, pressing the microswitch
still locks the closed doors, but the
horn sounds once only, and the turn
signals do not flash.
Unlocking
03
●When the anti-theft alarm system is
armed, press the microswitch on the
door handle while carrying the smart
key. All doors and the trunk unlock.
CONTROLLER OPERATION
●Pressing the microswitch does not
work if:
●This is performed while a door is
being opened or closed.
●The ignition is not switched off.
●The smart key is left in the vehicle.
REMINDER
●If the smart key is too close to an
exterior door handle or window,
it may not be possible to activate
the entry function.
●When leaving the vehicle, always
carry your key and lock the
vehicle. Never leave anyone
(especially children) alone in the
vehicle.
●If the anti-theft alarm system is
armed, open a door within 30
seconds after the unlocking. or all
doors will relock automatically.
Raising/Lowering Windows with
Microswitch
●With the ignition off, press and
hold the microswitch while carrying
the smart key to roll up or down
Locking/Unlocking the Trunk
Halaman 44
all windows (By default, lifting the
window function is activated and
lowering the window function is
closed).
●To enable or disable microswitch
window locking and closing/unlocking
and opening functions, go to
infotainment touchscreen →
→
Vehicle → Locks.
Locking/Unlocking with NFC Key
Lock
●When doors are closed but unlocked,
hold the NFC key close to the
designated area on the driver's side
mirror. All doors are locked at the same
time with turn signals flashing once..
Unlocking
●With the anti-theft alarm system
armed, hold the NFC key close to the
designated area on the driver's side
mirror to simultaneously unlock all the
doors. The turn signals flash twice.
●The locking/unlocking function is
invalid if the NFC key is placed close
to the designated area on the driver's
side mirror while doors are being
opened or closed.
●To use the NFC digital key on the
phone, enable the NFC function of the
phone and hold the top back part of
the phone close to the designated area
on the driver's side mirror.
REMINDER
●If the anti-theft alarm system is
armed, open a door within 30
seconds after unlocking with the
NFC key, or all doors will relock
automatically.
●Some smartphone models do not
support the use of NFC digital
keys when the device is powered
off.
●Avoid using the NFC digital key of
your phone for extended periods
or frequently when it is out of
battery or turned off.
Locking/Unlocking the Trunk
Unlocking the trunk lid with smart key
●Press the trunk release button to
unlock the trunk. The turn signals then
flash twice.
●If manual trunk release is equipped:
Double-press the trunk release button
in two seconds to unlock the trunk lid.
Opening the trunk with exterior switch
●With the vehicle unlocked or the valid
smart key nearby, press the exterior
switch to unlock the trunk. Pull the
trunk lid up to open the trunk, and
close to lock the trunk.
●With the vehicle locked, approach with
the valid key and press the exterior
switch to open the trunk lid.
Emergency Trunk Releasing from the Inside
Halaman 45
Trunk close button*
●When the trunk lid is open and
stationary, press the trunk close
button to close this lid.
●Press this button a second time to stop
the lid at the current position. Press
this button again to have the lid move
in the opposite direction.
REMINDER
●If the switch is pressed again while
the lid is in motion, it will stop at
its current position.
Emergency Trunk Releasing from the
Inside
1. Remove the access cover of the trunk
lid lock from the lid trim panel.
2. Pull the lever to unlock the trunk.
WARNING
03
When operating the trunk, make
sure to observe the following
precautions:
CONTROLLER OPERATION
●When the trunk lid is opened, the
vehicle speed is less than 3km/h.
●Make sure the surrounding area is
safe when opening or closing the
trunk.
●Make sure the trunk is properly
closed before driving the vehicle.
●Make sure to alert people nearby
of the lid motion.
●Be mindful of windy conditions
when opening or closing the
trunk.
●The lid may start closing before
fully opening. Opening or closing
the trunk on slopes is more
difficult than on level ground.
Be mindful of the possibility of
the lid to move on its own in
such conditions. Before loading or
unloading the trunk, make sure
the lid is fully open and secure.
●Make sure hands and fingers are
clear from the lid area when it is
closing.
Emergency Vehicle Locking with Mechanical Key
Halaman 46
REMINDER
●When the vehicle is powered off,
the trunk lid can be unlocked from
the inside in case of emergency.
Locking/Unlocking with Central
Locking
Locking or unlocking with central
locking
See P63 in this chapter.
Locking or unlocking doors
automatically
●All doors automatically lock at vehicle
speeds above 8 km/h.
●Press the START/STOP button to switch
the ignition off. Then, all doors are
locked automatically.
REMINDER
●All doors unlock automatically
when the vehicle suffers a strong
impact, depending on the impact
intensity and accident type.
Locking/unlocking all doors
concurrently
●With the anti-theft alarm system
disarmed, the backlight of the central
lock button turns on if the vehicle
is locked and off if the vehicle is
unlocked.
●Pressing the central lock button locks
all doors so that any attempt to open
any door from the outside fails. At this
time, pull the interior handle once to
unlock a door and pull a second time
to open it.
Emergency Vehicle Locking with
Mechanical Key
When the central locking system fails or
the smart key battery is low, use the
mechanical key for emergency locking.
●Insert the mechanical key into the
inside gap of the stopper tongue,
and rotate the mechanical key to
press down the lock machine, the
white plastic component shown as the
picture, to lock the doors except the
driver' s side.
●Lock the other three doors firstly, and
they lock the driver' s door with the
mechanical key.
●When reenter the vehicle, use the
mechanical key to unlock the driver's
door first. Pull the interior handle
twice to unlock the three other doors
after entering the vehicle.
REMINDER
●Prevent excessive force from
distorting or breaking the key
during the operation.
Start-up
Halaman 47
Smart Access and Start
System
Access
Press the microswitch on the door handle
to lock or unlock the doors while carrying
the smart key.
Start-up
With the smart key inside, press the brake
pedal and the START/STOP button to start
the vehicle.
Antenna positions
① Interior antenna
② Exterior antenna (left and right)
Active area
The smart access and start functions take
effect only when the registered smart key
is within the active area.
① Active area of the access function:
about one meter from the front door
handle and the trunk.
② Active area of the start function: inside
the cabin.
If another smart key is near this vehicle's
smart key, unlocking may take longer
than usual, which is normal.
03
CONTROLLER OPERATION
REMINDER
●The smart access and start-up
function may not work properly in
the following situations:
●There is a strong
electromagnetic field nearby,
such as TV towers, power
stations, and broadcasting
stations.
●The smart key is being carried
along with a communication
device, such as a two-way radio
or mobile phone.
●The smart key is in contact with
or covered by a metal object.
●The door handle is operated too
quickly.
●The smart key is too close to the
handle.
●The smart key is in low battery.
Child Protection Lock
Halaman 48
REMINDER
●The smart key is close to
high-voltage equipment or
equipment that produces noise.
●The smart key is carried along
with another vehicle's smart
key.
●Even within the active area,
the smart key may not work
properly in certain locations, for
example, on the dashboard, in
the glove box or on the floor.
●If the smart access and start
system cannot work properly due
to system failures, bring all smart
keys to a BYD authorized dealer or
service provider for repair.
●If the smart access system is not
working properly and it is impossible
to enter the vehicle, the mechanical
key can be used to lock/unlock the
driver's door, or the wireless remote
control function can be used to lock/
unlock all doors.
●Pressing the START/STOP button may
not enable the start function due to:
●Smart key failure. If the smart
key warning light comes on and
a message ("Low key battery") is
displayed on the instrument cluster,
the battery of the key may be
exhausted.
●Hold the smart key close to the
no-power sign on the auxiliary
dashboard (in the cup holder) to start
the vehicle. Refer to the operation
procedure in P174.
●The smart key battery should be
replaced as soon as possible. It
is recommended to contact a BYD
authorized dealer or service provider
for replacement.
●The vehicle is started repeatedly in a
short time. Wait for 10 seconds and
start the vehicle again.
If smart key battery is exhausted
If the vehicle cannot be started using the
start function and the smart key indicator
does not flash, the smart key battery may
be exhausted. Please replace the battery
as soon as possible.
Saving battery power
●The smart key communicates with the
vehicle even when the vehicle is not
running. Therefore, do not leave the
smart key in the vehicle or within two
meters from the vehicle.
●Receiving strong electromagnetic
waves for a long time drains the
battery of the smart key quickly. The
smart key must be kept at least
two meters away from the following
devices:
●TVs
●PCs
●On-board charger
●Electroliers
●Fluorescent desk lamps
Child Protection Lock
●Child protection locks are designed
to prevent children in rear seats from
accidentally opening doors. Such locks
are provided on each side of the left
and right rear doors.
●The door cannot be opened from
inside the vehicle while the latch is
locked. To open this door, use the
exterior door handle.
Instructions for Seats
Halaman 49
CAUTION
●Before driving, especially when
a child is in the vehicle, ensure
that the doors are closed and the
child protection lock function is
enabled.
●Proper use of seat belts and
locked doors helps prevent the
driver and passengers from being
thrown out of the vehicle in the
event of an accident, and prevent
the doors from being opened
accidentally.
Seats
Seat Precautions
When the vehicle is moving, all
passengers in the vehicle must fasten
their seat belts, and rest their backs
upright against the seatback.
WARNING
●Do not drive the vehicle until
occupants are seated properly.
●Passengers are not to ride sitting
on folded seatback, in the
trunk or on luggage. Improper
seating position or improperly
fastened seat belts can result in
WARNING
severe personal injury in case of
emergency braking or a collision.
●It is prohibited to stand or move
around the seats when driving,
or passengers may get injured in
case of emergency braking or a
collision.
CAUTION
03
●Adjust the driver's seat so that
the pedals, steering wheel, and
dashboard controls are all within
the driver's easy control.
CONTROLLER OPERATION
REMINDER
●Do not adjust the driver's seat
while the vehicle is in motion, as
unpredictable seat movement can
cause the loss of vehicle control at
this time.
●While adjusting a seat, do not let
it hit against any passenger or the
luggage.
●After manually adjusting the seat,
always check that it is securely
locked into place by attempting to
push it forward and backward.
●After adjusting the seatback, lean
back to confirm the seatback has
been locked.
●Do not place any items under
the seats. The driver may lose
control of the vehicle because
items placed there affect the
seat locking mechanism or
accidentally push up the seat
position adjustment lever, causing
the seat to move suddenly.
●When adjusting the seat, do not
place your hand under the seat
Ventilation System
Halaman 50
REMINDER
or near its operating parts, to
prevent being crushed.
Adjusting Front Seats
Adjusting Front Seat with Power*
Manual front seat adjustment include
seat position adjustment, seat height
adjustment*, and seatback angle
adjustment.
① Seatback angle adjustment switch
Toggle the upper end of the seatback
angle adjustment switch to adjust the
seatback angle.
② Seat position adjustment switch
●Toggle the seat position adjustment
switch back or forth to move the seat
backward or forward.
●Move the switch up or down to raise or
lower the seat.
Adjusting Front Seats Manually*
Front seat adjustment include seat
position adjustment, seat height
adjustment, and seatback angle
adjustment. Choose the following
methods according to the actual
configuration of your vehicle.
① Seat position adjustment lever
●To move forward or backward, hold
the middle of the adjustment lever to
pull it up, slide the seat to the desired
position, and release.
●After adjusting the seat, always check
that it is securely locked into place
(for example, a locking sound is heard)
by attempting to push it forward and
backward.
② Seat height adjustment handle
Pull up the height adjustment handle
to adjust the seat to a desired height.
Pull down the handle to lower the seat.
Repeat the adjustment for several times
to the required height. If the resistance
of the handle increases significantly, it
indicates that the seat has been adjusted
to the highest or lowest position.
③ Seatback adjustment handle
Pull up the adjustment handle, and lean
back or forward to adjust the seatback
angle. Release when you have found the
desired position.
Ventilation System
●To enable or disable seat ventilation,
go to the infotainment touchscreen →
→ Seats.
●You can also access the seat ventilation
settings in the drop-down menu on
infotainment system homepage.
Adjusting Second-Row Seats
Halaman 51
Ventilation adjustment
●Seat ventilation: On the infotainment
touchscreen, tap the seat ventilation
controls to select a ventilation mode: 1
or 2.
●This function is always disabled when
the vehicle is just powered on.
Adjusting Second-Row
Seats
Seven seaters*
●To move forward or backward, hold
and pull up the adjustment lever, slide
to the desired position, and release.
●Pull up the adjustment handle, and
lean back or forward to adjust the
seatback angle. Release when you
have found the desired position.
Six seaters*
03
①Seatback adjustment handle
●Pull up the adjustment handle, and
lean back or forward to adjust the
seatback angle. Release when you
have found the desired position.
CONTROLLER OPERATION
●Ensure that the second row seats
are unoccupied. Lift the backrest
adjustment handle upward, and push
the backrest forward at the same time
until the backrest is folded flat.
②Seat position adjustment lever
●To move forward or backward, hold
the middle of the adjustment lever to
pull it up, slide the seat to the desired
position, and then release the lever.
●After adjusting the seat, always check
that it is securely locked into place
(for example, a locking sound is heard)
by attempting to push it forward and
backward.
Second row armrest adjustment (six
seaters)*
Adjusting Rear Seats
Halaman 52
●The height of the armrest of the
second row seat can be adjusted
within a certain range.
●Lift the armrest of the second row seat
before accessing the third row seat.
Adjusting Rear Seats
●Adjusting seatback angle
●Pull up the adjustment handle, and
lean back or forward to adjust the
seatback angle. Release when you
have found the desired position.
●Flipping and lowering the seatback
●Pull the cord to straighten the
seatback.
●Push the seatback forward/backward
to fold it. You can fold the seatback
forward until the back touches the
cushion, or you can fold it backward
until reaching the locking position
(with a locking click).
REMINDER
●Before folding the second or third
row seats, ensure that the seats
are unoccupied to avoid injury to
passengers or damage to objects.
●Before folding the second or third
row seats, remove any luggage or
other items under the seats to
avoid damage.
●Before folding the second or third
row seats, unfasten the seat belts
and put them away to prevent
them from interfering with seat
folding.
●Before folding the third row seats,
adjust the head supports to the
lowest position to avoid affecting
seat folding or scratching the seat
fabric.
●Handle the seats gently during
folding to avoid damage to the
seats.
●When raising the second row seat,
pull the backrest upward until
you hear the seat click into place
to avoid danger caused by seat
movement during driving.
●To raise the third row seats,
pull the backrest upward until
it reaches the end of the track
and then release the pull ring,
and confirm that the backrest is
Adjusting Head Supports
Halaman 53
REMINDER
securely locked into position to
avoid danger.
Accessing the Third-Row Seats
Seven seaters*
1. Stop the vehicle and ensure that it is
on a relatively flat surface.
2. Ensure that the second row seats are
unoccupied. Pull up the handle on the
top of the right outboard seat backrest,
push the backrest forward to tilt, and
the seat slide automatically unlocks,
and then push the seat forward. Then
enter and exit the third row seating
positions from the rear of the seat.
3. Pull the seat backward, and then lift
the backrest to the locked position to
ensure the safety of driving.
Six seaters*
●The third row can be accessed from the
aisle between the seats in the second
row.
REMINDER
●Before operating the right
outboard seat in the second row,
ensure that the seat is unoccupied
to avoid injury to passengers or
damage to objects.
REMINDER
●To facilitate passengers to enter
and exit the third row, move
the driver's seat forward as far
as possible before operating the
right outboard seat. This can
provide maximum access space
for passengers in the third row.
●If the third row seats are occupied,
be careful not to injure the feet or
knees of the passengers when the
right outboard seat of the second
row is moved backward.
03
CONTROLLER OPERATION
Head Supports
Lifting a head support
Lift the head support in the direction
of its post until it is in the appropriate
position, and then release it until a
locking sound is heard.
Lowering a head support
Press and hold the head support
adjustment button, lower the head
support to a proper position, slightly lift
the head support and release the button
after hearing a locking sound.
Removing a head support
Press and hold the head support
adjustment button, remove the head
support and release the button.
Installing a head support
Steering Wheel Switches
Halaman 54
Insert the head support post into
the bushing with the grooves facing
forward. Press and hold the head support
adjustment button, lower the head
support to a proper position, slightly lift
the head support and release the button
after hearing a locking sound.
REMINDER
●Head supports protect vehicle
occupants from head and neck
injuries. Adjust the head support
so that its center aligns with
the back of your head for
maximum protection. Adjust the
head support to the proper
position based on your actual
height.
Steering Wheel
Adjusting the Steering
Wheel
To adjust the steering wheel position,
hold it and operate as follows:
●Push down the steering wheel
adjustment handle, adjust the steering
wheel to the desired position, and
then restore the handle to the locking
position.
WARNING
●Never adjust the steering wheel
while driving. This may obstruct
the control of the vehicle,
resulting in accidents.
●After adjusting the steering wheel,
move it up and down to verify that
it is securely locked.
Power-Assisted Steering Mode
Settings*
●The feel of steering assistance varies
from person to person, and so do the
evaluation and needs for this feel.
●Settings of the function is accessible
on the infotainment touchscreen.
REMINDER
●Setting the power steering to
sport mode is suggested if the
steering wheel feels light when
the vehicle is running at a high
speed.
Steering Wheel Switches
Halaman 55
# Steering Wheel Switches
## Configuration 1

<div style="float: right; transform: rotate(90deg); transform-origin: top left; white-space: nowrap; margin-top: 150px; margin-right: -20px; font-weight: bold;">
03 CONTROLLER OPERATION
</div>
| | | | |
|---|-----------------------------|---|-----------------------------|
| 1 | AVM | 8 | Call |
| 2 | Screen mode | 9 | Speech recognition |
| 3 | Distance - | 10| Right |
| 4 | Distance + | 11| Scroll button |
| 5 | Cruise control switch or +/Reset or -/Set | 12| Left |
| 6 | Lever | 13| Mode |
| 7 | ICC | 14| Instrument cluster/Back |
55
Steering Wheel Switches
Halaman 56
Configuration 2
1
AVM
2
Screen mode
3
Reset
4
Set
5
Cruise control
6
Lever
7
Cancel cruise control
The audio control switch is accessible
when the ignition is switched on.
Left-hand buttons
AVM
●Turns panoramic view off if already in
panoramic view mode, or on if not in
panoramic view mode.
Screen mode
8
Call
9
Speech recognition
10
Right
11
Scroll button
12
Left
13
Mode
14
Instrument cluster/Back
●Switches between the landscape and
portrait mode of the infotainment
system touchscreen.
Distance -*
●Reduces the distance from the vehicle
ahead by one notch when the ACC
function is enabled. A total of four
notches are available.
Distance +*
Steering Wheel Switches
Halaman 57
●Increases the distance by one notch
when the ACC function is enabled. A
total of four notches are available.
Cruise switch*
●Turns the ACC system on or off.
+/Reset*
●Activates the adaptive cruise control
system and uses the previous system
settings.
-/SET*
●Sets the current speed to the target
cruise speed.
Cancel cruise control*
●Changes the ACC mode from active to
standby.
ICC*
●Enable or disable ICC system.
REMINDER
●For instructions on using cruise
control, see P100 and P104.
Right-hand buttons
Scroll button
●Adjusting infotainment system volume
when the instrument cluster is not in
menu mode:
●Roll the button upward to increase
the volume. The button is non-
operational when the volume
reaches the highest.
●Roll the button downward to
decrease the volume. The button is
non-operational when the volume
reaches the lowest.
●Press down the button to mute.
●When the instrument cluster is in menu
mode:
●Roll the button upward to select the
upper level-2 or level-3 menu items.
●Roll the button downward to select
the lower level-2 or level-3 menu
items.
●Press down the button to go to
the next-level menu or confirm the
current setting.
CAUTION
●The infotainment system is muted
once the instrument cluster is set
to the menu mode. To adjust
infotainment system volume, exit
the instrument cluster menu
mode first.
03
CONTROLLER OPERATION
Left/Right
●In radio mode:
●Press and hold the
button to
automatically search for the previous
radio station with a strong signal
(turning frequency down).
●Press the
button to select the pre-
saved radio station upward.
●Press and hold the
button to
automatically search for the next
radio station with a strong signal
(turning frequency up).
●Press the
button to select the pre-
saved radio station downward.
●When the infotainment system is
in USB/Bluetooth music/third-party
music app/other modes:
●Press the
button to play the
previous track (track number -1).
●Press the
button to select a
record upward on the Bluetooth call
record or phonebook screen.
Steering Wheel Switches
Halaman 58
●Press the
button to play the next
track (track number +1).
●Press the
button to select a
record downward on the Bluetooth
call record or phonebook screen.
●In the menu mode:
●Press the
button to switch to
level-1 menu and its submenus on
the left.
●Press the
button to switch to
level-1 menu and its submenus on
the right.
Call
●Press this button to make or receive a
call. The audio system is muted at the
same time.
●When a Bluetooth-unrelated screen is
currently displayed, press this button
to switch to the phone selection screen
if Bluetooth is disconnected, or to the
Dial screen if Bluetooth is connected.
●After entering a phone number on the
Dial screen or selecting a record on the
Call Log or Contacts screen, press this
button to dial the number.
●When Bluetooth is connected, but no
phone number is entered on the Dial
screen, press this button to switch to
the Call Log screen. Press this button
again to call the first dialed number on
the call history.
Speech recognition
●Press this button for the infotainment
touchscreen to switch to the voice
recognition screen.
●Press this button again to re-enter a
voice command.
Instrument cluster/Back
●When the instrument cluster is not in
the menu mode, press this button to
view the instrument cluster menu.
●When the instrument cluster is in menu
mode, press this button to return to
the upper-level screen, or to exit the
menu if there is no upper-level screen.
●When on the Bluetooth call screen,
press this button to end the call.
Mode
●Selecting a mode: Press the Mode
button to switch between media apps,
peripherals, and pre-installed third-
party audio/video apps.
●If speakers are turned off, press this
button to turn them on and enter the
memory playback mode, or switch
to the radio mode if there is no
playback source (for example, no
external audio equipment) in the
memory playback mode.
Horn
●Press the horn button area to honk the
horn, and release to stop honking.
CAUTION
●Avoid pressing honking for too
long, as the horn may be
damaged.
REMINDER
●Observe the traffic laws and use
the horn properly.
Light Switches
Halaman 59
Switches
Light Switches
Set the light switch to
to turn off all
lights except for daytime running lights.
Auto lights
Set the light switch to
. The body
control module captures the brightness
data from the light intensity sensor to
automatically turn the position lights and
low beam on or off.
Position lights
Set the light switch to
to turn on
position lights and license plate light.
Low beam
03
Set the light switch to
to turn on the
low beam.
CONTROLLER OPERATION
Rear fog lights
Set the light switch to
and rotate the
, to turn on rear fog
lights.
fog light dial to
High beam
Set the light switch to
and push
the lever down (away from the steering
wheel) to turn on the high beam.
Light Switches
Halaman 60
Overtaking light
Pull up the lever (toward the steering
wheel) to turn on the overtaking light.
Release the lever for the light switch to
automatically reset. The overtaking light
turns off.
Turn signals
●Push up the combination switch light
handle. The left turn signal and its
indicator on the instrument cluster
flash.
●Pull down the combination switch light
handle. The right turn signal and the
turn signal indicator on the instrument
cluster starts flashing at the same time.
●Once turned on, turn signals continue
flashing even after the lever is
released. They will turn off after the
turn is complete. Depending on the
driver's habit, the turn signal will reset
after the vehicle turns around under
some extreme conditions.
Auto light off
●Conditions to activate the auto light off
function: To activate this function, set
the light switch to
or
and
switch off the vehicle power.
●When the function is activated, the
headlights and position lights turn off
in 10 seconds if the driver's door is
closed.
●When the function is activated, the
headlights and position lights turn off
in 10 minutes if the driver's door is
open.
●After the lights turn off automatically,
if the light status changes, these lights
come on in the new status. If the
conditions to activate the auto light off
function are still met, the function is
activated again.
●Disabling of the auto light off function:
When the vehicle is powered on, the
auto light off function is disabled,
and the light switch can be operated
normally.
●If the auto light off function has turned
off the lights and the anti-theft alarm
system has been armed, disarming the
Wiper Switch
Halaman 61
alarm system makes the lights come
on again automatically. If the driver's
door remains closed, the lights go off
again after 10 seconds. But if any door
is open, it turns off the light in 10
minutes.
Lighting delay
●Coming-home lighting:
●The lighting delay is 10 seconds
by default and can be set on the
infotainment touchscreen. With the
light switch set to
,
, or
, when you power off the vehicle,
lock four doors, and are leaving
the vehicle, the corresponding lights
keep on for 10 seconds (or the set
time period).
●Leaving-home lighting:
●The lighting delay is 10 seconds
by default and can be set on the
infotainment touchscreen. With the
light switch set to
,
, or
,
when you unlock and are approaching
the vehicle, the corresponding lights
keep on for 10 seconds (or the set time
period).
●You can set the delay in infotainment
touchscreen →
→ Vehicle Settings
→ Ambient Light.
Wiper Switch
●The lever is used to control the
windshield wipers and washer. It has
five modes:
: Fast
●
: Slow
●
: Intermittent
●
: Off
●
: Point-wiping
●
03
●Push up or pull down the lever to
select a mode.
CONTROLLER OPERATION
●In slow and fast modes, the wiper
operates continuously.
●Pulling down the lever from the
position activates the point-wiping
mode
. The wipers wipe at a low
speed until you release the lever.
●The
INT knob determines the
frequency at which the intermittent
mode wipes.
Front windshield washer
●To clean the front windshield, pull the
wiper switch lever backward (towards
the steering wheel) so that the washer
spray washing fluid while the wipers
operate.
●If the lever is pulled for less than one
second, the wipers wipe once after the
current action. If the time exceeds one
second, the wipers wipe twice.
Power Window Switches
Halaman 62
Rear windshield wiper and washer*
●Set the wiper switch to
to activate
the rear windshield wiper; set it to
to stop the wiper.
●Set the wiper switch to
to activate
the rear windshield wiper and washer
simultaneously.
●Set the wiper switch to
and release
it. The wiper operates twice after
washing fluid has been sprayed.
CAUTION
●Due to differences in vehicle
equipment, the specific details
of wiper function vary between
vehicles.
REMINDER
●Check and clean the wiper blades
at regular intervals.
●Do not start the wipers while
rain is starting, as the windshield
cannot be cleaned and rainwater
mixed with sand and dust may
instantly blur your view, affecting
driving safety.
●Use cleaning agent for glass. The
use of water, or another type
of detergent, may damage the
washer motor.
●If the trunk is open or not fully
closed, the wiper switch will fail to
control the rear wiper until the lid
is closed.
Driver's Door Switches
Power Window Switches
●The window control switch at the
driver's side contains four buttons to
roll up or down windows on four
doors, respectively.
●When the ignition switch is on OK, all
the window switches can lift up and
down the window.
●The ignition is switched off. When
the left and right front doors are
not opened, the power windows can
continue to work for a maximum of
10 minutes. If the left and right front
doors are open, the power window
delay function is cancelled.
Central Locking
Halaman 63
Automatic operation (if equipped with
anti-pinch function)
●To open: Press the switch downward
firmly and the window will open
completely.
●To close: Pull the switch up firmly and
the window will close completely.
●To stop the window halfway, gently
push the switch in the opposite
direction.
Manual operation
●To open: Press the switch down gently
and hold it until the desired position is
reached.
●To close: Pull the switch up gently and
hold it until the desired position is
reached.
●Press the window lock switch. Only
the switches on the driver's side can
be used to open/close the rear two
windows, and the window switches on
the rear row are deactivated.
●When the ignition is switched off, the
power windows can continue to work
for a maximum of 10 minutes. If any
front door is opened halfway, the four
windows will stop working.
Window Lock Switch
Press the window lock switch. Only the
switches on the driver's side can be used
to open/close four windows; the window
switches in the rear row are deactivated.
Press the switch a second time, and the
rear window switches work normally.
03
CONTROLLER OPERATION
Central Locking
The driver's door is equipped with power
door lock switches. The switches can lock
or unlock all doors.
Press
to lock all doors.
Press
to unlock all doors.
Driver Assistance Switches
Halaman 64
Anti-pinch Function*
If someone or an object is caught by the
window when it is rolling up, the window
stops and rolls down automatically.
WARNING
●Excessively frequent activation
of the anti-pinch function can
activate the regulator motor's
overheat protection.
●Never try to deliberately activate
the anti-pinch function.
●The anti-pinch function may not
work if an object is jammed into
the window when it is almost
completely closed.
●Contacting a BYD authorized
dealer or service provider for
maintenance is recommended if
the windows' automatic closing
function or anti-pinch function is
not working normally.
Initialization of anti-pinch function
●If the low-voltage battery is
disconnected while a window is being
rolled up or down, the automatic
rolling-up and anti-pinch functions of
the driver's door both cease to work
and the indicator flashes. In this case,
initialize the settings as follows:
●Pull and hold the window control
switch for the first time, so that
the window rises to the top for
stalling for at least 400 ms. Release
it when the window rises to the top.
Then, the indicator on the window
control switch changes from flashing
to lighting and the initialization has
been completed.
Side Mirror Adjustment Buttons*
Side mirror selection buttons
Left side mirror button
Right side mirror button
Side mirror adjustment control
Press this button to adjust the side mirror
lens to a right position.
Window Control Switch
on Passenger Side
When the ignition is on, use the front
left and rear door window switches to
operate the respective windows.
Driver Assistance
Switches
The driver assistance switches include
blind spot detection (BSD) switch and
automatic vehicle hold (AVH) switch.
① BSD switch
Odometer Switch
Halaman 65
Press this switch to activate blind spot
detection (see P114 for details).
② AVH Switch
Press this switch to activate automatic
vehicle hold (see P97 for details).
Mode Switches
① Regenerative braking adjustment lever
●Toggle up the lever to increase
regenerative braking force.
●Pull the lever down to trigger standard
regenerative braking.
② Driving mode stick
●Available driving modes include
economy mode (ECO), sports mode
(SPORT), normal mode (NORMAL), and
snow mode. Using the stick, choose
among the different modes shown on
the cluster to suit your different needs.
Snow mode
●This mode is recommended on fairly
strong surfaces that are covered with
a layer of loose and slippery materials
(e.g., grass, snow, ice, or gravel).
●In snow mode, traction and control
features are optimized, but it is
recommended to press the accelerator
pedal slowly and control the speed.
CAUTION
●ESC system may limit the vehicle's
torque, therefore, temporarily
shutting down it may help if the
vehicle skids and gets stuck in soft
snow. The ESC system must be
restarted after conditions are back
to normal.
03
CONTROLLER OPERATION
Hazard Warning Light
Switch
When the
button is pressed, all turn
signals and turn signal indicators on the
instrument cluster start flashing. They
all stop flashing when the
button is
pressed again.
Odometer Switch
●Press the odometer switch to switch
between "Total Mileage" - "Mileage
1" - "Mileage 2" - "Total Mileage".
The switching status is displayed
accordingly on the instrument cluster.
Side Interior Light Switch
Halaman 66
●Press and hold "Mileage 1" and
"Mileage 2" to clear the mileage
information.
Interior Light Switch
Front Interior Lights Switches
Front interior lights switches are as
shown in the illustration:
① Greeting light
② Right front interior light
③ Right front interior light switch
④ DOOR control switch
⑤ Interior light master switch
⑥ Left front interior light switch
⑦ Left front interior light
Turn on/off all front interior lights
When the ignition is switched off, press
⑤, and all the front interior lights turn
on for several minutes and then turn off
automatically, so as to avoid continuous
discharge of the low-voltage battery.
Turn on/off the left front interior light
When the ignition is switched off, press
⑥, and the front left interior light turns
on for several minutes and then turns off
automatically, so as to avoid continuous
discharge of the low-voltage battery.
Turn on/off the right front interior light
When the ignition is switched off, press
③, and the front right interior light turns
on for several minutes and then turns off
automatically, so as to avoid continuous
discharge of the low-voltage battery.
DOOR control button
When the switch ④ is pressed and the
working indicator is on, the left/right
front interior lights and the greeting light
will turn on when any door is opened
or closed. If any door is opened all the
time, the left/right front interior lights
and the greeting light will turn on for
several minutes and then automatically
turn off.
Side Interior Light Switch
●When the ignition is switched off,
press the switch for side interior lights,
the lights turn on for several minutes
and then turn off automatically, to
avoid continuous discharge of the low-
voltage battery.
●If the working indicator for the door
control switch is on, the side interior
lights will turn on when any door
is opened or closed. If any door is
opened all the time, the side interior
lights will turn on for several minutes
and then automatically turn off.
Sunshade Switch*
Halaman 67
Sunshade Switch*
Sunshade Switch*
●Pull the switch to the rear of the
vehicle to open the sunshade. Gear
one is manual. Release the switch
midway to stop the sunshade at
its current position. Gear two is
automatic. Push the switch again
during the action to freeze the
sunshade in place.
●Pull the switch to the front of the
vehicle to close the sunshade. Gear
one is manual. Release the switch
midway to stop the sunshade at
its current position. Gear two is
automatic. Push the switch again
during the action to freeze the
sunshade in place.
Sunshade Anti-pinch
When the sunshade is being closed, if an
object is detected and its resistance is
larger than the set value, the sunshade
will stop and slightly retract.
Initialization of anti-pinch function
●If the low-voltage battery is
disconnected while the sunshade is
opening or closing, the automatic
closing and anti-pinch functions both
cease to work. In this case, initialize
the settings as follows:
●Press and hold the sunshade closing
switch to make the sunshade run
to the fully closed position and
stall for 0.4 seconds. The sunshade
initialization is then complete.
03
CONTROLLER OPERATION
WARNING
●Excessively frequent activation
of the anti-pinch function can
activate the sunshade motor's
overheat protection.
●Do not intentionally activate the
anti-pinch function by jamming
any part of your body into the
window.
●The anti-pinch function may fail
to work if an object is caught
right before the sunshade is fully
closed.
●Contacting a BYD authorized
dealer or service provider for
maintenance is recommended if
the sunshade automatic closing
function or anti-pinch function is
not working normally.
Sunshade Switch*
Halaman 68
68
Using and Driving
Halaman 69
04
USING AND
DRIVING
Charging/Discharging...................... 70
Battery...............................................83
Usage Precautions............................87
Starting and Driving..........................92
Driver Assistance.............................. 99
Other Main Functions.....................126
Charging Precautions
Halaman 70
Charging/
Discharging
Charging Instructions
Charging Safety Warnings
●Charging equipment uses high-voltage
current. Minors are prohibited to
charge the vehicle or touch the
charging equipment. Keep them away
from the vehicle during charging.
●Charging may affect medical or
implanted electronic devices. Consult
the device manufacturer before
charging.
●Charge the vehicle in a relatively safe
environment, and avoid charging in
damp areas, or areas with fire or heat
sources.
●Protect the charging equipment
against water contact on rainy days.
●Before charging:
●Ensure that the charging connector
and charge port are free of defects,
such as cable wear, rusted ports,
cracked casings, or foreign objects in
the ports.
●Do not charge the vehicle when
the metal terminals of the charging
connector and charge port are loose
or damaged by rust or corrosion.
●When the charging connector and
charge port is visibly stained or
damp, wipe them with a dry and
clean cloth to ensure the connection
is dry and clean.
●Use charging equipment that complies
with local standards.
●To avoid charging failure or fire, do
not modify, disassemble, or repair
the charging equipment and related
ports. Contact a BYD authorized
dealer or service provider for
handling if there is a fault.
●Ensure the quality of products.
●Do not operate with wet hands,
because it may cause electric shock
and personal injury.
●If anything abnormal is found in
the vehicle or charging equipment
during charging, stop immediately and
contact a BYD authorized dealer or
service provider.
●Always observe the following charging
precautions to prevent damage to the
vehicle:
●Do not shake the charging connector,
otherwise the vehicle charge port
may be damaged.
●Whenever possible, do not charge
the vehicle in a thunderstorm, under
risk of lightning strikes.
●Do not open the hood for maintenance
while charging.
●After charging, do not disconnect the
charging equipment with wet hands or
while standing on any wet surface.
●Before driving, ensure that the
charging equipment is disconnected
from the charge port.
Charging Precautions
●When the SOC bar on the instrument
cluster turns red, the high-voltage
battery is about to be exhausted.
Please charge it immediately,
otherwise the service life of the high-
voltage battery will be reduced.
●Avoiding damage to the charging
equipment (precautions for charging
equipment):
●Prevent the charging equipment
from any mechanical impact.
Charging Precautions
Halaman 71
●Do not place the charging equipment
near heaters or other heat sources.
●Never drop the equipment or move
it by pulling it directly by the
cable. Take caution when moving the
equipment.
●Before charging:
●Make sure that the charging
connector and charge port are
free of foreign objects, and that
the protective cap of the charging
connector terminal does not get
loose or deformed.
●Hold the charging connector, align
the connector with the charge port
and push it in, making sure that they
are properly connected.
●When charging is complete:
●Stop charging first and make sure the
charge port is unlocked.
●Hold the charging connector with
one hand and remove the connector
by pressing and holding its button.
●Do not force the charging connector
out while the charge port is locked,
otherwise the charge port may be
damaged.
●Switch the ignition off before charging.
●The vehicle can be powered on to turn
on the A/C while charging. However, to
ensure the charging power, this is not
recommended.
●It is recommended to park the vehicle
in a ventilated area during charging. It
is recommended that no one stay in
the vehicle.
●During charging, the estimated
remaining time to full charge is
displayed on the instrument cluster.
It is normal that this charging time
may vary slightly across temperatures,
SOC, and charging facilities. Before
charging is completed, "Calculating..."
is displayed on the instrument cluster.
●The vehicle system automatically
stops charging when the high-voltage
battery is fully charged.
●To stop DC charging in advance, turn
off the charger before disconnecting
the charging connector.
●When charging is complete and the
charging connector is unplugged,
make sure that the charge port's cap
and door are closed, otherwise water
or foreign materials may enter the port
and affect its normal use.
04
●Before starting the vehicle, be sure
to unplug the charging equipment.
The vehicle is ready to drive even if
the charging connector is left plugged
but not fully locked, which may
damage the charging equipment and
the vehicle.
USING AND DRIVING
●If the vehicle is to be parked for a
lengthy period of time, charge it every
three months and, to prolong the
service life of the high-voltage battery,
charge fully before starting it again
(see battery usage tips for details).
●If the charge port door is frozen due
to weather or other reasons, it is
suggested to warm it with hot water
and then open the port, do not force it
open.
●Battery temperatures that are too
low or too high compromise vehicle
charging performance.
●For faster low-temperature DC
charging, charging from low SOC
is recommended because, due to
the low battery temperature, the
charging current is small for vehicles
with high SOC in low-temperature
environments.
●To improve your experience, it is
recommended to charge the vehicle
immediately after using it, as the
Charging Mode
Halaman 72
battery is relatively hot and has
better charging performance.
●In low-temperature regions, it is
better to charge the vehicle in
a heated indoor space. In high-
temperature regions, charging in
a cool and ventilated place is
recommended.
●Turning A/C on during low-
temperature charging compromises
charging performance.
●When the cooling function is enabled
during charging, it is normal that both
charging time and power consumption
increase slightly.
●During charging, battery cooling
may start, and the compressor, fan
and other components work when
necessary. It is normal that there will
be some noise under the hood.
●During charging, when the battery
cooling is activated, it is normal
that the charging power displayed by
the instrument cluster decreases or
fluctuates for a short time.
●Before charging is complete, battery
equalization is activated for longer
battery life and thus the charging time
may be longer.
●In case of high-temperature high-
power DC charging, the performance
of battery temperature control system
may be affected by the A/C in
the passenger compartment, and the
charging performance may degrade,
resulting in an extended charging time.
To ensure charging efficiency, it is
recommended to keep the A/C off
during charging.
●If the charging connector is frozen due
to cold weather, it is recommended
to use proper tools to separate the
connector from the charging port.
REMINDER
●Do not open the charge port door
forcibly when it is locked.
●Do not forcibly insert the
connector with the electric lock
engaged.
●Do not close the charge port door
when the port cap is fully open.
●When the vehicle is charged
with an external power supply,
it is normal that the cooling fan
and A/C compressor may operate
automatically for the high-voltage
battery to cool down.
Charging Method
The pure electric vehicle is driven by
electric energy supplied from the high-
voltage battery. To prevent insufficient
power of the high-voltage battery
affecting the vehicle driving experience,
it is very important to charge the vehicle
in time and estimate the power demand
before driving.
Charging method:
1. Using Mode 2 Charging Cable*
2. Using AC Charging Piles*
3. Using DC Chargers
●The charging time of the high-voltage
battery varies with the charging
method, current SOC, real-time
temperature, service time, ambient
temperature and other conditions.
●Use charging equipment that complies
with local standards.
Charging Mode
●Scheduled charging (for AC charging
only): Charge the vehicle regularly at
a scheduled charging time set by the
General Charging Troubleshooting
Halaman 73
user. See scheduled charging settings
in this chapter for details.
●Instant charging: Charging starts after
the charging connector is connected.
General Charging Troubleshooting
Fault
Possible Cause
Solution
The high-voltage
battery has been fully
charged.
When the high-voltage battery is fully charged,
the charging will stop automatically.
High-voltage battery
temperature is too high
or too low.
Keep the vehicle in an environment with
appropriate temperature and charge it when the
temperature becomes normal.
Charger is
connected,
charge starts,
but battery
will not
charge.
Low-voltage battery
over-discharges.
Replace the low-voltage battery.
If it is verified that the charging equipment's
power indicator is working properly, or that
there are no other unusual indications, change
the charging equipment or contact the charging
equipment supplier.
Charging equipment
fails.
Verify that there is a charging system fault
message on the instrument cluster, then stop the
charging. It is recommended to contact a BYD
authorized dealer or service provider.
Vehicle display fails.
The power grid goes
down.
Charging will restart automatically after power is
restored.
Charging cable is not
connected properly.
Verify that the charging connection cable is not
loosely connected.
If the charging connector switch is pressed, the
charging will stop. Plug in the connector again to
start charging.
Charging connector
switch is pressed.
Charging
stops
midway.
If the instrument cluster shows that EV function
is limited, the charging will automatically
stop. Charge the vehicle when the battery
temperature returns to a normal level.
High-voltage battery
temperature is too high
or too low.
If there is any fault prompt for the charging pile
or the vehicle, it is recommended to contact a
BYD authorized dealer or service provider.
Vehicle or charging pile
fails.
04
USING AND DRIVING
Using Mode 2 Charging Cable*
Halaman 74
Charging
Using Mode 2 Charging Cable*
1. Equipment
●Connect the vehicle to an outlet that
meets local standards to charge the
vehicle.
●A household socket meeting local
standards must be used in order to
avoid line damage or tripping due to
high-power charging, which may affect
the normal use of other devices.
●This mode 2 charging cable includes
a power plug (complying with local
standards), a charging connector, a
control box, and a charging cable.
The plug is connected to a standard
household power socket, and the
charging connector to the vehicle's
charge port.
●Charging time: Refer to the charging
time message on the instrument
cluster.
WARNING
●See "Charging Instructions" for
charging safety warnings.
●The highest working temperature
allowed for the product is 50°C.
Store the product in a cool and
dry place when it is not in use.
●When charging, do not place the
equipment in the trunk, under the
front of the vehicle, or near the
tires.
●When using the equipment,
prevent it from getting rolled
over by the vehicle, dropped, or
trampled on.
●It is strictly prohibited to
modify, disassemble, or repair the
charging equipment and its ports.
WARNING
●It is not recommended to use
any additional wire or adapter/
connector. If an additional
adapter is required, choose
a suitable cable diameter
(≥1.5 mm²) and the adapter/
connector parameters must meet
requirements.
●Never use the charging equipment
if the household power strip cable
becomes soft, if the charging
connector cable is worn out, if the
insulation layer is cracked, or in
case of any other damage.
●Never use the equipment
when the charging connector,
power plug, or power strip is
disconnected or broken, or if there
is any sign of surface damage.
CAUTION
●The charging cable cannot be
placed in a spiral during charging,
as this will affect heat dissipation.
●See the charging instructions for
specific charging precautions.
REMINDER
●Contact a BYD authorized dealer
or service provider, or a BYD
authorized technician, to select
the appropriate power supply
according to the requirements of
the charging equipment.
●Charging equipment grounding
instructions: The equipment must
be properly grounded. In the
event of failure or damage to the
equipment, the grounding cable
provides a minimum impedance
Using Mode 2 Charging Cable*
Halaman 75
REMINDER
to circuit discharge and thereby
reducing the risk of electric shock.
●The equipment comes with a
ground cable connecting its
ground point with that of the
power plug, which must match
a properly installed and well-
grounded power supply outlet.
2. Charging
●With the vehicle doors unlocked and
preferably powered off, press the
charge port door to open it.
●Open the charge port cap and the
protective cover of the charging
connector, and make sure that no
obstacles exist between the head of
the charging connector and the end of
the charging socket.
REMINDER
●Do not open the charge port door
forcibly when it is locked.
●Connect the power supply terminal:
●Plug the mode 2 charging cable into
a household socket.
●Connect the vehicle port:
●Plug the charging connector correctly
into the port.
●After the charging connector is
inserted, the charging connection
indicator
04
lights up on the
instrument cluster or infotainment
touchscreen.
USING AND DRIVING
REMINDER
●Do not try to forcibly plug the
connector with the anti-theft lock
engaged.
●In the charging process, the instrument
cluster displays relevant charging
parameters and the charging sign.
●At this point, you can schedule
charging on the infotainment
touchscreen. See "Scheduled
Charging" for the configuration
process.
REMINDER
●During charging, the estimated
remaining time to full charge
is displayed on the instrument
cluster or infotainment system. It
is normal that the remaining time
to full charge may vary slightly
depending on the temperatures,
SOC, and charging facilities.
Using AC Charging Piles*
Halaman 76
REMINDER
●Reservation charging cannot be
used when the remaining battery
is too low.
3. Stopping charging
●End the charging:
●The charging automatically ends
when the vehicle is fully charged.
●To end the charging early, proceed to
the next step.
●Unplug the charging connector:
●If the anti-theft mode of the electrical
lock is deactivated, directly pull out
the charging connector.
●If the anti-theft lock is active, press
the unlock button on the key or press
the door handle microswitch (when
the key is nearby), then pull out the
charging connector.
REMINDER
●To unlock the vehicle, press
the unlock button on the key
(when charging the vehicle with
ignition switched off) or press the
microswitch on the door handle
(when the key is nearby).
●Unlock the vehicle to deactivate
the anti-theft lock before pulling
out the charging connector. The
connector has to be pulled out
within 30 seconds, or the port will
re-lock.
●You can activate the anti-
theft lock on the infotainment
touchscreen, as detailed in
"Charge Port Anti-theft Lock" in
this chapter.
●If the charging connector cannot
be removed after unlocking,
REMINDER
try a few more unlocking
attempts. If that does not work,
try emergency unlocking. For
the operating procedure, see
"Emergency Unlocking of the
Charge Port" in "Charge Port Anti-
theft Lock".
●When the charge port's anti-theft
mode is deactivated, if you cannot
pull the charging connector out
directly, try to unlock the vehicle
and pull it again.
●Disconnect the power plug.
●Close the charge port cap and the port
door.
●Store the charging equipment
properly.
REMINDER
●When the port cap is fully open,
do not close the charge port door.
Using AC Charging Piles*
1. Equipment
●Single-phase AC charging pile*
●Charge the vehicle using a single-
phase AC charging pile in a public
place. Since some charging piles
are not equipped with charging
connectors, AC charging connectors
need to be prepared.
●Three-phase AC charging pile
●Charge the vehicle using an AC
charging pile in a public place, such
as large supermarkets, shopping
malls and parking lots.
●Charging time: Refer to the charging
time message on the instrument
cluster.
Using AC Charging Piles*
Halaman 77
WARNING
●See section "Charging
Instructions" for charging safety
warnings.
CAUTION
●Be careful where you park the
vehicle before charging, and
do not stretch the cable when
charging.
●If you need to stop charging
before the battery is fully charged,
try to use early stop set for the
charger first instead of directly
unplugging the charger.
●See the charging instructions for
specific charging precautions.
REMINDER
●If power supply resumes
after short-time outage of
the external power grid, BYD
charging equipment will re-start
charging automatically and no
re-connection of the charging
equipment is required.
●The equipment must be properly
grounded. In the event of failure
or damage to the equipment,
the grounding cable provides a
minimum impedance to circuit
discharge and thereby reducing
the risk of electric shock.
2. Charging
Connect the vehicle to the AC charge
pile/box by the charging connector of this
pile/box to begin charging.
Instant charging method:
●Unlock the charge port door, then
open the port door and cap:
●With the ignition off, open the charge
port door.
●Take out charge port caps, and make
sure that no obstacles exist between
the head of the charging connector
and the end of the charging socket.
●Connect the vehicle port:
●Plug the charging connector into the
port and make sure it is tight.
REMINDER
●Do not forcibly insert the
connector with the electric lock
engaged.
04
●Charging settings:
USING AND DRIVING
●Skip this step if a public AC charging
pile without any setting option is
used.
●For single-phase AC charging
pile/box subject, swipe the card or
scan the QR code. See the user
manual for charging pile/box for
details.
●The charging connection indicator
lights up on the instrument cluster.
●In the charging process, the instrument
cluster displays relevant charging
parameters and the charging sign.
●At this point, you can schedule
charging on the infotainment
touchscreen. See scheduled charging
for the configuration process.
CAUTION
●Reservation charging cannot be
used when the battery is too low.
3. Stopping charging
●End the charging:
Using DC Charging Piles
Halaman 78
●Charging ends automatically when
early stop time is due or charging is
complete.
●Unplug the charging connector:
●Pull the charging connector after the
anti-theft lock is disabled.
REMINDER
●To unlock the vehicle, press
the unlock button on the key
(when charging the vehicle with
ignition switched off) or press the
microswitch on the door handle
(when the key is nearby).
●Unlock the vehicle to deactivate
the anti-theft lock before pulling
out the charging connector. The
connector has to be pulled out
within 30 seconds, or the port will
re-lock.
●You can activate the anti-
theft lock on the infotainment
touchscreen, as detailed in
"Charge Port Anti-theft Lock" in
this chapter.
●If the charging connector cannot
be removed after unlocking,
try a few more unlocking
attempts. If that does not work,
try emergency unlocking. For
the operating procedure, see
"Emergency Unlocking of the
Charge Port" in "Charge Port Anti-
theft Lock".
●Insert the charge port cap back and
close the vehicle charge port door.
●Store the equipment properly.
●If using an AC charging pile/box,
place the charging connector in its
designated location in the charging
pile/box.
Using DC Charging Piles
1. Equipment
●Charge the vehicle using a DC charging
pile in a public place. The pile is
usually installed at a specific charging
station.
●Equipment specifications: Please
check the instructions for the charger.
●Charging time: Refer to the charging
time message on the instrument
cluster or infotainment touchscreen.
2. Charging
●Unlock the charge port door, then
open the port door and cap.
●Connect the vehicle port:
●Plug the charging connector into the
port and lock it.
●Operate the charging equipment to
start charging.
●The charging connection indicator
lights up on the instrument cluster.
●In the charging process, the instrument
cluster displays relevant charging
parameters and the charging sign.
3. Stopping charging
●End the charging:
●Charging ends automatically when
early stop time is due or the charging
is complete.
Scheduled Charging
Halaman 79
●Unplug the charging connector:
●Press the mechanical lock button of
the DC charging connector to pull out
the connector.
●When the DC charging pile charging
is complete, organize the charging
equipment and store the charging
connector in its designated position
properly.
●Reinsert the DC charge port cap and
close the port door.
CAUTION
●If the charging connector cannot
be removed after unlocking, try a
few more unlocking attempts. If
that does not work, try emergency
unlocking (see P82).
●To unlock the charge port after DC
charging, press the unlock button
twice within three seconds for the
operation to be successful.
●See the charging instructions for
specific charging precautions.
REMINDER
●Do not close the charge port door
when the port cap is fully open.
Scheduled Charging
●The charging mode can be set on the
infotainment touchscreen. To access
the setting:
●Go to infotainment touchscreen →
→ New Energy. The scheduled
charging screen is displayed.
●To exit the Scheduled Charging screen,
tap
or
.
Setting screen
① Scheduled charging switch
② Charging time
③ Repeat cycle
④ Settings
●The factory default setting is to charge
the vehicle immediately and scheduled
charging is disabled.
04
●To schedule a charging, toggle the
scheduled charging ON ①, set the
charging start time ② and repeat cycle
③, then save the settings.
USING AND DRIVING
●After the schedule is set up
successfully, if you connect the
charging connector or press the power
button to power off the vehicle during
the charge waiting period, you will
be reminded through the infotainment
touchscreen that scheduled charging
has been set. Switch to instant
charging if needed.
●You can tap the scheduled charging
setting icon ④ to turn off the charging
connector connected alert and power-
off alert in the Scheduled Charging
Alert.
CAUTION
●The reservation charging function
is developed for BYD's slow AC
charging equipment only. Please
disable this function when using
slow AC charging equipment that
is not certified by BYD. Otherwise,
scheduled or immediate charging
may fail due to no response from
the equipment, resulting in low
Discharging Device*
Halaman 80
CAUTION
SOC or even low voltage of the
high-voltage battery.
REMINDER
●The instant charging option on
the reminder screen is valid for
the current reservation only. To
cancel all reservations, toggle
charging reservation off on the
corresponding setting screen.
●In the event of low battery,
the vehicle is charged to the
minimum level before scheduled
charging begins. In this process,
the infotainment system still
gives reminder messages for
power-off and charging connector
connection, and a related
message is displayed at the lower
part of the instrument cluster.
●The schedule setting is invalid
for DC charging. Charging begins
immediately after a DC charging
connector* is connected.
Discharging Instructions
●This vehicle is equipped with vehicle-
to-load (V2L) feature*.
WARNING
●Do not touch any metal terminal
of the discharging socket or
vehicle charge port during
discharging.
●Stop discharging immediately if
there are any abnormalities such
as peculiar smell and smoke.
●See "Charging Instructions" for
charging safety warnings.
WARNING
●Store the product in a cool and
dry place when it is not in use.
●When discharging, do not place
the equipment in the trunk, under
the front of the vehicle, or near
the tires to prevent it from falling
and being rolled over by the
vehicle and trampled on.
●Never use the charging equipment
if the power strip cable becomes
soft, the charging connector cable
is worn out, the insulation layer
is cracked, or any other damage
occurs.
●Never use the device when the
discharging connector or power
strip is disconnected or broken, or
when there is any sign of surface
damage.
CAUTION
●For precautions concerning use of
the discharge connection device,
please refer to the precautions for
charging equipment included in
item 3 of "Charging Precautions".
●Before discharging, please
confirm the vehicle SOC and
estimate the remaining driving
range.
●Before V2L discharging, ensure
that the load is turned off.
REMINDER
●The V2L function is recommended
only when the vehicle SOC is high.
●The V2L function is restricted
when the vehicle SOC is low.
Intelligent Charging
Halaman 81
REMINDER
●When the vehicle is powered off,
the static power consumption of
the vehicle will increase if the V2L
connection device is connected
for an extended period without
any output. Therefore, removing
the discharging connector is
recommended when the device is
not used.
External Discharging
1. Starting discharging
●Before discharging, disarm the anti-
theft alarm system.
●Unlock the charge port door, then
open the port door and cap.
●Check before discharging:
●Ensure that the battery capacity of
the vehicle to be discharged is not
below 15%.
●Ensure the V2L connecting device
casing is not cracked, and its plug is
free from rust or obstructions.
●Ensure that there is no water or
foreign material inside the charge
port and that metal terminals are
not damaged and free from rust or
corrosion.
●Do not discharge if the above
second or third condition is found;
otherwise, short circuit or electric
shock so caused could lead to
personal injury.
●Connect the discharge connection
device:
●Connect the V2L discharge device
to the charge port. The power strip
indicator lights up when the strip is
powered and ready for use.
●Discharging starts:
●After the connection is made,
discharge begins and respective
information is displayed on the
instrument cluster.
2. Stopping discharging
●Stop discharging:
●Disconnect the load.
●Disconnect the discharge connection
device:
●Unplug the discharging device.
●Close the charge port cap and the
port door.
04
●Organize the equipment:
●Store the equipment properly when
discharging is complete.
USING AND DRIVING
Intelligent Charging
●When the low-voltage battery manager
detects that the battery level is too
low, the low-voltage battery can be
charged with the high-voltage battery.
REMINDER
●When the vehicle is stored for a
long time, the intelligent charging
function may be activated, which
is normal and not a vehicle failure.
●Power for intelligent charging
comes from the high-voltage
battery pack, so it is normal that
an SOC decrease is noticed when
the vehicle is powered on.
●To avoid high-voltage battery
over-discharging due to intelligent
charging, when the vehicle is at
low SOC, intelligent charging is
not available. Avoid parking at low
SOC for a long time, and charge
the vehicle in time.
Emergency Unlocking of the Charge Port
Halaman 82
Charge Port Anti-theft
Lock
In order to prevent the charging
connector from being stolen, the charge
port of this vehicle is anti-theft during
charging. This function is disabled by
default. To enable the function, follow
these steps:
●Go to the infotainment touchscreen
→
→ New Energy to turn on the
charging port lock.
●When the anti-theft mode of charge
port electric lock is activated, the
charging connector will lock if you
connect it to the vehicle. The four
doors and the trunk are also locked. To
disconnect the connector, you need to
unlock the four doors.
CAUTION
●The connector needs to be pulled
out within 30 seconds after it is
unlocked. Otherwise, the electric
lock will lock again.
●After the vehicle is fully charged,
the charging connector will be
automatically unlocked when the
anti-theft mode of the charge port
is disabled. When this mode is
enabled, the charging connector
must be manually unlocked
following the above steps.
REMINDER
When the anti-theft mode of the
charge port is enabled and disabled,
the charging connector is locked
during charging. Unlock the vehicle
in the following ways:
●When the vehicle is being charged
with the ignition off, press the
unlock button on the smart key to
unlock.
●Press the microswitch next to the
exterior handle of the driver's side
door to unlock (with the smart key
nearby).
●Press the window control
switches on the driver's side door
to unlock.
Emergency Unlocking of the Charge
Port
When charging connector cannot be
unplugged due to failure of the anti-theft
lock, unlock the charge port manually.
AC charge port lock latch
1. Open the trunk lid. There is an
emergency lock latch for the charging
connector on the right side panel
inside the trunk.
2. Remove the access cover on the right,
and pull the latch to unlock the
charging connector.
3. Restore the access cover after
unlocking.
Battery Properties
Halaman 83
Battery
High-Voltage Battery
●The vehicle is powered by a high-
voltage battery that can be charged
and discharged repeatedly. The high-
voltage battery is charged by an
external power source or through
energy recovery when the vehicle
brakes or coasts.
●The high-voltage battery is located
under the vehicle floor, so be careful
and slow down to avoid bumping
when driving on bumpy or uneven
roads. If bumping occurs, go to a BYD
authorized dealer or service provider
for maintenance.
Battery Properties
●It is normal that vehicle performance
is affected by battery electrochemical
properties and self-protection and
varies to some extent in the following
conditions:
●When SOC is high, the regenerative
braking performance may decline.
●The vehicle switches to trickle
charging mode at high SOC. If the
charging time is prolonged, the
estimated remaining charging time
displayed on the instrument cluster
may not be accurate.
●When SOC is low, the acceleration
performance may decline.
●At high or low temperatures, it
is normal that the charging and
discharging capabilities of the high-
voltage battery decline, and the
charging time is prolonged. For
fast charging, high-power charging
equipment is recommended. Power
performance may also decline under
extreme temperatures.
●Usable capacity of the high-voltage
battery is lower in cold weather
and reduces as the temperature
decreases. If the vehicle with high
battery level is charged at low
temperatures, the SOC may quickly
jump to 100%.
04
USING AND DRIVING
●When the high-voltage battery is
normal, the driving range of the vehicle
varies with the following factors:
●Driving habit: For example, the
range in frequent acceleration or
deceleration is shorter than that at
constant speeds, and the range is
shorter when driving at high speeds
than when at low speeds.
●Road conditions: For example, the
range driven in rough conditions or
on long slopes is shorter than that
in normal conditions and on even
roads.
●Temperature: The driving range at
low temperatures is shorter than that
at ambient temperatures.
●Use of electric equipment: For
example, the range driven with A/C
on is shorter than that with A/C off.
●The available battery capacity
decreases as the vehicle is used over
time.
Battery Usage Tips
Halaman 84
Battery Usage Tips
●It is recommended to use the vehicle at
temperatures between -10℃ to 40℃.
When SOC is low, timely charge the
vehicle to ensure enough driving range
and good acceleration performance.
●To ensure long term performance,
avoid driving in extreme temperatures
for over 24 hours.
●In low ambient temperatures, if the
vehicle must be stored for a long time,
it can be placed in an underground
garage or other warmer area to reduce
loss of battery heat, maintaining
vehicle performance.
●Frequent and sudden acceleration or
deceleration should be avoided. Drive
the vehicle on flat and dry roads.
When necessary, turn off high-power
equipment such as A/C or adjust
the A/C temperature to reduce power
consumption of such devices and
increase the driving range.
●When the vehicle is used for the
first time or after a long idle period,
the SOC displayed on the instrument
cluster may not be correct. It is
recommended to fully charge the
vehicle first.
●For optimal battery performance,
use a charging connector to fully
charge the battery regularly, and the
recommended frequency is once a
week at least.
●Under extreme working conditions
(such as frequent sudden acceleration/
deceleration) that cause battery
overheating, if the temperature of
high-voltage battery is excessively
high, it is normal for discharging
capability to decrease gradually. If
the battery temperature keeps rising,
the fault warning light lights up on
the instrument cluster. In that case,
it is recommended to contact a BYD
authorized dealer or service provider.
●When the battery SOC increases
or decreases abnormally, it is
recommended to contact a BYD
authorized dealer or service provider
for inspection.
WARNING
In the event of an emergency or
accident, be aware of the following
warnings:
●To avoid personal injury, do not
touch the high-voltage battery
directly.
●It is recommended to contact a
BYD authorized dealer or service
provider as soon as possible.
●If the high-voltage battery is
damaged and leaking fluid, avoid
any contact with the fluid.
If it comes into contact with
skin or eyes, rinse immediately
with plenty of water, and seek
immediate medical attention.
●If the vehicle catches fire,
use dedicated fire extinguishers
instead of water-based fire
extinguishers.
WARNING
●To ensure safety of the high-
voltage battery, stop the vehicle
away from flammable and
explosive materials, ignition
sources and various hazardous
chemicals.
●Prolonged exposure to heat
sources and direct sunlight reduce
the service life of the high-voltage
battery.
Low-Voltage Battery
Halaman 85
WARNING
●When the vehicle is not to
be operated for an extended
period (over seven days), it is
recommended that the battery
SOC should be kept at 40%-60%
to prolong its service life. When
the vehicle is not to be operated
for over three months, the high-
voltage battery must be fully
charged and then discharged to
40%-60% every three months.
Otherwise, over-discharge may
lead to battery performance
degradation or even damage. Any
vehicle fault or damage so caused
are not warranted.
●If there is a collision with
the high-voltage battery, contact
a BYD authorized dealer or
service provider immediately for
maintenance.
Recycling the High-Voltage Battery
How to scrap an NEV:
1. Take the vehicle to the BYD recycling
service provider that will assess the
residual value of the high-voltage
battery.
2. Take the assessed vehicle to the
recycling organization to disassemble
the high-voltage battery.
3. Take the battery to the recycling
service provider which will buy back
the battery.
WARNING
●New energy car owners have
the responsibility and obligation
to hand over waste high-voltage
batteries to the recycling service
outlet. Anyone who hands over a
used high-voltage battery to any
WARNING
other organization or individual,
or removes/disassembles a
high-voltage battery without
authorization, shall be liable for
any environmental pollution or
safety incident so caused.
Low-Voltage Battery
●Open the hood to find the two poles
of the low-voltage battery, the positive
terminal and negative terminal.
04
●To prevent the SOC of the low-
voltage battery becoming too low,
the intelligent charging function
is triggered automatically when
conditions are met (ignition off, high-
voltage battery discharging allowed,
and low-voltage battery level below
the design value).
USING AND DRIVING
●If the "intelligent charging" fails, and
the vehicle is idle for a period of time,
the low-voltage battery may not be
able to power on the vehicle as the
low-voltage power supply. In that case,
contact a BYD designated maintenance
agency promptly.
●Check low-voltage battery conditions
monthly, and check for terminal
corrosion.
●If the terminals are corroded, pour
soda water on them. Bubbles generate
and the soda water gradually turns
brown. When the bubbles dissipate,
rinse the brown water and wipe them
with a dry cloth. Apply some grease to
prevent further corrosion.
●If the connector becomes loose,
tighten the clamp nut, but do not over-
tighten it. Tighten the pressing tool
until it securely fixes the low-voltage
battery in place. Over-tightening
Low-Voltage Battery
Halaman 86
will damage the low-voltage battery
compartment.
WARNING
●Since the low-voltage battery
may produce combustible and
explosive hydrogen gas, use tools
in such a manner that the battery
would not produce sparks. Do not
smoke or use open flames near
the battery.
●Avoid electrolyte contact with
eyes, skin or clothing.
●In case of mouth contact with
the electrolyte, seek medical
attention immediately.
●Wear goggles at all times when
working near the low-voltage
battery. If electrolyte gets into the
eyes, rinse with plenty of fresh
water and seek medical assistance
immediately.
●Keep children away from the low-
voltage battery.
●If electrolyte contacts bare skin,
rinse the contact area with baking
soda. Seek medical assistance
immediately if you experience any
painful or burning sensations.
●Electrolyte may seep in,
and contact the skin, if
they come into contact with
clothing. All contaminated
clothes must therefore be
removed immediately. Follow the
instructions above if needed.
●If the low-voltage battery needs to
be connected to other chargers,
the positive and negative cables
should be disconnected to
prevent damage to the vehicle
electrical system.
WARNING
●Charging the low-voltage battery
during cable connection may
seriously damage the electronic
controls. Remove the low-voltage
battery cable before connecting
the low-voltage battery to the
charger.
●If the low-voltage battery is
exhausted, the clock and preset
channel settings in the audio
system will be cancelled. You need
to reset the clock and preset
channels.
CAUTION
●When checking the low-voltage
battery, remove the ground cable
from the negative terminal (-) first,
and reconnect it last.
●Try to avoid shorting electronic
components when using tools.
●When cleaning the low-voltage
battery, make sure to avoid any
fluid getting inside.
REMINDER
●Be sure to replace a low-
voltage battery with insufficient
electrolyte. Do not add electrolyte
by yourself.
●When leaving the vehicle, make
sure the doors are closed and all
electrical equipment is turned off.
●If the vehicle needs to be parked
for a long time, please disconnect
the negative terminal wire.
Driving Safety Precautions
Halaman 87
Usage Precautions
Break-in Period
●If the powertrain is hard to start or
frequently stops turning, inspect the
vehicle immediately.
●If the powertrain makes any abnormal
sounds, stop the vehicle for inspection.
●If the powertrain has severe coolant
and oil leakage, stop the vehicle for
inspection.
●The powertrain needs break-in. It is
recommended that this be done within
the first 2,000 km in economic mode
by smoothly driving, instead of high-
speed driving. The following practices
can effectively prolong vehicle service
life:
●Avoid flooring the accelerator pedal
when starting and driving the
vehicle.
●Avoid speeding.
●Avoid emergency braking within the
first 300 km.
●Do not maintain a high or low speed
for too long.
●Do not use the vehicle to tow other
vehicles within the first 2,000 km of
mileage.
Trailer Towing
●This vehicle is designed to carry
passengers. Do not overload it or use
it to tow other vehicles.
●Towing other vehicles has an adverse
impact on the maneuverability,
performance, braking, endurance,
driving economy, power consumption,
and other aspects of performance of
the vehicle itself.
●Driving safety and comfort totally
depend on equipment usage and good
driving habits.
●BYD does not provide free warranty for
the damage or faults resulted from the
trailer towing.
Driving Safety
Precautions
No Drunk Driving
Even a small amount of alcohol can
reduce a driver's ability to respond to
traffic condition changes. The higher the
level of alcohol, the less responsive the
driver will be. Therefore, never drive
while under the influence.
04
USING AND DRIVING
No Speeding
Speeding is a major cause of fatal
accidents. Faster speeds generally entail
higher risk. Therefore, maintain a speed
safe for the road traffic conditions.
Keeping the Vehicle Safe for Driving
Tire bursts and mechanical faults are
extremely dangerous. To reduce the
possibility of such faults, frequently check
the vehicle's condition, and regularly
complete the specified inspections.
CAUTION
●Any driver must possess a driver's
license before driving a vehicle.
●Do not drive when fatigued.
●Always follow the traffic
regulations when driving a
vehicle.
●When driving, drivers must stay
focused and not carry out
any unrelated activity, such as
Vehicle Usage Tips
Halaman 88
CAUTION
answering calls or adjusting
buttons.
Suggestions for Vehicle
Use
Suggestions for prolong the battery
usage:
●When the vehicle is not to be operated
for over seven days, it is recommended
that the battery SOC should be kept at
40%-60%, or the high-voltage battery
service life may be reduced.
●When the vehicle is not to be operated
for over three months, the high-voltage
battery must be fully charged and then
discharged to 40%-60%. Otherwise,
over-discharge may lead to battery
performance degradation or even
damage. Any vehicle fault or damage
so caused will not be warranted.
●During operation of the vehicle, if
the instrument cluster displays the
pure electric driving mileage as 0, it
indicates the battery SOC is low. In this
case, charge the high-voltage battery
in time and avoid operating the vehicle
with low SOC for a long time.
●For optimal battery performance,
use a charging connector to fully
charge the battery regularly, and the
recommended frequency is once a
week at least.
●To maintain long-term performance,
avoid continuously exposing the
vehicle to an environment with a
temperature above 60°C or below
-30°C for over 24 hours.
●If the tray dented inward or there
is scrarification under the battery
package tray, it is suggested to check
at a BYD authorized dealer or service
provider.
●During operation of the vehicle,
avoid repeated rapid acceleration or
deceleration whenever possible.
●During operation of the vehicle, avoid
operating the vehicle continuously
for a long time whenever possible;
otherwise, the excessively high
battery temperature will affect vehicle
performance.
●If the instrument cluster mulfunctions
when driving, it is recommended to
contact a BYD authorized dealer or
service provider for inspection as soon
as possible.
●When the high-voltage battery
temperature is high, the vehicle
performance will be limited to some
extent. In this case, stop the vehicle
and wait until the temperature drops
before operating.
REMINDER
●If the meter drops to zero, the
battery must be recharged. If it is
not recharged within seven days,
the battery may suffer permanent
damage. Such damage is not
covered by BYD warranty terms.
●Driving range depends on many
factors, such as the vehicle's
available power, vehicle age
(current battery life), weather,
temperature, road conditions and
driving habits. Compared with
under normal temperatures, the
pure-electric driving range is
somewhat reduced and power
performance will also be affected
in low or high temperature
environments.
Carrying Luggage
Halaman 89
Saving Energy and
Extending Vehicle Service
Life
●Saving energy is simple and easy, and
it helps prolong the vehicle's service
life.
●Here are some tips for saving energy
and repair cost:
1. Regenerative braking setting:
●The vehicle is provided with an
energy regeneration function. To set
the energy regeneration intensity,
operate the regenerative braking
mode button on the auxiliary
dashboard or go to the infotainment
touchscreen. In high energy recovery
mode, more energy is recovered
during vehicle braking and coasting.
Please set to suit to your driving
habits.
2. Maintaining constant speed:
●Constant speeds save energy.
Sudden acceleration, sharp turns
and emergency braking increase
consumption.
●Speeds should be kept constant
according to traffic conditions.
Additional energy is consumed each
time the accelerator is pushed.
●Acceleration should be gradual.
Avoid sudden startup, acceleration,
or deceleration.
●Prevent emergency braking, and
subsequent brake wear, by keeping
an appropriate distance from
vehicles ahead, and paying attention
to traffic lights.
●Congested roads increase energy
consumption.
●Keep moderate speeds in
motorways. The higher the speed,
the higher the consumption.
Maintaining vehicle speed within the
economical speed range can save
power.
3. Reducing load:
●Consumption is higher when air
conditioning is used. Turn off the A/C
to reduce power consumption. When
outside temperatures are moderate,
use fresh air mode.
●Do not overload the vehicle
unnecessarily. Excessive weights will
add the load of vehicle, increasing
energy consumption.
04
4. Other tips:
●Make sure tire pressure is correct.
Low tire pressure increases energy
consumption and wear.
USING AND DRIVING
●Keep front wheels properly aligned,
avoid driving into curbstones, and
drive slowly in rough terrain.
Misalignment of the front wheels not
only increases tire wear, but also
increases load on the powertrain and
power consumption.
●Keep the bottom of the vehicle clean
and mud free. This reduces vehicle
weight and prevents corrosion.
REMINDER
●Do not coast in neutral gear.
Carrying Luggage
●This vehicle has multiple
storage spaces. Overloading or
improper accommodation may affect
maneuverability, stability and normal
operation of the vehicle, and reduce its
safety.
●The glove box, door bins and seatback
pockets are designed for small and
Fire Prevention
Halaman 90
light objects, while the trunk for large
and heavy objects.
●When loading luggage, the total mass
of the vehicle body, all passengers and
luggage shall not exceed the maximum
allowable total mass.
WARNING
●Overloading and improper
accommodation may affect
stability and vehicle control,
which may lead to accidents.
●Observe the maximum weight
limit and other loading guidelines
in this manual.
●Do not carry highly magnetic
items, as they might interfere in
the vehicle's operating functions.
Carrying Items in the Passenger Area
●All items that could be thrown inwards
and thus injure occupants in case of a
collision must be properly placed and
secured.
●Do not place any objects on the inner
side of rear windshield. Otherwise,
these objects will block the driver's
line of sight and will be thrown here
and there inside the vehicle in case of
collision.
●Ensure that items placed on the floor
behind the front seat do not roll under
the seat, so as to avoid affecting the
driver's ability to control the pedals or
normal seat adjustment. Do not stack
items to a height taller than the front
seats' seatbacks.
●Make sure the glove box is always
closed while driving. If the glove box
is open, the occupant's knees may be
injured in case of a collision or an
emergency stop.
REMINDER
●Do not pile up toys in the vehicle,
as this may affect driving safety
and present a hazard to the
children, especially in case of
emergency braking or collision.
Loading the Trunk
●Place luggage evenly in the trunk. Put
heavier items at the bottom and as far
as possible.
●Secure items with ropes or straps so
that they will not move while driving.
Do not stack items to a height taller
than seatbacks.
●Electrical devices are under the cover
of the rear trunk, so the luggage placed
on the cover is not allowed to exceed
75kg.
Fire Prevention
To prevent vehicle fires in a timely and
effective manner, pay attention to the
following during use of the vehicle:
●No flammable or explosive items are
allowed in the vehicle.
●Temperatures may reach over 70°C in
a vehicle exposed to direct sunlight
in summer. Therefore, flammable
and explosive items, such as lighters,
cleaning agents and perfumes,
stored in the vehicle can cause a fire
or even explosion easily.
●Make sure cigarettes are thoroughly
put out.
●Smoking is not only harmful to your
health, but can also may cause a fire.
Cigarettes that not thoroughly put
out may cause a fire.
Wading into Water
Halaman 91
●It is recommended to go to a BYD
authorized dealer or service provider
for regular vehicle checks.
●Check vehicle wiring, connections,
wiring harnesses, insulation, fixed
position regularly. Deal with
identified problems promptly.
●Do not refit vehicle wiring or add any
unauthorized electrical appliance.
●The addition of extra electrical
appliances, such as high-power
audio systems, light fixtures, etc.,
may overload and overheat the
wiring harness and increase the risk
of fire. Improper refitting of electrical
appliances or wiring may cause a
fire due to contact resistance and
abnormal heating.
●Fuses or other replacement wires in
excess of relevant electrical rating are
strictly prohibited.
●Select a proper parking location.
●When the vehicle is parked,
especially in summer, do check
whether there are any flammables
such as dry grasses, dead woods,
leaves or wheat straws under the
vehicle. If any, a fire may be caused.
●When the vehicle is running, avoid
driving on the road sections piled
up with flammables such as dry
leaves, wheat straws and grasses,
or immediately stop the vehicle to
check whether any flammables are
carried along after passing such road
sections. When parking the vehicle,
try to avoid sun exposure.
●Keep a lightweight fire extinguisher in
the vehicle and know how to use it.
●In order to ensure vehicle safety, a
fire extinguisher should be equipped
in the vehicle, and be checked and
replaced regularly. Also, you should
familiarize yourself with use of the
fire extinguisher and be prepared for
any accidents.
●In the event of a fire in the vehicle,
take effective measures in a timely and
calm manner to minimize any losses.
●Fires typically show initial warning
signs, such as abnormal noises and
odors in the vehicle body. When
abnormal conditions are found, turn
off and stop the vehicle immediately.
Try to put out the fire if possible.
●Call a fire emergency number and
then contact a BYD authorized dealer
or service provider.
04
REMINDER
USING AND DRIVING
●In order to mitigate losses in the
event of an accident, the purchase
of commercial insurance (fire loss,
theft, etc.) is recommended.
Wading into Water
●Check water depth - it must not exceed
the vehicle's lower edge before driving
into flooded areas.
●If crossing a flooded area is necessary,
turn off the air conditioner, decrease
the speed, and keep acceleration
steady to slowly cross over.
●Be careful when driving through deep
water, as brakes may get wet. After
crossing over, press the brake pedal
Preparations Before Driving
Halaman 92
several times to dry out the disks and
recover brake performance.
WARNING
●Drive carefully to avoid accident
when there is any water or slurry
on the brake disc surface, as this
may increase the brake response
time thus extending the braking
distance.
●Carefully apply any wet brake, and
remove ice or water on it.
●Avoid emergency braking as far as
possible after driving through any
waterlogged road section.
●If the vehicle drives on
the waterlogged road, prevent
water from entering the motor,
otherwise the motor will
be damaged seriously. Such
damaged is not covered by the
vehicle's warranty
●After the vehicle drives through
waterlogged road sections,
vehicle components, such as
drive system, driving system and
automotive electric system may
also be damaged seriously. Such
damage is not covered by the
vehicle's warranty either.
●Be sure to find a sheltered
place when charging the vehicle
on rainy days. If the vehicle
is immersed in water or
wades through water over
the doorsill, which may cause
water ingress in high-voltage
components, promptly contact
a BYD authorized dealer or
service provider for testing and
troubleshooting.
●Do not drive the vehicle on
the road where the depth of
WARNING
accumulated water exceeds half
of the tires.
Influence of water ingress in high-
voltage components:
●Water getting into high-voltage
components, which are electronic
devices, may not be fully dried out by
any means.
●Water ingress seriously compromises
insulation of high-voltage
components, and conductive
substances in water may lead to short
circuit of high-voltage components or
such risk in the entire high-voltage
system. This significantly affects the
safety and service performance of the
vehicle.
●The reduced ingress protection
rating and voltage withstanding
performance due to water in high-
voltage components pose a high safety
risk.
Starting and
Driving
Starting the Vehicle
Preparations Before Driving
●Check your surroundings before
getting into vehicle.
●Adjust seat position, seatback angle,
cushion height, headrest height, and
the steering wheel angle and height.
●Adjust interior rearview mirror and
side mirrors.
●Make sure all doors are closed.
●Fasten the seat belts.
Remote Start
Halaman 93
Safety Check Before Driving
Exterior
●Tires: Check tire pressure and
carefully inspect tires for any cut,
damage, foreign material, anomaly,
and excessive wear.
●Lug nuts: Ensure all nuts are fitted and
tightened.
●Lighting: Verify that headlights,
parking lights, position lights, turn
signals, and other lights are all
working. Check headlight intensity.
Interior
●Seat belts: Check whether seat belts
can be properly fastened. Verify that
seat belts are not worn or scratched.
●Instrument cluster: Particularly,
verify that maintenance indicator,
instrument cluster lighting, and
defroster work properly.
●Braking: Verify that there is enough
space for the brake pedal to work.
In the engine compartment
●Spare fuses: Verify that spare fuses of
all rated charges in the fuse box are
available.
●Coolant level: Verify that coolant level
is correct.
●Low-voltage battery and cables: Check
connectors for any corrosion or
looseness and any cracks in the battery
housing.
Starting the vehicle
In normal cases, start the vehicle as
below:
●Engage the parking brake firmly.
●Turn off all unnecessary lights and
accessories.
●Shift to "P" or "N".
●Carry the correct smart key with you.
●Press the START/STOP button while
pressing the brake pedal.
●The vehicle is ready to drive when
the OK indicator lights up on the
instrument cluster.
The vehicle cannot power on when:
●The vehicle cannot power on when:
●After you press the START/STOP
button, the smart key warning light
turns on, a beep sounds, and
the message "No key detected" is
displayed on the instrument cluster.
This means that the key is not in the
vehicle or cannot be detected due to
interference.
04
USING AND DRIVING
●The electronic smart key is on the
floor, or in the cup holder, trunk, or
glove box.
Starting the vehicle in emergencies:
●Engage the parking brake firmly.
●Turn off all unnecessary lights and
accessories.
●Shift to Park or Neutral.
●The power mode is "OFF".
●The electronic smart key is in the
vehicle.
●Press and hold the START/STOP button
for more than 15s to start the vehicle.
REMINDER
●Do not touch the power button
while driving.
Remote Start
Before starting
●The power mode is "OFF".
Gear Shift Controls
Halaman 94
●The gearshift lever is on Park.
●The vehicle speed is below 5 km/h.
Starting the vehicle
1. Press and hold the remote start/stop
button on the electronic smart key for
two seconds to start the vehicle. After
it is started, turn signals will flash three
times.
2. If there is no valid operation within 10
minutes after remote start, the vehicle
stops and powers off, and turn signals
flash twice.
3. Press and hold the remote start/stop
button on the electronic smart key for
two seconds. The vehicle powers off,
and turn signals flash twice.
Check after starting
●Instrument cluster: Confirm that
the maintenance indicator and the
speedometer work normally.
●Brakes: In a safe area, verify that the
vehicle maintains a straight direction.
●Other abnormalities: Check for loose
parts, leaks, and unusual noises.
Gear Shift Controls
●The gear position of the gear actuator
is marked on the gearshift lever as
shown.
●"P": Park, press this button to park the
vehicle and the parking indicator will
light up. Press the brake pedal to start
the vehicle, you may shift from "P" to
another position.
CAUTION
●To prevent damage, press the "P"
button only after the vehicle has
completely stopped.
●"R": Reverse, used only when the
vehicle has come to a complete stop.
●"N": Neutral, used for temporary stop.
Under all circumstances, always shift
to "P" before the driver gets out.
●In "P" gear, shifting into "N" gear by
moving the shift lever forward to the
first gear and holding for 0.5 seconds
after pressing the brake pedal.
●In "D" gear, shifting into "N" gear by
moving the gearshift lever forward to
the first gear and holding it for 0.5
seconds.
●In "R" gear, shifting into "N" gear by
moving the gearshift lever backward
to the first gear and holding it for 0.5
seconds.
●"D": Drive, shift to D position to drive
the vehicle normally.
●If the shift is successful, the lever
returns to its middle position after it is
released.
Engaging EPB Automatically
Halaman 95
●Turn the ignition on before shifting
into "D".
●Shifting out of "P" or into "D" gear
requires pressing the brake pedal. For
details, see the prompt message on the
instrument cluster.
●To prevent unintended vehicle
movement, press the "P" button once
the vehicle has stopped completely.
The electronic parking brake (EPB) is
automatically applied and the EPB
indicator lights up.
CAUTION
●If the EPB indicator does not
come on after shifting into P,
enable the EPB on the shortcut
menu or go to
→ ADAS →
Active Safety on the infotainment
touchscreen. In this case, contact
a BYD authorized dealer or service
provider for inspection.
Electronic Parking Brake
(EPB)
Be sure to engage the EPB every time
before parking and leaving the vehicle.
Engaging EPB Manually
When the vehicle is not in "P", press
the brake pedal and engage EPB in
→ ADAS → Active Safety on the
infotainment touchscreen. Then, EPB
applies appropriate parking force, and
on the instrument cluster flashes and
then stays on, indicating that EPB is
engaged. The "EPB ON" message is also
displayed.
CAUTION
●When
flashes, EPB is working.
If the vehicle is on a slope, do not
release the brake pedal until
is
steady on. Otherwise the vehicle
may move down.
04
USING AND DRIVING
Engaging EPB Automatically
Engaging EPB automatically when the
ignition is switched off
●When the vehicle is powered off, EPB
automatically engages, the indicator
lights up and the "EPB activated"
message is displayed on the cluster.
Shifting into "P" automatically
●Press the brake pedal to stop the
vehicle and shift into Park. EPB is
engaged automatically. Do not release
the brake pedal until the indicator on
the instrument cluster stops flashing
and becomes steady on and the "EPB
activated" message is displayed.
WARNING
●Do not release the brake pedal
early in the process, especially
when the vehicle is stopped on a
slope, to prevent it from rolling.
●This function is designed to
improve vehicle safety. Excessive
reliance on or frequent use of the
function is not recommended. For
Emergency Braking When Brake Pedal Fails
Halaman 96
WARNING
safety reasons, make sure that the
vehicle is shifted into "P" or the
EPB is engaged before getting off.
Automatic EPB Release upon Vehicle
Start
●With the vehicle parked, start the
vehicle, press and hold the brake
pedal, and shift from "P" or "N" into
a driving gear such as "D" or "R". EPB
is released automatically, the indicator
goes off, and the "EPB released"
message is displayed.
CAUTION
●Be sure to always press and hold
the brake pedal when shifting
gears. Release the pedal only after
the intended gear is displayed on
the instrument cluster.
●Within several seconds after the
vehicle is started, the EPB system
performs a power-on self-test
(POST). In this process, the EPB
system does not respond to any
function.
●When the vehicle has been started and
the gear is in a driving gear such as
"D" or "R", engage EPB manually, then
simply press the accelerator pedal
slowly to a certain degree. EPB is
released automatically and
turns
off with the message "EPB released"
displayed.
WARNING
●For safety considerations, refrain
from using EPB for braking in
normal driving. It is preferred to
be used when the brake pedal
fails or is blocked.
WARNING
●As the EPB cannot go beyond the
physical limit of road adhesion,
activating the emergency brake
function may result in vehicle
drift, sideslip or deflection when
the vehicle passes through bends
or dangerous/heavy-traffic road
sections, or when the vehicle
is driven under severe weather
conditions. Be careful to avoid any
possible accident.
Emergency Braking When Brake Pedal
Fails
●During driving, if the braking fails or
is blocked, continue to press the P
gear switch for over two seconds for
emergency braking.
WARNING
●For safety considerations, refrain
from using EPB for braking in
normal driving. It is preferred to
be used when the brake pedal
fails or is blocked.
●As the EPB cannot go beyond the
physical limit of road adhesion,
activating the emergency brake
function may result in vehicle
drift, sideslip or deflection when
the vehicle passes through bends
or dangerous/heavy-traffic road
sections, or when the vehicle
is driven under severe weather
conditions. Be careful to avoid any
possible accident.
●For safety considerations, refrain
from using the EPB for braking
in normal driving. If the brake
pedal fails or is blocked, use the
emergency braking function while
you can always keep the vehicle
under control and drive normally.
Automatic Vehicle Hold (AVH)
Halaman 97
EPB System Indicator
●When the vehicle is powered on, if the
EPB is engaged,
is solid on on the
instrument cluster.
●When the vehicle is powered off, if the
EPB is engaged,
on the instrument
cluster turns on and then turns off in
several seconds.
●When the vehicle is powered on, the
EPB system starts self-check. The
indicator on the instrument cluster
turns on and then turns off in several
seconds. If it does not, the EPB or
braking system may be faulty. In this
case, contact a BYD authorized dealer
or service provider immediately.
EPB Operating Sound
●EPB motor noises can be heard while
the EPB is being engaged or released.
●If there is a burning smell or unusual
noises after emergency braking is
activated, contact a BYD authorized
dealer or service provider immediately.
WARNING
●To prevent the vehicle from
moving, the vehicle must be in "P"
gear and make sure that EPB is
engaged before getting off.
●The EPB switch must not be
operated when the vehicle is
moving.
●When the EPB switch is pulled
or released, the brake pedal
must be pressed to prevent
the vehicle from moving, and
the subsequent locking of the
gearshift that occurs because
EPB cannot provide a sufficient
parking force.
Automatic Vehicle Hold
(AVH)
Automatic vehicle hold (AVH): The
automatic vehicle hold (AVH) is activated
automatically when the moving vehicle
needs to be stationary for longer periods
of time, such as in traffic jams on a slope
or waiting at traffic lights.
AVH standby
●When the ignition is on, press the AVH
switch to enable the function. The AVH
standby indicator
is displayed on
the instrument cluster.
04
●Press the AVH switch again to disable
AVH.
USING AND DRIVING
AVH activated
●When the AVH standby indicator
is solid on, press and hold the brake
pedal until the vehicle stops (vehicle
speed reduces to zero) to activate AVH.
At this time, the vehicle is in AVH state
with
displayed on the instrument
cluster.
CAUTION
●For AVH to be activated, all of the
follow conditions must be met:
●The driver's seat belt is fastened
and the doors are closed.
Driving Precautions
Halaman 98
CAUTION
●Intelligent power braking system
and electronic park brake (EPB)
systems are normal.
●Pressing the accelerator pedal,
shifting into Park, or engaging the
EPB manually can make AVH exit
to the standby status.
●The AVH is off by factory default.
AVH running
●The AVH function runs normally when
it is activated, brake lights and the
high-mount brake light are on, and the
AVH indicator
is solid on on the
instrument cluster.
●The AVH function exits to the standby
mode after the vehicle stops for
10 minutes, with the AVH standby
indicator
lighting up and gear
shifted into Park
●To activate AVH function, shift into
Drive to enable the vehicle to move
normally, and then press and hold
the brake pedal until the vehicle
stops (vehicle speed reduces to zero).
AVH exits
●When the AVH function runs normally,
the following actions make AVH exit
and shift the vehicle from Drive to Park
automatically:
●Open the driver's door.
●Unlock the driver's seat belt.
●The gear status is in Drive when the
vehicle stops, and EPB is enabled.
●Press the AVH switch to disable AVH
when releasing the brake pedal.
AVH suppressed
●Shifting into Reverse, AVH goes into
slow-moving condition. When the
vehicle is reversing (in Reverse) or
shifts from Reverse into Drive to
travel at a low speed, AVH cannot
be activated but stays on standby to
facilitate low-speed vehicle motion.
●To exit slow-moving mode, press the
AVH switch or drive at a speed above
10 km/h. The AVH function is on
standby and can be activated normally.
Driving Precautions
●Slow down when driving against
strong winds.
●Drive slowly and carefully along gravel
roads. To prevent tire damage, do not
drive over sharp-edged obstacles. Or it
will severely damage the tires.
●Slow down on bumpy or uneven roads.
Otherwise, the impact may seriously
damage wheels.
●Avoid driving through flooded areas as
much as possible.
WARNING
●The driver shall ensure the riding
safety of all passengers in the
vehicle, guide them to correctly
use vehicle features, and prevent
children and other passengers
operating control switches such
as window switches in a wrong
way.
●Do not touch the power button
while driving.
CAUTION
●The battery is located in the
vehicle's chassis. Make sure to
avoid bumping when driving.
Cruise Control System Setup*
Halaman 99
CAUTION
●Before driving, make sure that
EPB is fully released and that the
EPB indicator light is off.
●Do not leave the vehicle when the
drive motor is running.
●Do not rest your feet on the
brake pedal and accelerator
pedal for a long time during
driving. Otherwise, this will cause
overheating, wear and waste of
electric energy.
●Slow down when driving down
steep slopes, and avoid braking
too frequently to prevent disc
overheating, which affects brake
performance.
●Be careful when accelerating or
braking on slippery roads. Quick
acceleration or sudden braking
will cause the vehicle to skid or
deviate.
●Make sure no occupant sticks
their head or hands outside the
vehicle, specially when it comes to
children.
●Large amounts of water
entering the engine compartment
can cause damage to the
power system and electrical
components.
Winter Driving Precautions
●Make sure the coolant is freeze-proof.
●Use coolant of the same type as the
one used originally. Fill up coolant
into the cooling system based on
ambient temperature.
●Improper coolant will damage the
cooling system.
●Check batteries and cables conditions.
●The low-voltage battery's capacity is
lower in cold weather, so they must
be fully charged when winter comes.
●Avoid door frost.
●Spray some deicing agent or glycerin
in the lock hole to prevent freezing.
●Use anti-freeze washer fluid.
●These can be found in the BYD
authorized dealer or service provider
and the auto parts stores.
●The water and anti-freeze ratio
must conform to manufacturer
instructions.
04
CAUTION
USING AND DRIVING
●Use special washer fluid to prevent
paint damage.
●Prevent ice and snow from going under
the fender.
●Steering is difficult with ice or snow
accumulating under the fenders.
When driving in cold weather, stop
from time to time and check for snow
and ice under the fenders.
●It is recommended to carry emergency
tools or items for different road
conditions.
●It is advisable to have snow chains,
window scraper, bags of sand and
salt, flashing signal, a shovel and
connecting cables in the vehicle.
Driver Assistance
Cruise Control*
Turning ACC on/off
●After the vehicle is started, press the
cruise button ③ and
lights up on
the instrument cluster.
Adaptive Cruise Control (ACC)*
Halaman 100
●Press the cruise button ③ again, press
the cruise cancel button ①, or power
off the vehicle to turn off the cruise
control system.
Setup
When the vehicle speed exceeds 40 km/h,
toggle the lever ② down to set the
current speed as the target cruise speed,
and
lights up on the instrument
cluster.
Adjusting speed
●Toggle the lever ② up briefly to
accelerate by 1 km/h or keep the
toggling to accelerate continually.
●Toggle the lever ② down briefly to
decelerate by 1 km/h or keep the
toggling to decelerate continually.
Reset
When the vehicle has not started cruising,
push up the lever ② to restore to the
stored speed prior to exiting the cruise
system last time.
Exit
Tap on the button ①, press the brake
pedal, or shift the gear from "D" to others
to exit cruise control.
Over speed
When the cruise system is activated, press
the accelerator pedal to accelerate. If the
press is stopped, the vehicle will return
to the speed set before the acceleration.
Press accelerator pedal while toggling the
lever ② down. The current speed is set
as the target cruise speed and the vehicle
cruises at this speed.
WARNING
●Improper use of the cruise control
system may lead to a crash.
●The cruise control system can only
be activated in smooth highway
traffic in good weather.
Adaptive Cruise Control
(ACC)*
●The adaptive cruise control (ACC)
system, an extension of traditional
cruise control, uses a front mmWave
radar and a multi-purpose camera
to detect the relative distance and
speed of a vehicle ahead, so as
to control vehicle speed accordingly
for automatic cruise control. The
system switches between regular
cruise control and ACC according to
whether there is a vehicle ahead.
●Cruise speed and time interval from
the vehicle ahead can be set by using
the cruise buttons. You can set the
cruise control speed within the 30-150
km/h range, or set a fixed distance
from the vehicle ahead to cruise at
speeds between 0 km/h and 150 km/h.
Status Description
●ACC standby:
●Once enabled, the system is on
standby by default and can be
manually activated. If the vehicle
does not meet activation conditions,
it must be checked until such
conditions are met. At this time,
(with a variable cruise speed value) is
displayed on the instrument cluster.
●ACC activated:
Adaptive Cruise Control (ACC)*
Halaman 101
●The system is operational. It
maintains the set speed or
automatically adjusts the distance
from the vehicle ahead. At this time,
(with a variable cruise speed
value) is displayed on the instrument
cluster.
●Over speed:
●When you step the accelerator pedal
while ACC is active, the vehicle
responds to your acceleration action
so that the ACC is temporarily
deactivated until you release the
pedal.
●ACC failure:
●There has been a failure in
the system. No operation can
be performed, and the ACC
failure indicator
lights up
on the instrument cluster. It is
recommended to contact a BYD
authorized dealer or service provider.
ACC Activation Conditions
●The EPB has been released.
●The vehicle is in Drive.
●The vehicle does not slide backwards.
●The trunk, hood, and all doors are
closed.
●Driver seat belt is fastened.
●The ESC system is on, but not activated
yet.
●The vehicle speed is not greater than
150 km/h.
●Brake pedal is pressed or AVH is
activated at speed 0; or brake pedal is
not pressed at speeds above 0.
●There is no vehicle network
communication failure prompt on the
instrument cluster.
●The AEB function is not activated.
How to Use
① ICC switch (with ICC switch on the
infotainment touchscreen off, this button
cannot activate ICC or ACC)
② Speed control lever, move up to the
RES+ position (to increase or reset cruise
speed), down to the SET- position (to
decrease or set cruise speed)
③ ACC switch
④ Reducing the following distance
⑤ Increasing the following distance
04
USING AND DRIVING
Resetting ACC
●When the ACC system is on standby
within the same ignition cycle, the
system memorizes the last speed
setting. Push up the lever ② to revert
to the stored speed prior to exiting the
cruise system last time. If the system
does not memorizes any vehicle speed
(ACC is activated for the first time in
this cycle), the "RESET" button will not
activate the ACC.
Increasing/Decreasing target speed
●When ACC is activated, set the vehicle
to a speed within the 30–150 km/h
range by moving the lever ②. Toggle
the lever ② up/down to increase/
decrease the vehicle speed by 5 km/h.
Press and hold the lever up/down
to continuously increase/decrease the
vehicle speed by 1 km/h.
Exiting ACC
Adaptive Cruise Control (ACC)*
Halaman 102
●While ACC is being activated, pressing
the button ③ for a second time or
depressing the brake pedal makes the
ACC system go on standby.
Setting vehicle distance
●The driver must select a safe vehicle
distance.
●The system adjusts vehicle speed to
keep a suitable distance from the
vehicle ahead on the same lane.
Pressing buttons ④ and ⑤ on the
steering wheel adjusts vehicle distance
to any of the four available levels. At
each level, vehicle distance is in direct
proportion to vehicle speed. The faster
the speed, the longer the distance.
Increasing/Decreasing speed with ACC
active
●When ACC is activated, you can press
the accelerator pedal to reach the set
cruise speed in advance. The system
then enters over speed mode and you
can move the lever downward to the
SET- position to set the current speed
as the target cruise speed. At the target
cruise speed, if you accelerate without
performing any other operations, the
vehicle accelerates and then returns
to target cruise speed after the
accelerator pedal is released. If the
you press the brake pedal to slow
down the vehicle speed continuously,
ACC goes into standby mode. After the
brake is released, ACC will need to be
reactivated.
Follow-to-stop/start
●ACC brings the vehicle to a stop when
the vehicle ahead stops in normal
driving conditions. It automatically
accelerates the vehicle away from a
standstill if the vehicle ahead pulls
away within a short period of time. To
increase or decrease the cruise speed
when parking, press the brake pedal
and pull up or down the lever ②.
●If the vehicle stops for a longer time
but within three minutes, press the
accelerator pedal or the switch ③ to
reactivate ACC.
●If the vehicle stops for more than three
minutes, the ACC system will enter
standby mode, with EPB engaged.
System Limitations
●The front mmWave radars are installed
in the front of the vehicle. Blockage
of its detection area by contaminants
can disturb the intended function. In
particular, if the sensor is covered by
snow completely, the ACC system exits
and informs of this on the instrument
cluster. System function will recover
after blockage is removed and the
vehicle is restarted or runs on normal
roads for a while.
●Front mmWave radar sensors may
have a transient function failure from
limited detection if the vehicle runs
under special conditions, such as
circular ramps or tunnels, for an
extended period. The function can be
recovered by restarting the vehicle or
driving on normal roads for a while.
●Reaching or leaving a curve may delay
or disturb target selection. In such
cases, the ACC vehicle may not brake
as expected or may brake late.
●On roads with sharp curves, such as
winding roads, the vehicle ahead may
be out of ACC sensor detection for
several seconds due to sensor vision
limitations, possibly causing the ACC
vehicle to accelerate automatically.
●Traffic flow and weather conditions,
such as rain and fog, must be heeded
for setting vehicle distance on the
ACC system. After the ACC system is
properly set, the driver must be able
to decelerate until the vehicle stops at
any time.
Adaptive Cruise Control (ACC)*
Halaman 103
●The ACC system may not be able
to identify stationary or slow-moving
objects, such as vehicles, the end
of traffic, toll booths, bicycles, or
pedestrians. This means a risk of
collision and requires the driver to
beware of the surroundings.
●The ACC system cannot identify
pedestrians or oncoming vehicles.
●The ACC system can only achieve
limited braking instead of emergency
braking.
●Metal objects, such as rail or metal
plates used in road construction, may
interfere with front mmWave radars,
making it malfunction.
●Performance of front mmWave radar
sensors may be affected by vibration
or collision. In this case, it is
recommended to contact a BYD
authorized dealer or service provider.
●ACC cannot be activated if
special driving modes* such as tow/
snow/mud/sand/terrain are enabled.
Precautions
●ACC is a comfort system rather than
a safety system, obstacle detector or
collision warning system. The driver
must keep control of vehicle at all
times and be fully responsible for the
vehicle.
●ACC assists instead of replacing the
role of the driver. The driver is
responsible for abiding by traffic rules
and keeping vehicle control.
●For safety reasons, ACC cannot be
activated with ESC disabled.
●The ACC is suitable for highways and
roads in good conditions, rather than
complex urban or meandering roads.
●It is the driver's responsibility to keep
distance from the vehicle ahead. The
ACC system's vehicle distance meets
the minimum distance required in
driving environments in the country.
●Vehicle control is transferred to the
driver if the accelerator or brake pedal
is pressed with ACC active. As a result,
the ACC system cannot keep a safe
distance from the vehicle ahead.
●ACC may have no or slow responses to
a vehicle ahead that brakes or stops
suddenly, resulting in a risk of late
braking. The driver should intervene
immediately.
●In some cases, such as when the
vehicle ahead is going too slow, when
lane change is too fast, when the
vehicle ahead is quickly jammed at
a close distance, or when the safe
distance from the vehicle ahead is too
short, there is no adequate time for the
system to decrease the relative speed.
so response has to come from the
driver. The system cannot give audio or
visual warnings in every case.
04
USING AND DRIVING
●If ACC is activated with the vehicle
stationary, the system identifies any
stationary obstacle ahead and keeps
the vehicle still to ensure a safe
startup and prevent collision. However,
this function cannot identify all the
obstacles, so the driver must be alert
to the front obstacles or other traffic
participants.
●A short distance from an adjacent lane
(or a vehicle on an adjacent lane that
is too close to the ACC vehicle's lane)
may trigger ACC to brake.
●Vehicles coming into the ACC vehicle's
lane and within the detection range of
its front mmWave radars are identified
as target vehicles and prompt a
response accordingly, which may lead
to hard or late braking.
●Detection may be affected or delayed
in some environments. If the radar
reflection cross-sectional area of the
Intelligent Cruise Control (ICC)*
Halaman 104
target (a bicycle, four-wheeler, or
pedestrian, for example) is too small,
the system may not be able to
establish its distance, resulting in
either late or no response to those
vehicles. In such cases, vehicle speed
must be controlled by the driver.
In addition, detection may also be
affected or delayed by noise or
electromagnetic interference.
●ACC cannot target vehicles with too
small contact ratio, so the driver must
keep control of the vehicle.
●When the vehicle stops as it follows
a vehicle ahead, in rare cases, the
system does not recognize the end of
the vehicle ahead but the lower end of
the target (for example, the rear axle of
a truck with a high chassis or a vehicle
bumper). In such cases, the system
cannot ensure proper stop distance, so
the driver must stay alert and be ready
to brake.
●Modifying the vehicle structure, such
as lowering the chassis or changing
the front license mounting plate, may
affect the ACC system.
●Do not use the ACC system when
visibility is poor, or when driving on
slopes, winding roads, or wet roads
(covered in ice/snow or flooded).
●Make sure to go to a BYD authorized
dealer or service provider for
professional calibration and checking
of front mmWave radars or the front
view camera in any of the following
situations:
●The front mmWave radar, front
bumper, or front windshield has been
removed.
●Wheel alignment has been carried
out.
●The vehicle has experienced a
collision.
●ACC system performance has
degraded or the instrument cluster
has prompted an system error.
WARNING
●ACC serves as a driver assistance
function only, so the driver is fully
responsible for driving safety.
●Influence of weather, road
conditions, and other factors may
cause ACC to fail.
●Use ACC based on your needs,
traffic, and road conditions.
Intelligent Cruise Control
(ICC)*
●The intelligent cruise control (ICC)
system helps control the vehicle
both longitudinally and transversely
at speeds between 0 and 130 km/h
to reduce the driving burden and
provide a safe and comfortable driving
environment.
●When the function is enabled, the
driver must always hold the steering
wheel and control the vehicle when
necessary.
●Longitudinal assistance, driven by the
ACC system, keeps the vehicle at a
fixed speed or fixed driving intervals
from the road user ahead.
Status Description
●ICC standby:
●ICC system is on standby when
the ICC switch on the infotainment
touchscreen is turned on. Press the
switch on the steering wheel to
manually activate the system. If the
vehicle does not meet activation
conditions, it must be checked until
such conditions are met. At this time,
Intelligent Cruise Control (ICC)*
Halaman 105
is displayed on the instrument
cluster.
●ICC activated:
●The ICC system is operational.
It maintains the set speed or
automatically adjusts the distance
from the vehicle ahead. At this time,
is displayed on the instrument
cluster.
●ICC failure:
●There has been a failure in the
system. No operation can be
performed, and
lights up
on the instrument cluster. It is
recommended to contact a BYD
authorized dealer or service provider.
ICC Activation Conditions
●The EPB has been released.
●The vehicle is in Drive.
●The vehicle does not slide backwards.
●The trunk, hood, and all doors are
closed.
●Driver seat belt is fastened.
●The ESC system is on, but not activated
yet.
●Vehicle speed is not greater than 130
km/h.
●Brake pedal is pressed at speed 0; or
brake pedal is not pressed at speeds
above 0.
●There is no vehicle network
communication failure prompt on the
instrument cluster.
●The AEB function is not activated.
●Two-way lane lines are clear and the
vehicle is at the center of the lane.
How to Use
●To enable or disable ICC, go to the
infotainment touchscreen →
→
ADAS → Intelligent Driving. This
function can only be disabled on the
infotainment touchscreen when the
vehicle is in "P". When the vehicle
is started, the system defaults to
previous settings.
① ICC switch (with ICC switch on the
infotainment touchscreen off, this button
cannot activate ICC or ACC)
② Speed control lever, move up to the
RES+ position (to increase or reset cruise
speed), down to the SET- position (to
decrease or set cruise speed)
04
③ ACC switch
USING AND DRIVING
④ Reducing the following distance
⑤ Increasing the following distance
●Press ① on the steering wheel to
activate (with ICC switch on the
infotainment touchscreen on) or exit
ICC. (By default, when the function is
activated, the current speed is set as
the cruise speed. If the current speed is
below 30 km/h, the cruise speed is set
to 30 km/h.) For how to set the cruise
speed and vehicle distance, see ACC
function descriptions (in the previous
chapter).
Precautions
●ACC function precautions must be
followed when using ICC (see the
previous chapter for details).
Forward Collision Warning (FCW)* & Automatic Emergency Braking (AEB)*
Halaman 106
●When ICC is turned on and activated
at vehicle speeds between 0 km/h and
130 km/h:
●If there is no lane lines ahead,
transverse ICC control is suppressed
and only ACC works. In that case, ICC
working status indicator turns gray
on the instrument cluster.
●If lane lines ahead are clear and
recognizable, transverse ICC control
is activated automatically. In that
case, ICC working status indicator
shows activated status on the
instrument cluster.
●The ICC system is a driving assistance
system, not an automatic driving
system. The driver should keep control
of the vehicle at all times, and their
hands should not leave the steering
wheel for a long time. Otherwise, the
system will exit after prompting the
driver to take over the control.
●The ICC system can be affected by
weather conditions, lighting and clarity
of lane lines. Performance degrades
significantly in situations such as
backlighting, sunset, snow covered
roads, and severely damaged roads.
●Do not use the ICC system on
winding roads with sharp turns,
icy and slippery bends, or under
weather conditions, such as dense fog,
heavy rain and heavy snow, liable to
hinder the sensing operation of front
mmWave radars or the multi-purpose
camera.
●ICC cannot be activated if special
driving modes* such as tow/
snow/mud/sand/terrain are enabled.
●Situations where ICC cannot be used
include:
●The sensor is blocked.
●The vehicle is running under severe
weather conditions.
●Active safety function is triggered.
●Vehicle speed exceeds the specified
range.
●The road is too curvy.
WARNING
●ICC serves as a driver assistance
function only, so the driver must
be fully responsible for driving
safety.
●Influence of weather, road
conditions, and other factors may
cause ICC to fail.
●When the vehicle passes through
a too curvy road, it may
exceed the system's ability
to pass through the curve
and automatically exit the ICC
function. The driver should always
be aware to the road environment
and function status.
●Use ICC based on your needs,
traffic, and road conditions.
Forward Collision
Warning (FCW)* &
Automatic Emergency
Braking (AEB)*
Forward collision warning (FCW) system
and automatic emergency braking (AEB)
system detect vehicles and pedestrians
ahead by using a front mmWave radar
and a multi-purpose camera. When
detecting a risk of collision, the system
gives audio and visual alarms to alert the
driver, and improve the potential braking
pressure for better response timing. If
detecting increased risk of collision, the
system automatically applies braking
pressure to assist in collision avoidance
or impact reduction.
Forward Collision Warning (FCW)* & Automatic Emergency Braking (AEB)*
Halaman 107
How to Use
●Enable or disable FCW and AEB in
infotainment touchscreen
→ ADAS
→ Active Safety. AEB is enabled
by factory default. When the vehicle
is started, the system defaults to
previous settings.
●FCW gives alarms in forms of audio,
text, and intermittent braking.
●When FCW is activated,
is
displayed on the instrument cluster
depending on the level of emergency,
and audible and textual prompts are
given.
or
●When AEB is triggered,
and audible
and textual prompts are displayed on
the instrument cluster.
●In the event of malfunction,
is
displayed. Contact a BYD authorized
dealer or service provider.
●If you disable AEB manually by
pressing buttons,
is displayed.
FCW Activation Conditions
All the following conditions must be met:
●This function has been turned on in the
infotainment touchscreen.
●Vehicle speed is within the range of
30-150km/h.
●The vehicle is in Drive.
●The vehicle does not slide backwards.
AEB Activation Conditions
All the following conditions must be met:
●This function has been turned on in the
infotainment touchscreen.
●Vehicle speed is within the range of
4-60km/h.
●The EPB has been released.
●The vehicle is in Drive.
●The vehicle does not slide backwards.
●The trunk, hood, and all doors are
closed.
●Driver seat belt is fastened.
●The ESC system is on, but not activated
yet.
System Limitations
●Detection may be affected or delayed
in some environments. If the front
mmWave radar cross section of the
target (a bicycle, tricycle, four-wheeled
carriage, electric bicycle or motorbike,
for example) is too small, the system
may not be able to establish its
distance to the target ahead, resulting
in either late or no response to those
vehicles.
04
USING AND DRIVING
●The system may be affected or give no
response in the following cases:
●On rainy, snowy or foggy days, or
exposure to direct sunlight or glaring
lights, or significantly varying lighting
conditions.
●Dirty, hazy, damaged or blocked
sensor.
●Malfunction of front mmWave radars
due to interference from other
radar sources such as strong front
mmWave radar reflection in multi-
story parking lots.
●In complex traffic, the system may
be unable to properly respond to the
following circumstances:
●Pedestrians or vehicles move too
quickly into the sensor's detection
range.
●Pedestrians are obscured by other
objects.
Forward Collision Warning (FCW)* & Automatic Emergency Braking (AEB)*
Halaman 108
●Pedestrian outlines are
indistinguishable from the
surroundings.
●Pedestrians are not detected, due
to, for example, coverage by special
clothing or other materials.
●The vehicle is on a sharp curve.
Precautions
●The AEB system cannot ensure zero
collision. In complex traffic, the system
cannot always clearly identify all the
vehicles or pedestrians. It may trigger
unnecessary warning or braking action
for well covers, iron plates or road
signs.
●Make sure to drive safely and observe
surrounding traffic conditions. The AEB
is not a substitute for normal braking
operation in any event.
●Do not overly rely on the AEB system
as this may result in severe injuries or
deaths. The system is only an auxiliary
safety tool. The driver must always
keep a safe distance from vehicles
ahead, control the speed, and be ready
to brake or steer away when necessary.
The driver must keep control of the
vehicle at all times and be fully
responsible for safe driving.
●The AEB system is activated only
when it exceeds certain speeds. Careful
driving is always required, because the
system may not be triggered correctly.
●The AEB system cannot work normally
when the ESC function is disabled or
the fault light is on.
●If FCW gives an alarm, the driver must
brake based on traffic conditions to
decrease vehicle speed or steer away
from obstacles.
●If the vehicle travels too close to
the vehicle ahead for too long, a
safety distance warning will be given.
If the vehicle ahead brakes suddenly,
collision may be unavoidable.
●The system will not trigger AEB when
the driver is aware of an emergency
warning, such as turning the steering
wheel, pressing the throttle pedal hard
or braking hard.
●Front mmWave radar sensors may
have a transient function failure from
limited detection if the vehicle runs
under special conditions, such as
circular ramps or tunnels, for an
extended period. The function can be
recovered by restarting the vehicle or
driving on normal roads for a while.
●Sometimes the surfaces of front
mmWave radars or the multi-purpose
camera are dirty or obscured by
foreign objects. In that case, a message
is displayed on the instrument cluster
and both FCW and AEB are disabled.
The functions will return normal after
the sensor is cleaned.
●As the pedestrian protection function
is limited by certain physical
conditions, the driver must take timely
and effective control of the vehicle
under dangerous conditions.
●The system cannot completely protect
pedestrians or avoid accidents and
severe injuries on its own.
●Under certain complex conditions,
such as on winding roads, the
pedestrian protection function may
trigger unnecessary warning or
braking.
●System failure may trigger wrong
warnings or braking. This may
be caused, for example, by the
misalignment of the front mmWave
radar or multi-purpose camera.
●The brake pedal becomes harder if
AEB is triggered. A large amount of
hydraulic pressure will be required to
Traffic Sign Recognition (TSR)*
Halaman 109
push the caliper in a short time and
there will be a sizzling noise.
●The AEB system is triggered only with
doors closed and seat belts fastened. It
fails to work in the following cases:
●Any door is not closed or it is opened
when the vehicle is moving.
●Any seat belt has not been fastened
or it is unfastened while the vehicle is
traveling.
●The driver accelerates or decelerates
rapidly or turns the steering wheel
quickly.
●System performance may be reduced
in the following cases:
●Strong front bumper impact from
accidents or other causes.
●Improperly inflated or worn out tires.
●Unqualified tires installed.
●Snow chains installed.
●Use of a small spare tire or tire repair
kit.
●Make sure to go to a BYD
authorized dealer or service provider
for professional calibration of the
front mmWave radar or multi-purpose
camera in any of the following
situations:
●The front mmWave radar or multi-
purpose camera has been removed.
●Toe-in or rear camber has been
adjusted during wheel alignment.
●The vehicle experienced a collision.
●ACC system performance has
degraded or become abnormal.
●Do not attempt to test the AEB system
on your own using objects such as
carton, iron plate, dummy, etc. The
system may not work properly and
thus result in accidents.
WARNING
●FCW and AEB serve as driver
assistance functions only, so the
driver is fully responsible for
driving safety.
●Influence of weather, road
conditions, and other factors may
cause FCW and AEB to fail.
●Use FCW and AEB based on
your needs, traffic, and road
conditions.
Traffic Sign Recognition
(TSR)*
04
USING AND DRIVING
The traffic sign recognition (TSR) system
recognizes speed limit signs through the
front camera. It displays such signs on the
current road on the instrument cluster
and emits alarms when the vehicle speed
exceeds the detected speed limit.
How to Use
●Enable or disable TSR in
→ ADAS
→ Driving Assist. TSR is enabled
by factory default. When the vehicle
is started, the system defaults to
previous settings.
●When the TSR system identifies the
current traffic sign, the identified
speed limit icon is displayed on the
instrument cluster (for example,
).
●When the TSR system is disabled,
fails or identifies no traffic sign,
no indicator is displayed on the
instrument cluster.
Precautions
●The speed limit icon disappears from
the instrument cluster within a certain
distance after system recognition. The
Intelligent High Beam Control (IHBC)*
Halaman 110
driver must control speed within
range.
●The TSR system can identify speed
limit signs only, and will not control
speed. The control over the vehicle
always vests in the driver. Please drive
properly.
●When there are several speed limit
signs on side-by-side lanes, the system
recognizes the limit signs of all lanes to
display the speed limit alert icon. The
driver must remain in the correct lane.
●Weight limit signs not in standard
size as per national regulations may
mistakenly be identified as speed limit
signs.
●If a speed limit sign is unclear or
distorted, inclined, reflective, partly
blocked or covered, the camera may
be unable to recognize the sign
completely or clearly.
●TSR performance depends on weather
conditions, lighting, and sign visibility.
The system may fail to or incorrectly
identify the sign at night or sunset,
in rainy, foggy, hazy, snowy or dusty
environment, when light is coming
from the back of the vehicle, or when
there is a sudden change in lighting.
●In case there is a collision or the
camera sensor has been reassembled,
it is recommended to go to a BYD
authorized dealer or service provider
for sensor calibration so as to avoid
affecting system performance.
WARNING
●TSR serves as a driver assistance
function only, so the driver must
be fully responsible for driving
safety.
●Influence of weather, road
conditions, and other factors may
cause TSR to fail or lead to late
alarms.
WARNING
●Use TSR based on your needs,
traffic, and road conditions.
Intelligent High Beam
Control (IHBC)*
IHBC is a driver assistance function that
helps the driver use the high beams
correctly. It can automatically turn on the
high beam in the dark to provide the
driver with the maximum field of vision,
turn off the high beam when there is an
oncoming vehicle, so as not to dazzle
other drivers, and turn off the high beam
in urban areas (marked by street lights) or
other conditions.
Status Description
●IHBC standby:
●When the function is enabled but not
activated yet,
is displayed on
the instrument cluster.
●IHBC activated:
●With the function enabled,
is
displayed on the instrument cluster.
●IHBC failure:
●The function has failed, and
is
displayed.
How to Use
●Enable or disable IHBC in the
infotainment touchscreen →
→
ADAS → Driving Assist. The function is
disabled by factory default. The system
defaults to the previous settings when
the vehicle starts.
●With the function enabled, when you
set the light switch to the auto lights
position, the light meets conditions
Lane Departure Assist (LDA)*
Halaman 111
and vehicle speed exceeds 35 km/h,
the system automatically switches
between low and high beams based on
the current driving environment.
Precautions
●The system is an auxiliary light control
function. While it is recommended
to use the system at high vehicle
speeds, the system cannot completely
replace the driver. The driver must
observe road regulations and actively
switch between high and low beams
according to road condition changes at
all times.
●When the vehicle is in a high dynamic
state, for example when the ABS or
ESC is activated, beam switching is
suppressed.
●IHBC system exits when you turn fog
lights or turn signals on, set wipers
to high-speed mode, are backing up,
or set the light switch to a position
other than auto lights, or when the
environment has too much lighting.
●Even when HMA is working, the driver
must respond to possible situations
where the HMA is triggered in error
or fails to work due to unavoidable
environmental factors and conditions.
Typical situations are:
●The driver's stick operation to switch
to the high beam is prioritized.
●The weather, such as fog, rain
or snow, is extremely terrible for
driving.
●There are traffic participants with
poor lighting (such as pedestrians
and bicycles), railways or waterways
nearby, or wild animals on the roads.
●There are strongly reflective objects
around, such as traffic signs on
highways and water reflection on the
road surface.
●The front windshield is dirty, covered
in mist, or blocked by stickers or
decorations.
●In case there is a collision or the
sensor has been reassembled, it
is recommended to go to a BYD
authorized dealer or service provider
for sensor calibration so as to avoid
affecting system performance.
WARNING
●HMA only serves as a driving
assistance function, so the driver
must be fully responsible for
driving safety.
04
●Influence of weather, road
conditions, and other factors may
cause HMA to fail.
USING AND DRIVING
●Use HMA based on your needs,
traffic, and road conditions.
Lane Departure Assist
(LDA)*
Lane Departure Warning (LDW)*
The lane departure warning (LDW) system
detects the lane lines ahead through a
multi-purpose camera. When the vehicle
speed is between 60 km/h and 150 km/h
and the driver unintentionally drifts out
of the lane, the LDW system warns the
driver by steering wheel vibration, a
sound, and an instrument cluster prompt.
Lane Departure Prevention (LDP)*
●The lane departure prevention (LDP)
system identifies lane lines ahead
through a multi-purpose camera. If
the driver unknowingly departs from
the lane at a vehicle speed between
60 km/h and 150 km/h such that the
vehicle is about to roll over lane lines,
the system, when activated, slightly
turns the steering wheel by providing
Lane Departure Assist (LDA)*
Halaman 112
reverse torque through the electronic
power steering (EPS) system to prevent
lane departure.
How to use
●Enable or disable this function in
→ ADAS → Driving Assist → Lane
Support System (LSS). The function is
disabled by factory default. The system
defaults to the previous settings when
the vehicle starts.
●There are three LDW modes: audible
alarm only, steering wheel vibration
only, and combination.
●When LDW or LDP is enabled,
is
displayed on the instrument cluster.
●When activated, LDW gives alarms
(in the form of audible alarm, visual
alarm, and steering wheel vibration).
On the instrument cluster, virtual lane
lines on the side where the vehicle rolls
over lane lines turn red.
●When activated, LDP gives alarms
(in the form of audible and visual
alarms). On the instrument cluster,
flashes twice, virtual lane lines
on the side where the vehicle rolls over
lane lines turn blue.
●In the event of malfunction,
is
displayed.
System Limitations
In a complex road traffic environment,
the LDA system may detect the lane line
incorrectly or fail to detect the lane line.
In the following cases, the system may
not work or its performance may be
significantly degraded:
●Poor visibility on snowy, rainy, or foggy
days
●Dirty or fogged front windshield, or
blocked multi-purpose camera
●Glaring from direct sunlight, reflection
in puddles, or oncoming vehicles
●Sudden changes in light, such as when
the vehicle is entering or exiting a
tunnel
●Lane lines obscured by tree shadows
on roads in direct sunlight on sunny
days
●Unidentifiable road boundary with
grass, soil, or curb
●The function may be suppressed
in narrow lanes to prevent the
interference of its frequent activation.
Precautions
●LDW will be suppressed if a turn signal
is used and the vehicle changes lane as
indicated by the turn signal.
●LDW may be suppressed if the vehicle
travels over lane lines or if lane lines
are unclear, too thin, worn, blurred, or
covered by dirt/snow.
●LDW may be suppressed if the lane is
too wide or too narrow, if the number
of lanes increases or decreases, if lane
markings change suddenly on ramps
or exits, or in situations of complex line
arrangements.
●LDW may be suppressed on slopes or
winding roads when the vehicle travels
too close to the vehicle ahead or when
the vehicle ahead obscures lane lines.
●LDW may be suppressed when the
vehicle jolts, accelerates or decelerates
too quickly, or takes a sharp turn.
●The system operation may be affected
if the windshield within the visual
field of the multi-purpose camera is
cracked, if the front windshield glass
is dyed or coated in a manner that
is not compliant with standards, if
any reflective object is placed on the
dashboard, or if any other object
interferes with camera sight.
Emergency Lane Keeping Assist (ELKA)*
Halaman 113
●For safety reasons, do not test LDW
function on your own. The function
will be interrupted if the multi-purpose
camera is blocked by any object
or exposed to strong lights. The
function recovers once conditions
return to normal. If it does not, it
is recommended to contact a BYD
authorized dealer or service provider.
●Disabling the LDW is recommended
under any of the following
circumstances:
●Driving in a sporty style
●Severe weather conditions
●On uneven roads
●Situations where lane lines may not be
identified include, but are not limited
to:
●Unclear lane lines
●Incomplete lane lines
●Situations that may cause recognition
difficulty or late function activation of
the multi-purpose camera include, but
are not limited to:
●The multi-purpose camera comes off,
is loosely installed, or is blocked.
●The vehicle is running under extreme
weather, such as rain, snow, or smog.
●The multi-purpose camera is partially
or completely blocked.
WARNING
●LDA serves as a driver assistance
function only, so the driver must
be fully responsible for driving
safety.
●Influence of weather, road
conditions, and other factors may
cause LDA to fail.
WARNING
●Use LDA based on your needs,
traffic, and road conditions.
Emergency Lane Keeping
Assist (ELKA)*
The emergency lane keeping assist
(ELKA) system identifies lane lines ahead
through a multi-purpose camera and
identifies vehicles approaching from
behind on the adjacent lanes through
rear corner mmWave radars. It comes
to work within the 60–150 km/h vehicle
speed range when the vehicle drifts out
of solid lane lines, is about to cross a
road edge, or has a risk of colliding with
oncoming vehicles or vehicles that are
passing it on adjacent lanes. The system
activates EPS system to provide reverse
torque, keeping the vehicle in the current
lane.
04
USING AND DRIVING
How to Use
●Enable or disable this function in
→ ADAS → Driving Assist → Lane
Support System (LSS). The function is
disabled by factory default. The system
defaults to the previous settings when
the vehicle starts.
●When the system is active,
flashes
on the instrument cluster.
●In the event of system malfunction,
is displayed on the cluster.
●If you disable ELKA manually by
pressing buttons,
is displayed.
System Limitations
●The ELKA system may detect incorrect
or no lane lines in complex traffic.
The following situations may lead to
failure or performance degradation of
the system:
Blind Spot Assist (BSA)*
Halaman 114
●Poor visibility on snowy, rainy, or
foggy days
●Dirty or fogged front windshield, or
blocked multi-purpose camera
●Glaring from direct sunlight,
reflection in puddles, or oncoming
vehicles
●Sudden changes in light, such as
when the vehicle is entering or
exiting a tunnel
●Lane lines obscured by tree shadows
on roads in direct sunlight on sunny
days
●Unidentifiable road boundary with
grass, soil, or curb
●The function may be suppressed
in narrow lanes to prevent
the interference of its frequent
activation.
Precautions
●Situations where lane lines may not be
identified include, but are not limited
to:
●Pedestrians, animals, and specialty
or specially-shaped vehicles
●Unclear or incomplete lane lines
●Situations that may result in detection
failure of the multi-purpose camera or
late alarms include, but are not limited
to:
●The multi-purpose camera comes off,
is loosely installed, or is blocked.
●The vehicle is running under extreme
weather, such as rain, snow, or smog.
●The multi-purpose camera is partially
or completely blocked.
●Situations that may result in detection
failure of mmWave radars or late
alarms include, but are not limited to:
●MmWave radar(s) come off, are
loosely installed, or are blocked.
●The vehicle is running under extreme
weather, such as rain, snow, or smog.
●The vehicle encounters certain metal
guardrails or similar road conditions.
WARNING
●ELKA serves as a driving
assistance function only, so the
driver is fully responsible for
driving safety.
●Influence of weather, road
conditions, and other factors may
cause ELKA to fail.
●Use ELKA based on your needs,
traffic, and road conditions.
Blind Spot Assist (BSA)*
●Blind spot assist (BSA) includes blind
spot detection (BSD)*, rear cross traffic
alert (RCTA)*, rear cross traffic braking
(RCTB)*, rear collision warning (RCW)*,
and door open warning (DOW)*.
It detects the environment behind
the vehicle through corner mmWave
radars installed on both sides of the
rear bumper so as to remind the driver
of safe driving.
Blind Spot Detection (BSD)*
At vehicle speeds between 15–150 km/h,
if rear corner mmWave radars detects a
vehicle in blind spots on or a vehicle
approaching quickly from the adjacent
lane, the indicator on the corresponding
side mirror lights up. If the turn signal
for the same side is turned on at this
moment, the alarm indicator on the side
mirror flashes to alert the driver of a risky
lane change.
Blind Spot Assist (BSA)*
Halaman 115
Rear Cross Traffic Alert (RCTA)*
When the vehicle is reversing at a speed
no more than 15 km/h, RCTA detects the
vehicles traveling in the blind spot at
the back through rear corner mmWave
radars. If the system determines that a
vehicle approaching from behind poses a
risk of collision, the side mirror warning
indicators flash and an audible alarm is
given to alert the driver, reducing the
possibility of collision.
Rear Cross Traffic Braking (RCTB)*
When the vehicle is reversing at a speed
no more than 9 km/h, RCTB detects the
vehicles traveling in the blind spot at
the back through rear corner mmWave
radars. If the system determines that a
vehicle approaching from behind poses
a risk of collision, it performs emergency
braking automatically.
Rear Collision Warning (RCW)*
At vehicle speeds between 5 km/h and
146 km/h, if the rear corner mmWave
radar detects a risk of collision with a
vehicle approaching quickly from behind
on the current lane, the hazard warning
light turns on to warn the driver in that
vehicle against a possible collision.
Door Open Warning (DOW)*
DOW is realized with rear corner mmWave
radars installed on both sides of the rear
bumper. When the vehicle is stationary
with doors unlocked, the system keeps
indicators on side mirrors solid on to
warn the driver if moving objects, such as
bicycles or automobiles, on an adjacent
lane are approaching from behind. At the
same time, an icon is displayed on the
instrument cluster. If the driver attempts
to open the door at this time, indicators
on side mirrors begin to flash and a chime
sounds.
Function Button Operation
●Enable or disable BSD, RCTA, RCTB,
RCW, or DOW in
→ ADAS → Active
Safety → Blind Spot Assist.
●When the blind spot assist system is
disabled, no relevant indicators are
displayed on the instrument cluster.
04
●When the blind spot assist system
is standing by, if vehicle conditions,
such as speed or gear status, do not
meet the requirements of any function,
USING AND DRIVING
is displayed on the instrument
cluster and blind spot assist will not be
activated.
●If the blind spot assist system
malfunctions,
is displayed on the
instrument cluster.
●When the blind spot assist system
is active,
is displayed on the
instrument cluster, meaning that the
function has been activated and can
trigger alarms at any time.
Precautions
●While the BSD system provides
assistance in monitoring blind spots
of rearview mirrors, it cannot replace
the driver's observation and judgment.
The driver must keep control of vehicle
at all times and drive properly and is
fully responsible for the vehicle.
●The BSD system may be unable to
provide adequate warning on target
vehicles approaching from behind at a
high speed.
Panoramic View System
Halaman 116
●The driver must ensure the normal
operation of the BSD system, keeping
its rear corner mmWave radars in good
condition. For example, dirt, snow, or
other obstructions need to be cleared
right away.
●The BSD system gives a warning if
unrelated targets at the rear side or in
the rear (such as work zone barriers,
large roadside billboards, reflectors in
tunnels, or other objects with a large
radar cross section) are mistakenly
selected as target vehicles.
●Detection may be affected or delayed
in some environments. If the radar
cross section of the target vehicle is
too small (a bicycle, electric moped or
pedestrian, for example), the system
may fail to identify targets, leading
to false alarms. In addition, detection
may also be affected or delayed by
noise or electromagnetic interference.
System Limitations
●Under some circumstances, it is
difficult for the system to assist the
driver, and detection may be affected
or delayed. Possible circumstances
include, but are not limited to:
●The vehicle coming from behind
changes the lane suddenly.
●Vehicles coming from behind are
detected too late at sharp turns,
slopes, or other settings.
●The target vehicle is obscured.
●Vehicles come from behind at a
relative speed above 80 km/h.
●The vehicle is on a curve which is
too sharp, or is entering or exiting a
curve.
●The vehicle is running under severe
weather, such as rain or snow.
●Rear corner mmWave radar(s) come
off, are loosely installed, or are
blocked.
●The vehicle encounters certain metal
guardrails or similar road conditions.
●Targets that may not be responded
include, but are not limited to,
pedestrians and animals.
●The environment contains
electromagnetic interference or
other influences.
●Vibration or collision influence on
sensor calibration of BSD's rear corner
mmWave radars can degrade system
performance. If this is detected,
contact a BYD authorized dealer or
service provider.
WARNING
●Blind spot assist serves as a driver
assistance function only, so the
driver must be fully responsible
for driving safety.
●Influence of weather, road
conditions, and other factors may
cause blind spot assist to fail.
●Use blind spot assist based on
your needs, traffic, and road
conditions.
Panoramic View System
With the ignition switched on, tap
Panoramic View on the infotainment
system homepage or press the
button
on the steering wheel to access the
panoramic view.
Panoramic View System
Halaman 117
●Landscape mode:
●Tap the front, rear, right, or left area
of the vehicle icon on the left. View of
the selected area is displayed in the
image section on the right.
●In the single front and rear views,
double-tap the image section to switch
to a 180° perspective displayed in full
screen.
●Tap the radar icon
in the panoramic
view to enable the radar display, and
tap it again to disable it. When the
radar display is enabled, a warning is
displayed as the vehicle is approaching
an obstacle.
●Portrait mode:
●Tap any two of the front, rear, right,
and left areas of the vehicle icon
in the lower left section. Views of
the two selected areas are displayed
in the upper and lower right image
section.
●Slowly tap the vehicle image on the
right to switch between transparent
and non-transparent vehicle images.
●After the vehicle starts, the image
before last power-off is displayed
on the transparent panoramic view
screen. Foreign bodies shown may be
inconsistent with the actual ones in
the underbody and surrounding blind
areas. The underbody image update
will begin only after the vehicle has
started to run and will be complete
when the vehicle has been driven
beyond its length.
WARNING
●The panoramic view system is
only to be used for parking/
driving assistance. It is not safe
to rely solely on this system to
park or drive the vehicle, because
there are some blind spots in
front of and behind the vehicle.
The surroundings of the vehicle
should be observed in other
ways during the parking/driving
process, so as to avoid accidents.
04
USING AND DRIVING
●When the side mirrors are not
extended in place, do not use
the panoramic view system; and
when the panoramic view system
is used for parking/driving, ensure
that all the car doors are closed.
●Cameras are installed above the
front grille, the lower parts of the
side mirrors, and the rear license
plate. Make sure the cameras are
unobstructed.
●Protect the cameras from any
impact to prevent damage or
malfunction.
CAUTION
●This system uses wide-angle
fisheye cameras, so the object
on the display screen may
appear somewhat deformed in
Parking Radar Switch
Halaman 118
CAUTION
comparison with the actual
object.
●The distance to an object
displayed on the panoramic view
screen may be different from the
distance perceived subjectively,
especially when the object is
closer to the vehicle. Assess the
distance in various ways.
●To prevent affecting camera
performance, avoid spraying
directly on the cameras when
washing the vehicle body with
high-pressure water. Wipe any
water or dust off the camera in
time.
●After the vehicle is powered on,
if you press the panoramic view
start button or shift into reverse
while the infotainment system is
not fully activated, the output on
the panoramic view screen will
be delayed or the screen will
flash. This is a normal part of the
camera power-on process.
●When the vehicle runs at a low
speed, the transparent panoramic
view function is affected by speed
fluctuation or multiple stops,
so there will be misalignment
between the images below the
vehicle and that outside the
vehicle.
●The brightness of the reversing
image can be varied depending
on the touchscreen brightness.
Adjust the brightness as you
desire.
Parking Assist System*
●During vehicle parking, the parking
assist system detects obstacles by
sensors, and prompts the driver with
the proximity of obstacles by an image
on the infotainment touchscreen* and
a speaker alarm.
●The parking assist system helps
with reversing. Pay attention to the
environment behind and around the
vehicle during reversing.
●When you reverse the vehicle, a
reversing image* will be displayed
on the infotainment touchscreen
automatically.
●For your driving safety, when the
reversing image is displayed, all
buttons will be disabled except some
volume and calls-related buttons.
●After reversing ends, the interface will
be restored.
CAUTION
●The parking assist system ceases
to operate when the vehicle is
moving forward at over 10 km/h.
●Do not place any articles within
the sensors' working range.
●To prevent sensor malfunction, do
not wash the sensor area with
water or steam.
Parking Radar Switch
●Turn the parking radar system on or
off with the parking radar switch or on
infotainment touchscreen
→ ADAS
→ Parking Assist.
●When the ignition is switched on and
EPB is released, the parking assist
system is enabled automatically.
●When enabled, the system raises
an alarm if obstacles are found
surrounding the vehicle; when
disabled, it does not.
Distance Display and Speaker
Halaman 119
Sensor Type
●When the sensor detects an obstacle,
an image is displayed on the
infotainment touchscreen according to
the location of the obstacle and its
distance from the vehicle.
●When the driver conducts parallel
parking or reverse parking, the
sensor measures the distance between
the vehicle and the obstacle
and communicates this information
through the infotainment touchscreen
and the speaker. Be aware of the
surroundings when using this system.
① Rear right corner sensor
② Rear right center sensor
③ Rear left center sensor
④ Rear left corner sensor
Approximate Distance
(mm)
Touchscreen Display
Example
Alarm Sound
About 700 to 1,200
About 300 to 700
About 0 to 300
Working example of corner sensors
Distance Display and Speaker
When the sensor detects an obstacle,
the location of the obstacle and its
approximate distance from the vehicle
are displayed on the infotainment
touchscreen, and the speaker beeps.
04
USING AND DRIVING
Working example of center sensors
Slow honk
Sharp honk
Continuous
Working Sensors and Detection Range
Halaman 120
Approximate Distance
(mm)
Touchscreen Display
Example
Alarm Sound
About 300 to 600
About 0 to 300
Working Sensors and Detection Range
The detection range of the sensors may
vary depending on the shape of obstacles
and other factors.
①About 1,200 mm
②About 600 mm
CAUTION
●The sensors may fail to detect
obstacles that are very close to
the vehicle.
●The detection range of the sensors
may vary depending on the shape
of obstacles and other factors.
Sensor Detection Information
●Certain vehicle conditions and
surroundings may affect the sensors'
ability to accurately detect obstacles.
Sharp honk
Continuous
Sensor detection accuracy may be
affected if:
●There is dirt, water or ice block on
the sensor.
●There is snow or frost on the sensor.
●The sensor is blocked.
●The vehicle leans significantly to one
side.
●The vehicle is moving on particularly
bumpy roads, slopes, gravel or grass.
●The vicinity is noisy due to honking
of vehicles, motorcycle engines,
air brakes of large vehicles, or
other noises that produce ultrasonic
waves.
●There's another vehicle with parking
assist sensor nearby.
●The sensor is blocked by a layer of
fog or rain.
●The vehicle is equipped with a fender
antenna mast or wireless antenna.
●The vehicle is fitted with a tow eye.
●The bumper or the sensor was hit
hard.
●The vehicle is approaching a high or
zigzag curb.
●The vehicle is driving in the sun or in
the cold.
Intelligent Power Braking System
Halaman 121
●The suspension (low suspension,
etc.) that does not match the original
parameters has been installed.
●Except as described above,
sometimes due to the shape of traffic
signs and other objects, sensors may
not be able to correctly determine
the actual distance between the
vehicle and them.
●The shape and material of obstacles
may prevent sensors from detecting
them, especially the following:
●Electric wires, fences, and ropes
●Cotton, snow, and other materials
that absorb radio waves
●Any object with sharp edges and
corners
●Low obstacles
●High obstacles facing outwards
towards the vehicle
Driving Safety Systems
For better driving safety, the
following driving safety systems
works automatically based on driving
conditions. However, these systems only
provide assistance, and excessive reliance
on them is not recommended.
Intelligent Power Braking System
The intelligent power braking system is
an advanced decoupled electro-hydraulic
braking system, incorporating vacuum
booster, electronic vacuum pump, and
ABS/ESC functionality. The system assists
vehicle braking according to the driver's
demands. It offers advanced control
functions such as ABS, electronic brake
force distribution (EBD), traction control
system (TCS), vehicle dynamic control
(VDC), comfort parking (CST), hill-start
hold control (HHC), hydraulic brake assist
(HBA), and controlled deceleration for
parking brake (CDP) to improve vehicle
stability and comfort, and the recovery
efficiency of brake energy.
Vehicle Dynamics Control (VDC)
When the vehicle turns suddenly while
running, the VDC system determines
the driver's intention based on such
information as steering wheel's angle
and vehicle speed, and continuously
compares with the actual condition. If
the vehicle swerves from the normal
lane, the VDC corrects the situation by
engaging brakes to the corresponding
wheels to help the driver control skidding
and maintain directional stability.
04
Traction Control System (TCS)
USING AND DRIVING
TCS prevents the drive wheels from
skidding during acceleration by reducing
the motor power, and, when necessary,
applies braking forces to prevent drive
wheels from spinning. It makes it easy for
the vehicle to start, accelerate, and climb
under adverse driving conditions.
Hill Hold Control (HHC)
After the brake pedal is released, HHC
maintains brake pressure for one second
to prevent backward sliding.
Hydraulic Brake Assit (HBA)
When you press the brake pedal quickly,
HBA detects that the vehicle is in
emergency condition. It quickly increases
the brake pressure to the maximum so
that ABS can intervene more quickly and
shorten the braking distance effectively.
Controlled Deceleration for Parking
Brake (CDP)
When you engage the EPB, the CDP
function starts working so that the vehicle
brakes at a constant deceleration (0.4 g
if EPB is engaged but the brake pedal is
not pressed, and 0.8 g if EPB is engaged
and the brake pedal is pressed) until the
Intelligent Power Braking System
Halaman 122
vehicle stops. The function stops working
when the EPB is released.
Electronic Stability Controller (ESC)
Operation instructions
●ESC working
●If there is a risk of skidding or
backsliding when the vehicle starts
on a slope, or if either drive wheel is
spinning, the ESC indicator flashes to
indicate that ESC system is working.
●Disabling ESC
●If the vehicle gets stuck in snow or
mud, ESC may reduce power output
from the motor to the wheels. In this
case, you may need to turn off the
system to get out of the jam.
●Turning off ESC
●To turn off the ESC system, go to
the infotainment touchscreen. ESC
also checks its operating status in
real time. If ESC OFF switch is
pressed while ESC system is working,
the system will complete the active
intervention control rather than
executes the "shutdown" command
immediately. ESC is disabled only
after the intervention control is
complete.
●Some ESC functions may be re-
enabled if you press the ESC OFF
switch again or the vehicle speed
exceeds the threshold (80 km/h). In
order to prevent ESC from being
turned off suddenly, ESC can be
activated again only when it is not in
a vehicle dynamic intervention state.
●ESC OFF switch mis-operation
●ESC is considered to be mis-operated
if the ESC OFF switch is pressed and
held for more than 10 seconds. In
that case, all internal ESC functions
continue to work.
●Restarting ESC after the motor is
powered off
●When the ESC system has been
turned off, restarting the motor will
automatically restart ESC system.
●ESC start and speed linkage
●Although already turned off, the ESC
system can start on its own if the
vehicle becomes extremely unstable
as the speed increases and exceeds
the threshold of 80 km/h.
●When ESC system is activated
●If the ESC fault indicator
flashes, drive with extra care to
avoid accidents. Exercise additional
caution when the indicator is
flashing.
●With ESC system disabled
●Be careful when ESC is disabled,
and drive at speeds suitable for road
conditions. The ESC system ensures
vehicle stability and its driving force.
Never turn it off unless necessary.
●Replacing tires
●Make sure all tires are of the same
size, brand, tread pattern, and total
load. In addition, be sure to inflate
tires to the recommended pressure.
●Neither ABS nor ESC will work
properly if the vehicle is fitted with
different tires.
●For details on tire or wheel
replacement, it is recommended to
contact a BYD authorized dealer or
service provider.
●Tire and suspension handling
●The use of any defective tire or
modified suspension affects the
driving safety system and may cause
the system to fail.
Anti-lock Braking System (ABS)
Halaman 123
WARNING
●ABS cannot work effectively under
the following conditions:
●Tires with inadequate grip are
used (for example, excessively
worn tires used on snow-
covered roads).
●The vehicle skids when driving
at a high speed on slippery
roads. ABS is not designed to
reduce the braking distance of
the vehicle.
●Always keep a safe distance from
the vehicle ahead on:
●Muddy, sandy, or snowy roads.
●Roads with potholes or uneven
roads.
●Bumpy roads
●TCS may not work effectively in
the following situations:
●On slippery roads, even if TCS is
working properly, it may not be
able to control the direction and
meet power requirements.
●Do not drive in conditions where
the vehicle may lose its stability
and power.
Antilock Braking System (ABS)
●The ABS hydraulic system has
two separate circuits, each running
diagonally through the vehicle (left
front wheel brake connected to the
right rear wheel brake). If one circuit
fails, two wheels can still be braked.
●ABS helps maintain the steering
control by preventing the wheels
from locking or skidding when brake
is engaged suddenly or on slippery
roads.
●When the front tires skid, there is
no steering control, which means
that the vehicle still moves forward
even though the steering wheel is
turned. ABS helps prevent locking
and maintain steering control since
pulsating prompt brake is much faster
than human reaction.
04
USING AND DRIVING
●Never pulsate the brake pedal;
otherwise, ABS may malfunction.
While steering away from danger,
a firm and steady pressure should
always be maintained on the brake
pedal for the ABS to work.
●When the ABS is working, the brake
pedal will vibrate, which may produce
noise. This is normal because the ABS
is pulsating the brake quickly.
REMINDER
●ABS does not reduce the time
and distance required to stop
the vehicle. It only helps control
steering when braking. Always
keep a safe distance from other
vehicles.
●ABS cannot prevent skidding
caused by sudden direction
change, such as trying to make
a sharp turn or change lanes
suddenly. Always drive carefully at
a safe speed, regardless of road
and weather conditions.
Direct Tire Pressure Monitoring System
Halaman 124
REMINDER
●When running on soft or uneven
surfaces (such as gravel or snow),
a vehicle with ABS may require
a longer braking distance than
a vehicle without ABS. In such
cases, slow down and keep a long
distance from other vehicles.
Tire Pressure Monitoring
System
●The direct tire pressure monitoring
system is an auxiliary system that
monitors tire pressure in real time to
improve vehicle safety and comfort
and reduce tire wear and energy
consumption due to insufficient tire
pressure.
●You can access the instrument cluster
menu by pressing the
button on the
steering wheel, navigate to the driving
information bar by pressing the
and
buttons, and then select the
tire pressure display screen using the
scroll button.
Tire pressure system alarm
●When the pressure of any tire is
lower than 75% of the standard tire
pressure and the system is running, the
tire pressure fault warning light lights
up and the tire pressure value turns
yellow. In that case, it is recommended
to check for slow air leakage and
inflate the tire to the correct pressure
value.
●When the temperature of any tire
is above 85°C for three consecutive
minutes, the tire pressure system
gives a high temperature alarm,
and the temperature value of the
corresponding tire turns yellow. You
are then recommended to stop
the vehicle and wait for the tire
temperature to decrease before further
driving.
●When the system is running, if a fault
occurs, the tire pressure fault warning
light is solid on after flashing, and
the message "No Signal" or "Please
check the TPMS" is displayed on the
instrument cluster. In that case, check
the tire pressure monitoring module,
and check for any surrounding
electromagnetic source nearby. If the
alarm persists for a long time, please
contact a BYD authorized dealer or
service provider.
WARNING
●If the tire pressure is not normal,
the system will not prevent the
vehicle from traveling. Therefore,
each time before driving, the
vehicle should be started statically
to check whether the tire pressure
meets the requirements specified
by the manufacturer. If not, do
not drive the vehicle. Otherwise,
the vehicle will be damaged or
personal injury will occur.
●If pressure is found to be
abnormal while driving, check
the tire pressure immediately. If
the low pressure warning light
comes on, avoid sharp turns or
emergency braking, and reduce
vehicle speed, pull it over to the
curb and stop as soon as possible.
Driving with low tire pressure can
cause permanent damage to tires
and increase the likelihood of tire
scrapping. Serious tire damage
can lead to traffic accidents,
resulting in serious injuries or
deaths.
Acoustic Vehicle Alerting System (AVAS)
Halaman 125
CAUTION
●The running time of the tire
pressure monitoring module is
related to the daily travel distance
and other factors.
●The tire pressure monitoring
module regularly transmits tire
pressure and other information
to the display. Therefore, if the
tire pressure drops suddenly or
there is a flat tire, the monitoring
module will not transmit data
to the display until the next
monitoring. In this case, the
vehicle may be out of control. If
there is a flat tire and monitoring
fails to inform, or if you feel that
there is some tire problems, stop
driving immediately instead of
waiting for the display to signal an
alarm.
●If the tire pressure monitoring
module is installed incorrectly, it
will affect the air tightness of the
tire. It is recommended that the
installation and replacement of
the pressure monitoring module
be carried out by professional
technicians of a BYD authorized
dealer or service provider in
accordance with the requirements
of the installation manual.
●Since tire pressure varies with
regional temperatures, inflate
or deflate the tires according
to the values displayed on
the instrument cluster and the
standard tire pressure values.
●If the vehicle is equipped
with non-BYD approved electrical
accessories, the tire pressure
monitoring system may be
disturbed, do not misunderstand
the disturbance as a tire pressure
system failure.
CAUTION
●When replacing wheel rims or
spare tires* or performing tire
rotations, the tire pressure system
needs to be matched again.
Please go to a BYD authorized
dealer or service provider to re-
match the tire pressure.
Acoustic Vehicle Alerting
System (AVAS)
Acoustic vehicle alerting system (AVAS)
refers to the broadcast to pedestrians
near the vehicle when it is traveling at low
speed.
04
USING AND DRIVING
System Function
●When driving forward:
●The broadcast volume increases with
vehicle speed in the range of 0
km/h<V≤20 km/h.
●The broadcast volume decreases with
vehicle speed in the range of 20
km/h<V≤30 km/h.
●At speeds above 30 km/h, the
broadcast sound stops automatically.
●The vehicle makes a continuous and
balanced prompt sound when moving
in reverse.
Manual Anti-glare Function
Halaman 126
How to Use
●The system is enabled by factory
default. AVAS has two sound sources:
standard and brand. To choose a
sound source, go to
→ Vehicle →
Notifications.
●After a sound source is chosen, tap
PLAY to get an acoustic impression.
The sound is played for five seconds at
each tap.
WARNING
●If the AVAS prompt sound cannot
be heard when driving at a low
speed, stop the vehicle in a
relatively safe and quiet place,
open a window, then drive in
R gear and check whether you
can hear an audible prompt from
the front of the vehicle. If it is
confirmed that there is no sound,
contact a BYD authorized dealer
or service provider to deal with it.
Other Main
Functions
Interior Rearview Mirror
Adjusting the Rearview Mirror Manually
Move the interior rearview mirror up or
down, left or right to a suitable position.
Manual Anti-glare Function
Interior rearview mirror has two working
modes: normal mode and anti-glare
mode.
●Normal mode: Turn the control lever to
position ①, in which the image in the
interior rearview mirror is the clearest.
●Anti-glare mode: Rotate the control
lever to ② to effectively reduce
interference from headlights of rear
vehicles at night. Note that anti-glare
may lower the clarity of rear visual
field.
WARNING
●Adjusting the interior rearview
mirror before driving. Do not
adjust the rearview mirror while
driving. This may distract your
attention, causing accidents.
●Do not hang heavy objects from
the interior rearview mirror, or
shake or drag it with force.
Replacing Wiper Blades
Halaman 127
WARNING
●When manually adjusting the
interior rearview mirror, do not
forcibly adjust the stuck mirror to
avoid the mirror falling off.
Power Side Mirrors
Adjust the power side mirrors to the
proper position before driving.
●Selection switches: used to select the
side mirror to be adjusted.
: Left side mirror button
●
: Right side mirror button
●
●Side mirror adjustment buttons
:
used to adjust the side mirror lens.
Press the switch indicating the desired
direction.
Folding Side Mirrors
●Press the
button to fold the side
mirrors with power. Press the button
again to unfold the mirrors.
●Both side mirrors fold automatically
when the anti-theft alarm system is
armed, and extend automatically when
the system is disarmed.
WARNING
●Adjusting side mirrors before
driving. Do not adjust the side
mirrors while driving. This may
distract your attention, causing
accidents.
04
USING AND DRIVING
Wipers
Inspect wiper blades for cracks or partial
hardening at least every three months.
If they are noted, replace wiper blades.
Otherwise, the windshield will streak or
will be left unclean after wiping.
CAUTION
●Do not open the hood when wiper
arms are lifted, otherwise it may
damage the hood and wiper arms.
Replacing Wiper Blades
Replacing front wipers
1. Pull up the wiper arm at the driver
side, and then pull up the other at the
passenger side.
2. Press the wiper lock button ①.
3. Hold the wiper blade and pull it out
along the indicated direction ②;
4. When installing a new wiper blade,
follow the reverse procedure.
Snow Chains*
Halaman 128
Replacing rear wipers
1. Pull up the wiper arm;
2. Hold the wiper in position ①, and
pull the blade out vertically along the
indicated direction ②.
3. When installing a new wiper blade,
follow the reverse procedure.
Snow Chains*
●Snow chains are only for emergencies
or areas where they are permitted by
laws.
●Snow chains should be installed on
the drive wheels. Be careful when
driving the vehicle installed with snow
chains on snow-covered roads. Some
snow chains may damage the tires,
wheels, suspension, and vehicle body.
Therefore, use thin snow chains so as
to provide enough free space between
tires and other parts in the hubcap.
●Read the component assembly
drawings and other instructions
provided by the snow chain
manufacturer carefully.
●Before purchasing and installing snow
chains, consult a BYD authorized
dealer or service provider where your
vehicle was purchased.
●After snow chains are installed, be sure
to travel at a speed below 30 km/h on
snow-covered roads.
●In order to minimize wear of tires and
snow chains, do not travel with snow
chains on roads without snow.
CAUTION
●Driving speed must not exceed 30
km/h or the speed limit specified
by the snow chain manufacturer.
●Drive carefully and pay attention
to bumps, potholes, and sharp
turns that can cause the vehicle to
bounce.
●For vehicles with snow chains,
avoid sharp turns or braking with
locked wheels, and slow down the
vehicle before entering a curve
to avoid accidents due to loss of
control.
In-Vehicle Devices
Halaman 129
# 05 IN-VEHICLE DEVICES
* Infotainment System.................................................. 130
* A/C System................................................................... 132
* BYD App....................................................................... 139
* Storage......................................................................... 140
* Other Devices.............................................................. 142
Infotainment Touchscreen
Halaman 130
Infotainment
System
Infotainment Touchscreen
When the ignition is on, the initial
screen is displayed for several seconds
and the infotainment system starts to
work. To better experience infotainment
functions, such as apps and Internet calls,
the system must be used after network
connection.
①Infotainment touchscreen
②Scroll button
●When the infotainment system is
already started, press the button to
turn audio off, press a second time
to turn audio on. Press and hold the
button for three seconds to restart the
infotainment system.
●Scroll up to turn volume up or down
to turn volume down. Volume ranges
from 0 to 39. A mute icon is displayed
when volume is 0.
Reset to factory settings
●This function factory resets the
infotainment system.
●During the process, do not touch any
infotainment button or turn off the
power supply, or errors may occur.
●The process takes two to five
minutes.
WARNING
●Do not use a high-power inverter
in the vehicle, as this may cause
infotainment system malfunction.
●Do not format or root the device
without authorization, as this may
cause infotainment system or
vehicle malfunction.
●In driving, please use the
infotainment system in landscape
mode wherever possible for your
safety.
CAUTION
●To prevent damage to the
touchscreen:
●Touch the screen gently. If there
is no response, remove finger
from the screen, then touch it
again.
●Clean the screen with a soft
damp cloth. Do not use any
cleaning product.
●Using the touchscreen
●When the screen temperature is
low, the image displayed may be
darker or the system may work
slightly slower than normal.
●The screen may be dark or
difficult to see when you are
wearing sunglasses. In that case,
change the viewing angle or take
off the sunglasses.
●The touchscreen buttons that
are grayed out cannot be
operated.
●The touchscreen interface shown
here is for reference only.
Bluetooth Call
Halaman 131
Navigation Bar
: returns to the previous page or
exits the program.
: returns to the homepage.
: goes to vehicle setting screen.
: splits screen if applications
support.
: enables screen saver.
: shows recently opened
applications.
: switches between landscape and
portrait touchscreen modes.
Gestures and Responses
Gestures and associated system
responses are:
●Tapping: opens applications, selects
functions, clicks icons on the
touchscreen, or types characters.
●Dragging: touching and dragging an
icon, thumbnail, or preview to the
target position to change its location.
●Swiping: operational on homepage
and app screens.
●Double-tapping: zooms in or out an
image.
●Spreading/pinching: zooms in or out
an image with two fingers.
BYD Assistant
BYD Assistant is an intelligent voice
assistant that responds to your
voice commands, such as requesting
navigation, playing music/radio, making
a phone call, and controlling in-vehicle
devices.
●Waking up BYD Assistant:
●On the steering wheel, press the
button.
●On the infotainment touchscreen, tap
.
●Say the wake-up word: "Hi, BYD."
●Your voice commands can be
recognized after system wake-up.
●Give any instructions.
●This may be "Go home" (shortcut
locations set), "Play music", "Make
a call" (contacts data and Bluetooth
connection required), "Set the
temperature to 23°C", or "Turn on
the seat ventilation for the driver".
BYD Assistant then performs the
recognized instruction.
05
IN-VEHICLE DEVICES
Bluetooth Call
Connection
1. On Bluetooth Call screen, tap Please
connect Bluetooth to establish
connection.
2. Tap Scan for devices to search for
available device.
3. Pair the available device, and make
sure the paring code displayed on your
phone is consistent with the code on
the touchscreen.
4. Set Bluetooth when connection is
complete.
Bluetooth Call
Go to the dialing screen when Bluetooth
is connected.
●Tap Contacts, Call log, and Missed
calls, or use dial keypad to make a call.
A/C Buttons
Halaman 132
●Tap
to zoom in or out the dialing
screen.
●Tap
to display or hide the dial
keypad.
●In panoramic view screen, a small
window pops up to inform driver of a
call.
File Management
New folder
●Go to file management screen to
create new folders. You can enter the
folder name, and tap OKor Cancelto
perform actions.
●Tap the top of the file management
screen to change file sources.
Search
●Tap Search on the upper left corner
and enter file names to search for
target files.
Cut/Copy
●Touch and hold any file, select target
files and operation (copy, move or
delete), and then go to the edit status.
Rename
●Touch and hold any file, select
Rename in dialog displayed, rename
the selected file, and then tap OK.
Delete
●Touch and hold any file, select files,
and then tap Delete.
Sort
●Files are sorted by name by default.
You can also sort them by size, type, or
time.
Attributes
●Touch and hold any file, select a
file, and then tap Details to check its
attributes.
External Applications
This infotainment system is an Android-
based system that supports the
installation of external apps.
●Installing external apps:
1. Download the intended app.
2. Tap the app file, select Allow App
installation to install it.
3. The installed app is in the app list.
Tap to use it.
CAUTION
●Applications that are not officially
certified may not work properly.
●Installing a lot of unnecessary
software may make the system
unusable. Please use this function
with caution.
●Uninstalling external apps:
1. In System Settings → Apps → Apps,
select the app to uninstall.
2. Tap Uninstall and confirm.
CAUTION
●The applications on the
infotainment system cannot be
downloaded.
Front A/C Operation Interface
Halaman 133
A/C System
A/C Buttons
① A/C ON/OFF
② Front windshield defroster
A/C Operation Interface
Front A/C Operation Interface
1
A/C operation interface
2
Vent/Heating*
3
Air purification system*
4
A/C setting
5
Driver's temperature control
6
Fan speed control
7
Air distribution
8
Front passenger's temperature
control
05
IN-VEHICLE DEVICES
9
Ventilator
10
Circulation mode
11
Defroster for rear windshield &
side mirrors
12
Front windshield defroster
13
Max cooling
14
Cooling
15
Auto mode
16
A/C ON/OFF
Rear A/C Operation Interface
Halaman 134
# Rear A/C Operation Interface

| | | | |
| :--- | :--- | :--- | :--- |
| **1** | Rear A/C controls | **3** | Rear button lock |
| **2** | A/C ON/OFF | **4** | Fan speed control |
<br>
134
Air Purification Operation Interface
Halaman 135
Air Purification System*
The air purification system purifies
airborne PM2.5 particles. When A/C
is turned on, the system thoroughly
1
Air purification button
2
Outside PM2.5 value and level
3
PM2.5 detection
PM2.5 detection
●Tap this button to detect interior
and exterior air quality. The detection
values and levels are displayed on the
infotainment touchscreen in real time.
●Tap a second time to turn off air quality
detection function.
Quick purification
●Tap this button to enable quick
purification.
●Tap a second time to disable it.
Outside PM2.5 value and level
●The area displays the PM2.5 value and
level outside the vehicle.
removes PM2.5 particles from the air
blown into the cabin.
Air Purification Operation Interface
05
IN-VEHICLE DEVICES
4
Quick purification
5
Inside PM2.5 value and level
Inside PM2.5 value and level
●The area displays the PM2.5 value and
level inside the vehicle.
REMINDER
●The PM2.5 value detected by the
on-board air purification (PM2.5)
detector is the PM2.5 value in
the air near the vehicle carrying
the device in a short time, which
should be different from the
daily or real-time PM2.5 value
declared by national and relevant
government authorities.
Function Definition
Halaman 136
REMINDER
●Reduce the frequency of PM2.5
detection in the following
environments:
●Sandstorms and other such
extremely harsh environments;
●Cold regions (ambient
temperature <-20℃);
●High humidity environments
(relative humidity >90%);
●Environments with a change
in temperature (prone to
condensation), such as driving
in from a cold environment
to a high-temperature indoor
environment or parking lot.
●Running maximum fan speed in
recirculation mode can quickly
reduce the concentration of fine
particles in the air inside the
vehicle.
A/C Settings
●To access the A/C setting interface, go
to
→ Vehicle → A/C.
① Fan speed reduction during calls
●Tap this button to enable this setting.
●Tap this button a second time to
disable it.
② Auto air recirculation when parking
●Tap this button to enable this setting.
●Tap this button a second time to
disable it.
③ Remotely controlled air conditioner
running time
●Tap this button to set the time for
remote A/C running.
④ Auto A/C mode
●Two options are available: economic
and comfort.
⑤ Automatic purification
●Tap this button to enable auto
purification function.
●Tap this button a second time to
disable it.
Function Definition
A/C ON/OFF
●When the A/C is on, tap this button to
turn the A/C off. The air outlet mode
keeps unchanged, while the air input
mode turns to recirculation mode.
●With the A/C turned off, tap to turn on
the A/C in the memorized modes, with
Function Definition
Halaman 137
the last set temperature, fan speed and
air outlet mode.
Auto mode
●After tapping this button, its indicator
lights up, and compressor status, fan
speed and air distribution can be
adjusted automatically.
●The vehicle exits auto control if fan
speed or air distribution is set, and
other functions remain in auto mode
except for those that have been
operated.
Fan speed control
Tap the suitable fan speed level button to
set the speed at a desired level. A higher
level indicates a higher fan speed and
input air volume.
Front windshield defroster
●Tap this button, the indicator turns
on, and air is distributed to the front
windshield and side windows. Tap
this button a second time, the button
indicator turns off, and the A/C will
return to the status used last time.
●Press this button to activate
windshield defrosting and demisting
and no matter whether the compressor
control button is operated or not, the
A/C will also be turned on.
Temperature controls
●To increase/decrease the temperature,
tap the upper/lower arrow on the
screen, or touch the temperature
display area and then swipe
downwards/upwards.
●"Lo"/"Hi" is displayed when the
temperature is set to the lowest/
highest value.
Cooling
Tap this button to activate the A/C
compressor. The icon lights up, the
compressor starts working, and cooling
begins. Tap this button again to
deactivate the A/C compressor. The
button indicator goes out and the
compressor stops working.
Max cooling
●Tap this button to switch the A/C to
the maximum cooling control mode.
The temperature is set to "Lo", the
fan speed is set to the maximum, the
recirculation mode is activated, and air
is directed to face level.
●Tap this button again to exit.
Circulation mode
Tap this button to switch to recirculation
mode. Tap it again to switch to fresh air
mode.
05
Ventilator
●Tap this button to activate A/C
ventilation control. The outlet air is
natural air.
IN-VEHICLE DEVICES
●Tap this button again to deactivate
A/C ventilation control and enter auto
mode.
Rear defroster
●Tap this button to heat up and
defrost the rear windshield. It will
be automatically disabled after 15
minutes if there are no other
commands.
●Tap this button a second time to
disable the function.
●This function is not for drying
raindrops or melting snow.
CAUTION
●When the ignition is off, be sure
to turn off the defogger switch
to prevent the low-voltage battery
from discharging.
Air distribution
Usage Precautions
Halaman 138
●Tap an icon of A/C system on the
infotainment touchscreen to select the
corresponding air distribution mode.
●You can turn on different air
distribution modes at a time (up to
two).
●Adjustments can be made according to
the air supply illustration.
: Air flows to the face level.
: Air flows to the foot level.
: Air flows to the front windshield and
side windows.
Vents
Side Vents
●Turn the roller to increase/reduce air
flow or to open/close the vent.
●Toggle the vent stick to adjust the
outlet angle of airflow.
Center Vent
●Turn the roller to increase/reduce air
flow or to open/close the vent.
●Toggle the vent stick to adjust the
outlet angle of airflow.
Usage Precautions
●To quickly cool down the interior after
long exposure to sunlight, drive for a
few minutes with the windows open
to exhaust hot air and speed up A/C
cooling.
●To speed up cooling, adjust the
temperature to "Lo" and use the
recirculation mode for a few minutes.
●Make sure that the air intake grille in
front of the windshield is not blocked
(for example, leaves or snow).
●Avoid blowing cool air onto the
windshield in humid weather. The
inner and outer temperature difference
can cause glass fogging.
●Keep the space under the front seats
clear to improve air circulation.
●Use recirculation mode for a few
minutes for quick heating in cold
weather, and switch to fresh air mode
to prevent fogging after the cabin is
heated up.
●In cold weather, run the fan at high
speed for one minute to remove snow
or moisture from the intake passage
and reduce fogging.
●In dusty or windy driving conditions,
close all windows, switch on the
recirculation mode, and turn on the
A/C.
Account Registration
Halaman 139
●In heating mode, press the cooling
button to reduce airflow moisture and
the button lights up (the compressor is
on).
●In the ventilation mode, the system
introduces the natural wind from
outside, which is suitable for spring
and autumn.
REMINDER
●It is normal that there may
be a damp and moldy smell
just after the A/C is turned
on. During the operation of the
automobile A/C, A/C condensation
often remains in the evaporator,
and the wet evaporator can
easily absorb unfiltered body
sweat, smokes, etc., inside the
vehicle. Condensation not blown
dry makes the dark and damp
evaporator surface prone to mold,
which is very likely to produce
unpleasant odors by long-term
fermentation.
●How to prevent A/C odors:
●Turn off the A/C and ventilate
with natural air before parking
to keep the air inside the vehicle
relatively dry.
●Inspect, clean, or replace the
filter regularly.
●Try to keep the cabin clean and
fresh.
●If the odor persists after odor
prevention methods are used, it
is recommended to contact a
BYD authorized dealer or service
provider for repair.
●In order to reduce odors from
the A/C, if the A/C is already
turned on, the A/C blower may
keep running for a while after the
vehicle is powered off and locked.
That is because the condensed
REMINDER
water on the surface of the
evaporator needs to be dried to
prevent mold fermentation. It is
normal for the A/C blower to start
running automatically when you
lock the vehicle. No need to worry
about it.
BYD App
About BYD App
●BYD app is a mobile application of
Internet of Vehicle (IoV) developed by
BYD independently. It allows you to
control the vehicle remotely and check
vehicle conditions, delivering cloud era
experience of IoV.
05
IN-VEHICLE DEVICES
●Search for "BYD" in Google Play or App
Store to download and install BYD app.
Account Registration
App guidance and the following steps
give instructions on signing up and
logging in after BYD app installation.
1. Open the app, then tap Sign up to go
to the registration screen.
2. Enter email address registered in BYD
authorized dealer, tap Send email to
receive verification code, and then
enter the code in app.
3. Set your password in password setting
screen to complete the registration,
and then the homepage is displayed.
Glove Box
Halaman 140
CAUTION
●Provide the email address
registered at the BYD authorized
dealer, or registration will fail.
●In the app, select a country or
region on upper right corner of
the screen. The default setting
depends on your phone setting.
If it is not where you make the
purchase, choose the right one,
otherwise your data will not be
accessible.
Vehicle Condition and
Control
The BYD app homepage provides
information and control items of the
vehicle.
1. The homepage shows remaining
driving range, SOC, vehicle error
information, and status of vehicle
driving, charging, A/C system, seat
heater, seat ventilator, and tire
pressure.
2. Tap lock, unlock, light flashing &
honking, or light flashing button to
activate the corresponding function.
3. Turn on or off A/C on the app
homepage, or tap the A/C card
to access other settings, such as
temperature regulation, see P133 for
details.
4. At the bottom of the homepage, tap
the icon of seats, doors and windows,
or tires to go to the associated screen
and check their status.
5. If you have multiple vehicles on an
account, tap the vehicle name in the
upper left corner of the screen to
switch between vehicles.
CAUTION
●The control function of the app
is mainly for remote use. To use
this function, ensure your phone
and vehicle are connected to the
Internet.
Individual Center and
Vehicle Management
Tap the icon on the upper right corner to
go to the individual center.
●Vehicle management: changes vehicle
name and license plate number.
●Account and security: recovers or
changes your password.
●Settings: sets message reception,
automatic login, and other items.
●About: includes privacy policy and
information to contact us and give
feedback.
Storage
Glove Box
Pull the handle to open the glove box.
Second Row Seat Cup Holder*
Halaman 141
Center Console Storage
Compartment
The center console storage compartment
can be used for storage of small items.
Front Center Console
Cubby
●Press the switch on the front center
console cubby and pull up the cover to
open it.
●Some large objects can be placed in
the front center console cubby. Keep
the cubby closed while the vehicle is in
motion.
Door Bins
Storage boxes are available on all doors
to hold cups and canned beverages.
Bill Box
Pull the handle to open the bill box.
05
IN-VEHICLE DEVICES
Cup Holder
The cup holder is used to securely
hold items such as cups, ashtrays, and
beverage cans.
Second Row Seat Cup Holder*
●For seven seaters, flip the seat armrest
in the second row to use the cup
holder.
Grab Handles
Halaman 142
CAUTION
●Do not start or brake the vehicle
suddenly when the cup holders
are being used to prevent spillage
or scalding.
●Do not place an open cup or loose
beverage bottle in the cup holder,
so as to avoid liquid spillage
while you are driving, opening or
closing a door.
●To ensure safe driving, the driver
is strictly prohibited from taking
the cup out or placing it in the cup
holder while driving.
Other Devices
Sun Visor
① Sun visor
●The sun visor is located above the
driver seat and front passenger seat.
To block sunlight from the front, pull
the sun visor down.
●To block sunlight from a side, remove
the swivel sleeve from the fixed
support and turn the visor towards the
side window.
② Vanity mirror
●Vanity mirrors are installed on the
driver's and front passenger's sun
visors.
●Flip down the sun visor and slide the
mirror cover open for use. The light
turns on when you slide open the
cover.
REMINDER
●Correct use of the sun visor
improves driving safety and
comfort.
Grab Handles
●Pull the grab handle down for use. The
handle returns to its original position
when released.
CAUTION
●Do not hang any heavy objects
from the grab handles.
Second-Row USB Ports
Halaman 143
12V Auxiliary Power
●It is used for accessories with 12V DC
working voltage and no more than 10A
working current.
●The 12V auxiliary power is available
only when the ignition has been
switched on. Lift the cover to use it.
CAUTION
●To prevent fuses from blowing,
the power consumption must not
exceed 12V/120W of total vehicle
load.
●To prevent draining the low-
voltage battery, do not use the
12V auxiliary power supply for a
long time when the drive motor is
not running.
●When the 12V auxiliary power is
not in use, close its cover. Do
not insert any object other than a
suitable plug into the 12V auxiliary
power socket or let any liquid
ingress the socket, as electrical
failure may result.
USB Ports
Front-Row USB Ports
●There are two USB ports in the front
center console cubby, including a data
port and a charge port.
① Type-C charge port
② Type-A data transmission port
●The power outlet can be used only
when the ignition is on.
Second-Row USB Ports
05
●There are two USB ports in the second
row, which can only be used for
charging.
IN-VEHICLE DEVICES
① Type-A charge port
② Type-C fast charge port
●The power outlet can be used only
when the ignition is on.
●The infotainment system is compatible
with USB storage devices up to 128GB.
It is not compatible with all USB
devices on the market.
●It is recommended to use USB storage
devices up to 128GB with FAT32
format.
Wireless Phone Charger*
Halaman 144
CAUTION
●Do not use substandard or
special USB storage devices to
avoid damaging the infotainment
system or data in the USB device.
SD Card Slot*
●An SD card slot is located in the front
center console cubby.
●For this infotainment system, TF cards
(also called Micro-SD cards), up to
128GB and at least Class 10 and
FAT32), can be used to read data such
as videos and songs.
CAUTION
●Incompatible cards may not be
recognized and read by the
infotainment system.
●Insert the card correctly.
Wireless Phone Charger*
●The charger charges phones
without a cable connection through
electromagnetic wave induction.
●On the infotainment touchscreen, slide
down the shortcut menu and light up
the wireless charger icon .
●After starting the vehicle, place a
smartphone screen-up in the wireless
charging area to activate the wireless
charger.
●To disable the wireless charger: On the
infotainment touchscreen, slide down
shortcut menu and tap the wireless
charger icon. The indicator turns off
and the wireless charger function is
disabled.
●The wireless charger only works with
Qi-certified phones.
●To avoid burning cards with chips,
such as bank cards, do not place them
between the wireless phone charger
area and the phone during charging.
CAUTION
●Ensure your smart key is more
than 25 cm away from the
wireless charger area when
the wireless charger system is
working.
●To avoid wireless charger
dysfunction or even accidents, do
not place coins, metal keys, metal
rings, or other articles containing
metal in the wireless charger area
together with the phone.
●To avoid damage to the charger
area, do not place heavy objects
on it. If the phone wireless charger
system is faulty and does not work
properly, it is recommended to
Wireless Phone Charger*
Halaman 145
CAUTION
contact a BYD authorized dealer
or service provider.
●BYD will not assume any
responsibility for any problems
caused by improper use. If
the product is disassembled or
modified, the free warranty will be
terminated.
●For safety reasons, do not leave an
unattended phone being charged
in the vehicle.
●For safety reasons, refrain from
checking phone charging status
while driving.
●If a metal item is found between
the device and the charger rubber
pad during charging, do not
remove the metal item with bare
hands to prevent burning.
●The center of the phone coil must
be aligned with the center of
wireless charger (indicated with
text in the charging area), or
charging may fail.
●Prevent any fluid from coming
into contact with the charger
area. The wireless charger will
malfunction if water enters the
wireless charger via the gap
around the rubber mat.
●Charging may stop at high
temperatures, and will resume
once the temperature drops.
BYD makes no commitments for
problems caused by external
wireless charging coils. Please use
with caution.
REMINDER
●Only one phone can be charged at
a time.
REMINDER
●A phone case that is too thick may
prevent charging.
●On bumpy roads, the
wireless phone charging may
intermittently stop and then
resume.
●Try to ensure that the surface on
which a mobile phone is placed is
parallel to the charging module.
If the phone moves from the
wireless charger area and stops
charging, move it back.
●If the phone cannot be charged
properly, ensure that there are
no foreign objects in the wireless
charger area, or wait for the
wireless charger area to cool
down before trying again. If it
is still impossible to charge the
phone, contact a BYD authorized
dealer or service provider.
05
IN-VEHICLE DEVICES
●After power-off, if the phone is
still charging and the driver's door
is opened, the instrument cluster
sounds an alarm and a warning
text "Please take your cell phone
with you" is displayed for five
seconds.
Wireless Phone Charger*
Halaman 146
146
Maintenance
Halaman 147
# 06 MAINTENANCE
* Maintenance Information............................... 148
* Regular Maintenance..................................... 153
* Self-Maintenance.......................................... 158
Maintenance Intervals
Halaman 148
Maintenance
Information
Maintenance Cycle and
Items
Maintenance Plan
●The maintenance plan is designed to
ensure stable driving, failure reduction,
safe and economical driving.
●The maintenance schedule lists all the
maintenance items that are necessary
to keep the vehicle in optimum
condition at all times.
●The items in the maintenance schedule
are important and need to be
maintained according to the time
interval.
●Hoses with any degradation or damage
should be replaced immediately.
Rubber hoses (for systems such as A/C,
heating, and braking systems) must
be checked by professional technicians
according to the maintenance
schedule.
Maintenance Schedule Requirements
The vehicle must be maintained
according to the regular maintenance
schedule.
Item
Interval
Check and fasten them at three months or 5,000 km for the
first time, at 12 months or 20,000 km for the second time,
and every 12 months or 20,000 km afterwards. Replace
damaged parts in a timely manner.
Chassis screws
Check them at three months or 5,000 km for the first
time, at 24 months or 40,000 km for the second time, and
every 24 months or 40,000 km afterwards. In severe driving
conditions, check them at three months or 5,000 km for the
Brake pedal and EPB switch
If the vehicle is operated primarily
under one or more of the following
special conditions, certain maintenance
items may need to be performed more
frequently.
●Road conditions
●Muddy, sandy, or snowy roads.
●Dusty roads
●Driving conditions
●Use of towed trailer, camping trailer,
or roof rack
●Within 8 km, repeated short
distances are driven and the outside
temperature is below freezing.
●Long idling and/or long distance
driving at low speed, for example,
using the vehicle as a police car, taxis
or using it for transporting goods.
Maintenance Intervals
Vehicle maintenance is performed based
on the mileages or months, whichever
comes first.
Maintenance Intervals
Halaman 149
Item
Interval
first time, at 12 months or 20,000 km for the second time,
and every 12 months or 20,000 km afterwards.
Check them at three months or 5,000 km for the first time,
at 12 months or 20,000 km for the second time, and every
12 months or 20,000 km afterwards. Replace damaged
parts in a timely manner.
Brake friction block and disc
Check them at three months or 5,000 km for the first
time, at 24 months or 40,000 km for the second time, and
every 24 months or 40,000 km afterwards. In severe driving
conditions, check them at three months or 5,000 km for the
first time, at 12 months or 20,000 km for the second time,
and every 12 months or 20,000 km afterwards.
Brake piping and hoses
Check it at 12 months or 20,000 km for the first time,
and every 24 months or 40,000 km afterwards. Replace
damaged parts in a timely manner.
Guide pin of brake caliper
assembly
Check them at three months or 5,000 km for the first
time, at 24 months or 40,000 km for the second time, and
every 24 months or 40,000 km afterwards. In severe driving
conditions, check them at three months or 5,000 km for the
first time, at 12 months or 20,000 km for the second time,
and every 12 months or 20,000 km afterwards.
Steering wheel and tie rod
Check it at three months or 5,000 km for the first time, at
24 months or 40,000 km for the second time, and every
24 months or 40,000 km afterwards. In severe driving
conditions, check them at three months or 5,000 km for
the first time, at 12 months or 20,000 km for the second
time, and every 12 months or 20,000 km afterwards.
Drive shaft boot
Check them at three months or 5,000 km for the first
time, at 24 months or 40,000 km for the second time, and
every 24 months or 40,000 km afterwards. In severe driving
conditions, check them at three months or 5,000 km for the
first time, at 12 months or 20,000 km for the second time,
and every 12 months or 20,000 km afterwards.
Ball pin and boot
Check them at three months or 5,000 km for the first
time, at 24 months or 40,000 km for the second time, and
every 24 months or 40,000 km afterwards. In severe driving
conditions, check them at three months or 5,000 km for the
first time, at 12 months or 20,000 km for the second time,
and every 12 months or 20,000 km afterwards.
Front and rear suspensions
Tire condition and inflation
pressure, incl. TPMS
Check them at three months or 5,000 km for the first time,
at 12 months or 20,000 km for the second time, and every
06
MAINTENANCE
Maintenance Intervals
Halaman 150
Item
Interval
12 months or 20,000 km afterwards. Replace damaged
parts in a timely manner.
Check them at three months or 5,000 km for the first
time, at 24 months or 40,000 km for the second time, and
every 24 months or 40,000 km afterwards. In severe driving
conditions, check them at three months or 5,000 km for the
first time, at 12 months or 20,000 km for the second time,
and every 12 months or 20,000 km afterwards.
Front and rear wheel
alignment
Tire rotation
Check the tire pressure and conditions at least once a
month and rotate tires every 10,000 km.
Tire pressure reset is required for each service and
maintenance, and shall be operated every 12 months or
1,0000 km, whichever comes first.
Tire pressure reset (indirect
tire pressure)
Check it at three months or 5,000 km for the first time, at
12 months or 20,000 km for the second time, and every 12
months or 20,000 km afterwards. Remove dust from the tie
rod with a wet soft cloth, apply 0.3-0.8 g grease to the tie
rod, riveted joints, and rotating shaft, and replace damaged
parts in a timely manner.
Door brake
Check for it at three months or 5,000 km for the first time,
and every 24 months or 40,000 km afterwards. In severe
driving conditions, check them at three months or 5,000
km for the first time, and every 12 months or 20,000 km
afterwards.
Wheel bearing clearance
Check it at three months or 5,000 km for the first time, at
12 months or 20,000 km for the second time, and every 12
months or 20,000 km afterwards. Replace damaged parts in
a timely manner.
Coolant level in expansion
tank
Drive motor coolant
Replace the long-acting organic acid coolant every four
years or 100,000 km, whichever comes first.
Check it at three months or 5,000 km for the first time,
and every 12 months or 20,000 km afterwards. Replace
damaged parts in a timely manner.
Brake fluid
Brake fluid
Replace it every two years or 40,000 km.
Check for it at three months or 5,000 km for the first time,
at 12 months or 20,000 km for the second time, and every
12 months or 20,000 km afterwards. Replace damaged
parts in a timely manner.
Vehicle module DTCs (to be
cleared after recording)
Maintenance Intervals
Halaman 151
Item
Interval
Check them at three months or 5,000 km for the first time,
at 12 months or 20,000 km for the second time, and every
12 months or 20,000 km afterwards. Replace damaged
parts in a timely manner.
High-voltage battery tray,
shield, impact bar, and
mount point torque
Battery pack capacity
Test and calibrate it every six months or 72,000 km.
Gear oil in transmission
Replace it at 24 months or 40,000 km for the first time, and
every 24 months or 48,000 km afterwards.
Check for them at three months or 5,000 km for the first
time, at 12 months or 20,000 km for the second time,
and every 12 months or 20,000 km afterwards. Replace
damaged parts in a timely manner.
Powertrain leaks or bumps
Check for them at three months or 5,000 km for the first
time, at 12 months or 20,000 km for the second time,
and every 12 months or 20,000 km afterwards. Replace
damaged parts in a timely manner.
Loose high-voltage wiring
harnesses and connectors
Check for them at three months or 5,000 km for the first
time, at 12 months or 20,000 km for the second time,
and every 12 months or 20,000 km afterwards. Replace
damaged parts in a timely manner.
Deformation of or oil stains
on the high-voltage module
Check for them at three months or 5,000 km for the first
time, at 12 months or 20,000 km for the second time,
and every 12 months or 20,000 km afterwards. Replace
damaged parts in a timely manner.
Foreign materials on
or ablation of charging
connector
Check it at three months or 5,000 km for the first time, at
12 months or 20,000 km for the second time, and every
12 months or 20,000 km afterwards, whichever comes first,
and replace it if necessary. In severe driving conditions,
check it every six months and replace it if necessary.
HEPA filter
Check it at three months or 5,000 km for the first time, at
12 months or 20,000 km for the second time, and every
12 months or 20,000 km afterwards, whichever comes first,
and replace it if necessary. In severe driving conditions,
check it every six months and replace it if necessary.
PM2.5 quick tester filter*
Check it at three months or 5,000 km for the first time, at
12 months or 20,000 km for the second time, and every 12
months or 20,000 km afterwards. Replace damaged parts in
a timely manner.
Lamp and LED lighting
06
MAINTENANCE
Maintenance Intervals
Halaman 152
Item
Interval
Check it at three months or 5,000 km for the first time,
and every 12 months or 20,000 km afterwards. Replace
damaged parts in a timely manner.
Headlight dimming
Initial down tilt of low beam
Calibrate it every 10,000 km.
Check for them at three months or 5,000 km for the first
time, at 12 months or 20,000 km for the second time,
and every 12 months or 20,000 km afterwards. Replace
damaged parts in a timely manner.
Foreign materials on or
ablation of the EPS GND
point
Check for them at three months or 5,000 km for the first
time, at 12 months or 20,000 km for the second time,
and every 12 months or 20,000 km afterwards. Replace
damaged parts in a timely manner.
EPS connector looseness
and connector pin ablation
Check for it at three months or 5,000 km for the first time,
and every 24 months or 40,000 km afterwards. Replace
damaged parts in a timely manner.
EPS ECU corrosion
Foreign materials or
corrosion on connections
between the EPS ECU and
motor*
Check them at three months or 5,000 km for the first time,
at 12 months or 20,000 km for the second time, and every
12 months or 20,000 km afterwards. Replace damaged
parts in a timely manner.
Check them at three months or 5,000 km for the first time,
at 12 months or 20,000 km for the second time, and every
12 months or 20,000 km afterwards. Replace damaged
parts in a timely manner.
Vehicle module software
update (update if any)
Check them at three months or 5,000 km for the first time,
at 12 months or 20,000 km for the second time, and every
12 months or 20,000 km afterwards. Replace damaged
parts in a timely manner.
Wading marks on high-
voltage parts
Check it at three months or 5,000 km for the first time, at
12 months or 20,000 km for the second time, and every 12
months or 20,000 km afterwards. Replace damaged parts in
a timely manner.
Lock nut torque of wiper
arm
Hood lock and fasteners
Check them every 12 months.
Notes: When checking Item 1, replace chassis parts in a timely manner if any abnormal
damage is found.
CAUTION
●To keep the high-voltage battery
in optimal condition, please
CAUTION
fully charge and discharge the
vehicle regularly (at least every
Regular Maintenance
Halaman 153
CAUTION
six months or 72,000 km) for
battery self-calibration. You can
also contact a BYD authorized
dealer or service provider for
capacity testing and calibration.
●For any of the following severe
conditions, maintenance items need
to be added according to the
maintenance schedule:
●Frequent driving in dusty areas or
frequent exposure to salt-laden air;
●Frequent driving on bumpy, puddled,
or mountain roads.
●Frequent driving in cold weather.
●Frequent long-term idle running of
the motor or short-distance driving in
cold weather.
●Frequent and sudden braking.
●Frequent use of a towed trailer.
●Vehicle used as a taxi or for
commercial purposes.
●Driving in congested urban areas at
temperatures above 32°C for more
than 50% of total travel time.
●Driving at speeds over 120 km/h at
temperatures above 30°C for more
than 50% of total travel time.
●Frequent overloading.
●Specified maintenance records:
●Try to have the BYD authorized
dealer or service provider record all
specified maintenance operations,
and keep all corresponding receipts.
Regular
Maintenance
Regular Maintenance
Vehicle Servicing
●Pay attention to vehicle performance,
sound changes, and visual evidence
that indicates service is required.
Under any of the following
circumstances, the vehicle may need
to be adjusted or repaired. Therefore,
you are recommended to send the
vehicle to a BYD authorized dealer or
service provider as soon as possible:
●Motor start produces unusual noises.
●Coolant remains overheated, is
stagnated or leaks.
06
●Motor jams and produces
unexpected noise.
MAINTENANCE
●The motor runs with excessive
vibration.
●The motor fails to get started.
●Electric assembly leaks oil.
●Electric assembly emits odors.
●Power declines significantly.
●Water leaks from under the vehicle
(A/C condensate is normal).
●Tire deflates; tires make excessive
noises at turns; tire wear is uneven.
●Vehicle leads to one side when
driving straight on a flat surface.
●Suspension unit movement leads to
unusual noises.
●Loss of braking effect; sponge feeling
on the brake pedal or clutch pedal;
pedal almost contacts the floor;
Vehicle Corrosion Prevention
Halaman 154
vehicle leads to one side when
braking.
●Motor coolant temperature remains
high.
●Battery capacity decreases
significantly.
●High battery temperature or overheat
protection persists, or there is no
power output.
CAUTION
●Do not continue driving a vehicle
that has not been inspected, as
this may result in serious vehicle
damage and personal injury.
Maintenance Plan
●Be sure to maintain the vehicle as per
the maintenance schedule to allow it
serve in the best working efficiency
and reduce fault occurrence.
●Drivers can refer to the maintenance
plan for scheduled maintenance
intervals, depending on the odometer
reading or time interval, whichever
comes first.
●For overdue maintenance items, the
same time interval should be used for
maintenance.
●It is recommended that the
maintenance be performed in
accordance with the standards and
specifications of BYD Auto Industry Co.,
Ltd., and by a local BYD authorized
dealer or service provider.
●The maintenance schedule lists the
maintenance items and travel time or
distance based on the assumption that
the vehicle is used as a normal means
of transportation to carry passengers
and goods that do not exceed the
vehicle load limit.
CAUTION
●Please maintain the vehicle
regularly according to the
requirements in the Warranty and
Maintenance Service Manual of
BYD.
Vehicle Corrosion
Prevention
The most common causes of vehicle
corrosion are:
●The underbody of the vehicle is
covered in salt, dust, or moisture.
●The vehicle or some of its parts are
exposed to high humidity and high
temperature for a long time.
●The paint layer or underlayer is
scratched by minor collision or by
stones and gravel.
The following rules should be observed
to prevent vehicle corrosion:
●Wash the vehicle frequently.
●If driving on saline roads in winter
or living in coastal areas, wash
the landing area of the vehicle
at least once a month, and clean
the chassis and hubcap with a
high-pressure water jet or steam to
reduce corrosion. Wash the chassis
thoroughly after winter.
●Check vehicle paint and trims.
●Any chip or crack found on the
paint must be repaired immediately
to prevent corrosion. If fragments
or cracks peel off from the metal
surface, it is recommended to go to
a BYD authorized dealer or service
provider for repair.
●Check cabin interior.
Vehicle Cleaning
Halaman 155
●Moisture and dust buildup under the
carpet can cause corrosion. Check
the undersides of carpets frequently
to make sure these areas are dry.
●Special care should be taken when
the vehicle is transporting chemicals,
detergents, fertilizers, salt, and other
substances. Such substances should
be kept in appropriate containers for
transportation. If spillage or leakage
is found, clean immediately and keep
dry.
●Use fenders.
●Fenders protect vehicles in saline
areas or on gravel roads. The bigger
and closer to the ground the fender,
the better.
●Park in a well-ventilated and dry area.
Paint Maintenance Tips
●Clean the vehicle in time.
●Do not perform secondary painting if
there is no obvious scratches on the
finish, so as to prevent mismatch or
color incompatibility.
●When the vehicle is not used for a
long period, it should be parked in
a garage or a well-ventilated place,
and special body cover should be used
in winter. Choose a shady place for
parking temporarily.
●Prevent strong impacts, knocks, or
scratches on the paint. If the paint
is scratched, dented or if it peels, it
should be repaired in time, preferably
by professional auto beauty provider.
●Do not touch the paint with a greasy
hand or cloth. Do not place greasy
tools or rub with organic solvents
on the vehicle body so as to avoid
chemical reactions.
●The vehicle must be waxed once a
month or whenever water resistance
performance of the vehicle degrades
and be taken to an auto beauty
provider for maintenance once every
three months.
●High quality polish and wax must
be used. If body finish is severely
weathered, use a car cleaning polish
in addition to the wax. Carefully follow
the manufacturer's instructions and
precautions. Chrome finish should be
polished and waxed as well as painted
finish.
CAUTION
●When the vehicle is repainted
and placed in a high-temperature
paint waxing workshop, the
vehicle's plastic bumper must be
removed to avoid damage caused
by high temperatures.
06
Vehicle Cleaning
MAINTENANCE
●The vehicle must be cleaned in time
under the following circumstances,
which can cause peeling of paint layer
or corrosion of the vehicle body and
parts:
●Driving along the coast.
●Driving on a road with anti-freeze.
●Driving on roads covered with coal
tar.
●Resin, bird droppings, or insect
carcasses are stuck on the vehicle.
●Driving in areas with a large amount
of smoke, soot, dust, iron filings, or
chemicals.
●The vehicle is visibly soiled by dust or
mud.
●After raining.
Interior Cleaning
Halaman 156
Manual Vehicle Washing
Before washing the vehicle, park it in the
shade, and wait for the vehicle to cool
down sufficiently.
●Hose off loose dirt, including all muds
or road salts at the bottom of the
vehicle and on wheel pits.
●Wash the vehicle with neutral agents,
the mixing of which should be carried
out according to the manufacturer's
instructions. Soak a soft cloth with
cleaning solution and gently wipe it
down along the direction of the water
flow. Do not wipe in a circular motion
or horizontally.
●Rinse well—Dried washing agent forms
markings. After washing the vehicle in
hot weather, rinse all parts properly.
●Dry the vehicle with a clean soft towel
to prevent stay water marks. In order
to prevent scratching, do not rub or
apply excessive force on the paint.
CAUTION
●Do not use any alkaline washing
powder, soapy water, detergents,
de-waxing detergents or volatile
substance (gasoline, kerosene, or
solvent).
●When cleaning the combination
lights, do not wipe their surface
with chemical solvents such
as gasoline, alcohol, lacquer
thinner, thinner, and carbon
tetrachloride. Doing so can cause
the combination light casings to
crack.
●It is recommended that vehicles
traveling in coastal or heavily
polluted areas be washed once a
day.
●Do not use blades or gasoline to
remove hard dirt from the vehicle
body. The plastic wheel trim is
CAUTION
easily damaged by organic matter.
If any organic matter splashes
on the vehicle trim, remove it
with water and check whether
the trim is damaged. Please
replace any seriously damaged
plastic wheel trim in a timely
manner. Otherwise, the trim may
fall from the wheel during vehicle
movement and cause an accident.
●Do not use abrasive cleaning
agents to scrub the bumper.
●Clean polished metal parts with
carbon cleaner and wax them
regularly for protection.
●Be careful when cleaning the
chassis to avoid cutting hands.
Automatic Vehicle Washing
When choosing an automated car wash
service, be aware of certain types of
brushes, unfiltered rinsing water, or
machine-specific rinsing procedures that
may scratch the paint and affect its
gloss and durability, especially darker
colors. Before washing the vehicle, it is
best to consult the service provider to
understand which washing procedures
are the safest for the paint finish.
Interior Cleaning
REMINDER
●Prevent direct water splash onto
the dashboard or floor when
washing the vehicle, as these may
cause electrical faults.
Leather
Halaman 157
Carpet
●Clean carpets with a good foam
detergent.
●Use a vacuum cleaner to remove as
much dust as possible. Several types
of foam detergents can be used. Some
are in spray cans, and the others are
powders or liquids, which produce
foam when mixed with water. Clean
the carpets with foam soaked sponge
or a brush, scrubbing in a circular
motion.
●Do not use plain water, and keep the
carpets as dry as possible.
Seat Belts
●The seat belts can be cleaned with
neutral soapy water or lukewarm
water.
●Scrub the seat belts with a sponge
or soft cloth. Check the seat belts for
excessive wear, tear, or cut marks.
CAUTION
●Do not clean the seat belt
with colorant or bleach. These
substances may decrease the seat
belt's strength.
●Do not use any seat belt that is not
dry.
Doors and Windows
●Doors and windows can be cleaned
with any ordinary detergent.
●Check the door checks regularly. If
the check lever is found with visible
dust accumulation, wipe it with a wet
soft cloth. Then apply 0.3 - 0.8 g of
lubricant between the bracket and the
pull rod riveting shaft, and between
the pull rod and the sliding block.
CAUTION
●When cleaning the inside of the
rear windows, take care not to
scratch or damage electric heating
wires or junctions.
A/C Control Panel, Car Speakers,
Dashboard, Control Panel and Switches
●Clean the A/C control panel, car
speakers, dashboard, control panel
and switches with a wet soft cloth.
●Wipe dust off gently with a clean soft
cloth soaked in lukewarm water.
CAUTION
●Do not use organic substances
(for example, solvents, kerosene,
alcohol, and gasoline) or acid or
alkali solutions. These chemicals
can cause discoloration, staining,
or flaking.
06
MAINTENANCE
●Please confirm that the detergent
or polishing agent to be used does
not contain the above substances.
●If a new-type liquid car washer
is used, do not splash it onto
the interior surface of the vehicle,
because it may contain the above
substances. If there is any spillage,
immediately clean it thoroughly.
Leather
●Leather trimmings can be cleaned with
a neutral detergent for woolen.
●Use a soft cloth with a neutral
detergent solution to wipe off the dust,
and then use a clean, wet cloth to wipe
the remaining detergent thoroughly.
●If leather gets wet, wipe it with a clean
soft cloth. Dry the leather in a well-
ventilated, cool place.
Self-Maintenance Precautions
Halaman 158
●For any questions about vehicle
cleaning, please consult a local BYD
authorized dealer or service provider.
CAUTION
●If dirt cannot be cleaned off using
a neutral detergent, clean it with
a detergent that does not contain
organic solvents.
●Do not clean leather with any
organic material such as volatile
oil, alcohol, gasoline, acid or
alkali, as these will cause
discoloration.
●Do not clean leather with a nylon
brush or synthetic fiber cloth,
as these may scratch the fine
patterns on the leather surface.
●Mold may grow on dirty leather
trimmings. Special care must be
taken to avoid oil stains and
trimmings must always be kept
clean.
●Prolonged exposure to sunlight
will cause leather to harden or
shrink, so the vehicle should be
parked in a shady and cool place,
especially in the summer.
●In hot weather, avoid placing vinyl
or waxy items on the trimmings,
as these may stick to leather in
high temperatures.
●Improper cleaning of leather
trimmings may cause
discoloration or spots.
Self-Maintenance
Self-Maintenance
Self-Maintenance Precautions
●If maintenance is to be carried out by
the owner, be sure to follow the correct
steps specified in this section.
●Note that improper and incomplete
maintenance will affect the good use
of the vehicle.
●This section only lists instructions on
simple maintenance items that can be
done by the owner. However, there
are many items that must be done
by qualified technicians with special
tools.
●Special care must be taken in
maintaining vehicles to prevent
accidental injuries. Make sure to obey
the followings:
CAUTION
●Beware of short circuits, as some
circuits and vehicle components
carry high current or voltage.
●If any brake fluid overflows, rinse
it with water to prevent damage
to components or vehicle paint.
●When replacing wiper blades, do
not allow the wipers to scratch the
glass surface.
●Before closing the hood, check
whether any tool or wipe cloth is
left in the engine compartment.
REMINDER
●If the motor is very hot, do not
remove or loosen the expansion
tank cover to prevent burns.
Lights
Halaman 159
REMINDER
●Do not smoke in or near the
vehicle to avoid sparks or open
flames that may cause fire.
●Practice caution when handling
the low-voltage battery, as the
it contains toxic and corrosive
sulfuric acid.
●Never get under a vehicle
supported only by a jack. Be sure
to prop the vehicle up using both
a jack and a vehicle stand before
going underneath the vehicle.
●When working inside or under the
vehicle, always wear goggles to
protect your eyes against flying or
falling objects or splashing liquid.
●As brake fluid may damage
the skin or eyes, be careful
when filling it. If your
skin or eyes are exposed
to brake fluid, immediately
flush with clean water. Seek
medical attention immediately if
discomfort persists.
Checks
The following items should be checked
according to usage or specified mileage:
●Coolant level: The radiator and
expansion tank should be checked at
each charge.
●Windshield washer fluid: The residual
amount of washer liquid in the tank
should be checked monthly. When
washer liquid is frequently used, the
residual amount of liquid should be
checked more often.
●Windshield wiper: Check the wiper
condition monthly. If the wiper does
not work, check it for wear, cracking, or
other damage.
●Brake fluid level - Check the level
monthly.
●Brake pedal - Check whether the brake
pedal is operating properly.
●EPB switch - Check whether the switch
is functional.
●Low-voltage battery - Check battery
conditions and check for terminal
corrosion monthly.
●A/C system - Check the operation of
A/C units weekly.
●Tires - Check tire pressure monthly.
Check tread wear and whether there
are foreign bodies embedded.
●Windshield defrosters - Check the
defroster vent monthly.
●Lights - Check the condition of
headlights, position lights, tail lights,
high mount brake light, turn signals,
rear fog lights, brake lights and license
plate light monthly.
06
MAINTENANCE
●Doors - Check whether the trunk lid
and all other doors (including rear
doors) can be opened freely and
locked securely.
●Horn - Check whether the horn is
functioning properly.
REMINDER
●Do not continue driving a vehicle
that has not been inspected, as
this may result in serious vehicle
damage and personal injury.
Lights
Headlight adjustment
●Headlights are aligned before vehicle
delivery. If the vehicle carries heavy
load frequently, headlights may need
to be realigned. It is recommended to
Vehicle Storage
Halaman 160
have the headlights aligned by a BYD
authorized dealer or service provider.
Fogging of lights
●Combination lights, tail lights, and
turn signals on the side mirrors
may become foggy after heavy
rain or cleaning. This is similar to
condensation on the side window
during rain. It does not mean any
problem with your vehicle.
●The lights are a relatively enclosed
and narrow space. The temperature
is very high when they light up
(the mask and reflector could be
burned and deformed easily), so
they need heat dissipation. There are
heat dissipation holes on the lamp
housing for convection. The greater
the temperature difference is, the more
active the convection is. During the
convection, the moisture in the air
inevitably enters a lamp. Factors such
as exposure to sunlight, convection,
and bulb heating can cause the
moisture in the air to condense into
fog or water beads easily on the lamp
surface at low temperatures. This is
called fogging of lights.
WARNING
●The headlight bulb becomes very
hot when illuminated. Grease,
sweat, or scratches on the surface
of the bulb glass cause the bulb to
overheat and break.
REMINDER
●If fog presents inside the headlight
and inside the turn signals on
side mirrors, it may be due to
high air humidity or significant
temperature difference between
the vehicle and its surroundings.
In that case, turn on the headlight
or turn signal while driving. The
REMINDER
fog will evaporate after a short
period of driving.
●If there is a noticeable amount
of water inside the lights, it is
recommended to drive the vehicle
to a BYD designated maintenance
agency for maintenance.
Vehicle Storage
If the vehicle needs to be parked for
a long time (more than a month),
the following preparations should be
made. Proper preparation helps prevent
degradation and ensure easy use of the
vehicle. If possible, park the vehicle
indoors.
●Charge the vehicle on time.
●Thoroughly clean and dry the body
surface.
●Clean the interior of the vehicle to
ensure that carpets and mats are
completely dry.
●Release the parking brake. Set the
gearshift lever in parking gear.
●If the vehicle needs to be stored for a
long time, jack up the vehicle body to
keep the tires off the ground.
●Open one window slightly (if the
vehicle is stored indoors).
●Disconnect the negative terminal of
the low-voltage battery.
●Pad the front wiper arm with a folded
towel or cloth to keep it out of contact
with the windshield.
●To reduce adhesion, apply silicone
lubricant to all door seals and body
wax to the painted surface where the
door seals meet.
Cooling System
Halaman 161
●Cover the body with a breathable
covering made of a "porous material"
such as cotton. Non-porous materials,
such as plastic sheeting, can build up
moisture and damage the paint.
●If possible, start the vehicle regularly
(preferably once every month). If the
vehicle has been parked for a year or
more, go to a BYD authorized dealer
or service provider for comprehensive
maintenance.
REMINDER
●Before transportation or storage,
it is recommended that SOC
should be 25%-40% to ensure the
performance of the high-voltage
battery and normal power supply
of the low-voltage battery.
Hood
Opening the Hood
1. Shift to "P" or "N" and engage the EPB.
Pull the handle on the right under the
dashboard. The hood opens slightly.
2. Put your finger under the front edge of
the hood in the right of the front center
of the vehicle, push up the latch until it
unlocks the hood, and then open it.
3. Lifting the hood over the balance
position will allow the hood to spring
automatically.
4. Pulling down the hood past the
balance position and letting go will
close the hood.
5. After closing the hood, check whether
the latch is securely locked.
6. If the hood can be opened without
moving the latch, or the latch is
not flexible to move or cannot
bounce back to its original position,
the lock mechanism of the hood
should be cleaned and filled with
lubricating oil. If it still malfunctions,
it is recommended to go to a BYD
authorized dealer or service provider
for repair.
06
MAINTENANCE
REMINDER
●Ensure that the hood is
closed and locked firmly before
driving. Otherwise, the hood may
suddenly open during driving,
resulting in an accident.
●Do not force down the hood or
release it from a high position.
Cooling System
●It is required that the level in the
coolant expansion tank should be
between "MAX" (maximum level) and
"MIN" (minimum level) marks.
●Refill coolant to the MAX line if the
level is below the MIN line. Check the
cooling system for leakage.
Braking System
Halaman 162
●The coolant must always be of the
same specification as the original.
Do not add any admixture. Different
brands and types of coolant should not
be mixed.
CAUTION
●Before opening the expansion
reservoir cap, make sure that
the motor, high-voltage electronic
control assembly, expansion
reservoir and radiator are all
cooled down.
REMINDER
●Opening the coolant expansion
tank before the motor has not
yet fully cooled down may cause
coolant to squirt out, resulting in
severe burns.
●Do not use tap water, so as to
avoid cooling system damage.
●To avoid incompatible coolants
and additives, do not apply
additives like rust remover to the
cooling system.
Washer
●During normal use, check the liquid
level of the windshield washer
reservoir at least monthly.
●If the windshield washer is used
frequently, the level of the washer
reservoir should be checked more
frequently.
●High quality windshield washer fluid
should be added to improve stain
removal and prevent freezing in cold
weather.
●When refilling the washer fluid, use a
clean cloth dipped in the windshield
washer fluid to clean the windshield
wiper blade. This helps keep the wiper
blade in good condition.
CAUTION
●Do not inject vinegar-water
solution into the windshield
washer fluid reservoir.
●It is recommended to use certified
windshield washing fluid.
Braking System
●Check the level in the fluid tank
monthly, and change the brake fluid
according to the travel time and
mileage specified in Maintenance
Schedule.
●Be sure to use the brake fluid of the
same specifications as the original
brake fluid, and different types of
brake fluid must not be mixed.
Wiper Blades
Halaman 163
●The fluid level should be between the
lower (MIN) and upper (MAX) marks on
the fluid tank wall.
●If the level is below the MIN mark,
check if the braking system leaks and
the brake friction blocks are worn.
A/C System
●The A/C system is a closed system,
and any important maintenance work
should be performed by professionals
from a BYD authorized dealer or
service provider.
●The following practices help ensure
that the A/C system works effectively.
●Check the radiator and A/C
condenser regularly. Remove leaves,
insects, and dust from the front
surface. These deposits will hinder
the air flow and reduce the cooling
effect. It is recommended to contact
a BYD authorized dealer or service
provider.
●In cold months, turn the A/C on once
a week for at least 10 minutes to
circulate the lubricating oil in the
refrigerant unit.
●If A/C cooling efficiency decreases, go
to a BYD authorized dealer or service
provider for maintenance.
REMINDER
●Whenever the A/C system is
maintained, the maintenance
station should use a refrigerant
recycling system.
●The system can recycle refrigerant
to avoid environmental pollution
caused by directly discharging
refrigerant.
Wiper Blades
The blade strip, made of synthetic rubber,
is a vulnerable part. Various service
environment of the vehicle and usage
habits of drivers can damage the blades.
Therefore, please observe the following
to ensure the service life of blades and
driving safety:
06
●Do not use a blade to remove ice
from the windshield surface. Use a
customized ice scraper.
MAINTENANCE
●Do not scrape the windshield surface if
it is dirty, greasy or waxy.
●Keep the windshield surface clean.
Do not scrape dust, sand, insects,
or foreign bodies on the windshield
surface.
●During vehicle washing and body paint
maintenance, there is no need to
wax the windshield, as the wax layer
reflects light in bad light, affecting
the line of sight and driving safety.
After washing the vehicle, rinse the
blade with plain water, and use special
windshield wax cleaner to remove the
wax layer on the windshield.
●To prevent excessive water pressure
from damaging the blades, do not
wash the blades directly with a water
jet.
Tire Inflation
Halaman 164
Maintenance Rules
●Clean windshield and blade regularly
(preferably once a week or once every
two weeks).
●Wipe the wiper regularly (preferably
once a day or once every two days)
even if it doesn't rain.
●When using a blade to wipe the
windshield, keep the windshield fully
wet (when there is no rain, the washer
liquid must be sprayed in advance).
●Clean the windshield with a special
windshield washer fluid.
●Promptly clean mud and insect
carcasses stuck to the windshield with
a rag.
●When there are marks on the
windshield caused by gravel,
maintenance should be carried out
timely (it is recommended that
windshield repair resin products
should be used and the windshield
should be replaced if marks are too
large or too many.)
●Replace the wiper blades regularly,
preferably once every three months.
●When cleaning the windshield, raise
the wiper arm in advance. The specific
operation method is as follows:
1. Switch the ignition off.
2. Grasp the upper end of the wiper
arm and carefully lift the wiper arm
and blade assembly.
Tires
●For safe driving, tires must be made
and sized to fit the vehicle, with good
tread and standard tire pressure.
●The following pages provide details on
how to check tire pressure, damage to
and wear of tires, and the operating
method for tire transposition.
WARNING
●Using tires with excessive wear
or insufficient/excessive pressure
can result in accidents, severe
injury, or death.
●Please follow all instructions
in this manual regarding tire
inflation and maintenance.
Tire Inflation
●Keep tires properly inflated to
provide the best combination of
maneuverability, tread life, and driving
comfort.
●Under-inflated tires can cause uneven
tire wear, affect steerability and energy
consumption, and are prone to leakage
due to overheating.
●Over-inflated tires reduce riding
comfort and are prone to damage from
uneven roads. In severe cases, the risk
of tire bursting poses severe threats to
the safety of the entire vehicle. Over-
inflation will also cause uneven wear
and tear of tires, affecting tire service
life.
●The vehicle is equipped with a tire
pressure gauge. When tires are cold,
you can decide whether to replenish
tire pressure according to the tire
pressure values displayed on the
instrument cluster.
●Tire pressure should be measured
while tires are at ambient
temperatures. This means that it
should be measured at least three
hours after stop. If you must drive
the vehicle before the tire pressure is
measured, tires can still be considered
at ambient temperatures as long as the
Maintenance
Halaman 165
traveled distance is not more than 1.6
km.
●It is normal that tire pressure reading
measured while tires are hot (after
travel of several kilometers) is 30-40
kPa (0.3-0.4 kgf/cm²) higher than when
tires are cold. In that case, do not
deflate tires in order to achieve the
specified cold tire pressure reading;
otherwise, the tire pressure will be
insufficient.
REMINDER
●The recommended cold tire
pressure is indicated on the label
affixed to the driver's door frame.
●Tubeless tires can self-seal punctures.
However, as leakage is usually very
slow, the leaks should be carefully
identified as soon as the tire begins to
depressurize.
Checks
●Whenever checking tire inflation,
check tires for damage, foreign body
piercing and wear.
●Replace the tire if bumps, or tread or
side damage are found. Tires must be
replaced if any of the cases happens.
●Replace the tire if there are cracks on
its side or if its fabric or cord can be
seen.
●Replace tires with excessive tread
wear.
●Tire treads are cast with wear bars.
When the tread is even with the wear
bar, its thickness is less than 1.6 mm.
The adhesion of tires worn to this
extent is very small on wet roads.
●Tires with exposed wear bars are
experiencing serious performance loss
and therefore must be replaced.
Maintenance
●In addition to proper inflation, proper
wheel alignment also helps reduce
tread wear.
●If uneven tire wear is found, go
to a BYD authorized dealer or
service provider and check the wheel
alignment.
06
MAINTENANCE
●Although the vehicle has been
balanced in the factory, it may need
to be re-balanced after running for a
period of time.
●If there is some kind of continuous
vibration at high vehicle speeds (above
80 km/h), but not at low vehicle
speeds, go to a BYD authorized dealer
or service provider for tire checks.
●If a tire has been repaired, be sure to
re-balance it.
●When installing a new tire or replacing
a new wheel, always perform tire
balancing.
CAUTION
●Improper wheel balancers can
become loose and fall off,
which damages the vehicle
or surrounding objects during
vehicle travel.
Replacing Tires and Wheels
Halaman 166
CAUTION
●Improper wheel balancers
damage the aluminium rims
of the vehicle. Therefore, it is
recommended to use original
wheel balancers.
Tire Rotation
●In order to make tires wear the same
and prolong their service life, it is
recommended to rotate tires regularly
and conduct four-wheel alignment,
inspection and adjustment as well.
●Do not rotate tires when a spare tire is
used for the vehicle.
●When purchasing replacement tires,
you may find that some tires are
"directional," which can only be
rotated in one direction. If directional
tires are used, only the front and rear
wheels can be swapped in tire rotation.
●As shown:
●① Non-directional tires and wheels.
●② Directional tires and wheels.
●After tire replacement, go to a BYD
authorized dealer or service provider
for tire pressure matching.
Replacing Tires and Wheels
●Original tires maximize performance,
while providing the best combination
of maneuverability, driving comfort
and service life.
●Go to a BYD authorized dealer or
service provider for replacement of
original tires.
●Replacement of tires with different
sizes, road ranges, rated speeds and
maximum cold pressures (marked on
the tire side) or mixed use of radial
tires and diagonal tires can reduce
braking ability, driving force (ground
adhesion) and steering accuracy.
●The installation of unsuitable tires
can affect the maneuverability and
stability of the vehicle, and may lead
to accidents.
●Replace four tires at the same time
whenever possible. If this is impossible
or unnecessary, replace front or rear
tires at the same time. Do not replace
only one tire; otherwise it will seriously
affect the maneuverability of the
vehicle.
●ABS works by comparing wheel speed.
When replacing a tire, use a tire of
the same size as the original tire.
The size and structure of the tire can
affect wheel speed and may lead to
uncoordinated system operation.
●If the wheel needs to be replaced,
ensure that the specifications of the
new wheel match those of the original
wheel. New wheels are available for
purchase at BYD authorized dealers or
service providers. Please consult a BYD
authorized dealer or service provider
before replacing the wheels.
REMINDER
Please observe the following
precautions to ensure proper vehicle
maneuverability and control.
Fuses
Halaman 167
REMINDER
●Do not mix radial tires, bias belted
tires, or diagonal ply tires on the
vehicle.
●Do not use tires with dimensions
other than those recommended
by the manufacturer.
Fuses
●All vehicle circuits are provided with
fuses to prevent short circuit or
overloading. These fuses are mounted
in fuse boxes respectively.
●The under-hood fuse box is located
on the left side of the engine
compartment.
●The dashboard PDB is located in the
shield under the dashboard.
●The under-hood fuse box is located
at the left rear part in the engine
compartment. To open it, press the
latch as shown in the illustration.
REMINDER
●Do not use fuses with amperage
higher than the rated ampere
value or any other solution to
replace the fuses, as this can
cause serious damage or even a
fire.
●Replacement of blown fuses with ones
of higher amperage can significantly
increase the likelihood of damage to
the electrical system.
06
MAINTENANCE
●If there is no spare fuse of the same
amperage, use a fuse with lower
amperage instead.
Under-Hood Fuse Box Nameplate
Halaman 168
# Under-Hood Fuse Box Nameplate
***
### Under-Hood Fuse Box Diagram Info
* **USE SPECIFIED FUSES & RELAYS ONLY / CAUTION** (请使用指定规格的保险丝盒继电器 / 注意)
* **拔离器 / Fuseclip**
* **备用/Spare**: 15A, 20A, 30A, 5A, 7.5A, 10A
***
| No. | Ampere (A) | Protected Component or Circuit |
| :--- | :---: | :--- |
| F1 | - | - |
| F2 | - | - |
| F3 | - | - |
| F4 | - | - |
| F5 | - | - |
| F6 | - | - |
| F7 | - | - |
| F8 | - | - |
| F9 | 7.5 | BMS |
| F10 | 15 | HV all-in-one controller |
| F11 | 15 | HV all-in-one controller |
***
168
Under-Hood Fuse Box Nameplate
Halaman 169
### 06 MAINTENANCE
| No. | Ampere (A) | Protected Component or Circuit |
| :---: | :---: | :--- |
| F12 | 7.5 | Compressor |
| F13 | 10 | Electrically controlled cooling water pump |
| F14 | - | - |
| F15 | 5 | Throttle valve |
| F16 | - | - |
| F17 | - | - |
| F18 | - | - |
| F19 | - | - |
| F20 | - | - |
| F21 | 30 | Front wiper |
| F22 | 30 | Rear defroster |
| F23 | 10 | Left low beam |
| F24 | 10 | Right low beam |
| F25 | - | - |
| F26 | 10 | USB |
| F27 | 15 | Auxiliary power |
| F28 | 15 | USB |
| F29 | - | - |
| F30 | 60 | ESC |
| F31 | 20 | Roof Light |
| F32 | - | - |
| F33 | 5 | ADAS |
| F34 | 5 | Instrument Cluster |
| F35 | 5 | Rear body control module |
| F36 | 7.5 | Interior Lights |
| F37 | 7.5 | PM 2.5 |
<br>
<p align="right">169</p>
Under-Hood Fuse Box Nameplate
Halaman 170
| No. | Ampere (A) | Protected Component or Circuit |
| :---: | :---: | :--- |
| F38 | 10 | SRS |
| F39 | 5 | Gear shift panel |
| F40 | 7.5 | ADAS |
| F41 | 5 | EPS |
| F42 | 5 | ESC |
| F43 | 5 | Yaw rate sensor |
| F44 | 60 | ESC |
| F45 | 40 | Blower |
| F46 | 10 | Left high beam |
| F47 | 10 | Right high beam |
| F48 | 10 | Rear wiper |
| F49 | - | - |
| F50 | 70 | EPS |
| F51 | 60 | Electric fan |
| F52 | - | - |
| F53 | - | - |
170
Dashboard PDB Nameplate
Halaman 171
Dashboard PDB Nameplate
---
### Dashboard PDB Nameplate Layout
| Left Column | Middle Column | Right Column |
| :---: | :---: | :---: |
| 31 | 22 | 11 |
| 30 | 21 | 10 |
| 29 | 20 | 09 |
| 28 | 19 | 08 |
| 27 | 18 | 07 |
| 26 | 17 | 06 |
| 25 | 16 | 05 |
| 24 | 15 | 04 |
| 23 | 14 | 03 |
| | 13 | 02 |
| **B+** | 12 | 01 |
**Left Vertical Warning Label:**
⚠️
**注意** 只能使用指定的保险丝和继电器
**NOTICE** USE THE DESIGNATED FUSES AND RELAYS ONLY
---
### Fuse Specification Table
| No. | Ampere (A) | Protected Component or Circuit |
| :---: | :---: | :--- |
| 01 | 30 | Front left power seat |
| 02 | 30 | Front right power seat |
| 03 | 5 | Instrument Cluster |
| 04 | 5 | Brake light switch |
| 05 | 15 | Sunroof motor |
| 06 | 20 | Roof Light |
---
**06 MAINTENANCE**
171
Dashboard PDB Nameplate
Halaman 172
| No. | Ampere (A) | Protected Component or Circuit |
|:---:|:---:|---|
| 07 | 5 | LCD Display |
| 08 | 5 | High-frequency receiving module |
| 09 | 20 | Infotainment System |
| 10 | 15 | External amplifier |
| 11 | 7.5 | Combination switch |
| 12 | 30 | Rear body control module |
| 13 | - | - |
| 14 | - | - |
| 15 | - | - |
| 16 | 10 | Diagnosis port |
| 17 | - | - |
| 18 | 7.5 | Wireless Charger |
| 19 | 30 | Rear body control module |
| 20 | 30 | Rear body control module |
| 21 | 25 | Blower |
| 22 | - | - |
| 23 | - | - |
| 24 | - | - |
| 25 | - | - |
| 26 | - | - |
| 27 | - | - |
| 28 | - | - |
| 29 | - | - |
| 30 | - | - |
| 31 | - | - |
<br>
172
When Faults Occur
Halaman 173
07
WHEN FAULTS
OCCUR
When Faults Occur..........................174
Emergency Shutdown System
Halaman 174
When Faults Occur
Reflective Vest
●The reflective vest is in the tool kit.
●In case of emergency, always wear
the reflective vest properly before you
check for faults or handle accidents to
ensure your safety.
If Smart Key Battery Is
Exhausted
If the smart key indicator does not flash
and the vehicle cannot be started using
the start function, the smart key battery
may be exhausted. It is recommended
to contact a BYD authorized dealer or
service provider for battery change as
soon as possible. In this case, you may
start the vehicle in no power mode.
CAUTION
●Do not place the smart key
in a position exposed to high
temperature.
●Do not hit or slam the key with
hard objects.
●Check for nearby radio stations,
substations or airport radio
transmitters that may interfere
with the normal operation of
electronic smart keys.
●After locking the vehicle and
arming its anti-theft alarm
system, keep the key away from
the vehicle if you do not use the
vehicle; otherwise the automatic
card finding of the vehicle will
consume the power of the low-
voltage battery and the smart key.
1. Use the mechanical key to unlock the
vehicle.
2. Put the smart key close to the no-
power sign on the auxiliary dashboard.
3. Press the START/STOP button and the
brake pedal to start the vehicle.
Emergency Shutdown
System
●The emergency shutdown system is
activated and the high-voltage system
is automatically shut down when the
following conditions are met:
●Any air bag fails to deploy after a
front collision.
●Some rear collisions.
●Vehicle system failure.
●The OK indicator goes off if any of the
above situations occurs.
●Activating the emergency shutdown
system in the noted types of collision
minimizes the risk of injuries or
accidents. The vehicle system cannot
be switched into the OK status
once the emergency shutdown system
is activated. In that case, it is
recommended to contact a BYD
authorized dealer or service provider.
Even if the ignition switch is set to the
OK position, the system will be turned
off immediately. It is recommended
If a Collision Occurs
Halaman 175
to contact a BYD authorized dealer or
service provider as soon as possible.
Vehicle Fire Rescue
In case of fire, continue to operate the
vehicle as follows according to the actual
situation:
●Switch the ignition off, and disconnect
the low-voltage battery in the engine
compartment if conditions permit.
●Locate a dry powder fire extinguisher
nearby.
●If the fire is small and slow, use a dry
powder fire extinguisher to put out the
fire, and call for help immediately.
●If the fire is large and growing quickly,
stay away from the vehicle and wait for
rescue.
CAUTION
●Wear insulated gloves during
vehicle disassembly. Use fire
extinguishers of designated
type. Water or incorrect fire
extinguishers may cause electric
shock.
●In the event of other special
conditions that cause flying
projectiles (such as interior trims
and glass), stay away from the
vehicle and promptly ask a
BYD authorized dealer or service
provider to come to the site for
handling.
If a Collision Occurs
In the event of a collision, please take the
following actions:
1. Switch the ignition off, and disconnect
the low-voltage battery in the engine
compartment if conditions permit.
2. It is recommended to call immediately
a BYD authorized dealer or service
provider for rescue.
3. Carry out a simple inspection, if
conditions permit: Check whether any
edge of the high-voltage battery tray
is cracked and whether any obvious
liquid flows out.
●In case of light leaks, avoid potential
sources of fire or flammable materials.
Absorb leaks with an absorbent pad,
and place the waste in a closed
container or burn the waste. Wear anti-
corrosion gloves before the operation.
In the event of a severe leak, clean
up any leaked fluids and treat them
as hazardous waste. Calcium gluconate
solution can help treat toxic HF gases.
●If skin comes in contact with leaked
fluid, wash it immediately with plenty
of water for 10-15 minutes. If there
is still any discomfort, apply 2.5%
calcium gluconate ointment, or soak
in 2% to 2.5% calcium gluconate
solution. If the condition does not
get better or discomfort persists, seek
medical help immediately.
07
WHEN FAULTS OCCUR
CAUTION
●Do not touch any spilled liquid,
and stay away from a leaking
vehicle or high-voltage battery.
●Do not dispose of the leaked fluid
into the water or soil or other
environment.
●The vehicle system operates
with high-voltage DC power. It
generates a lot of heat before and
after vehicle start-up and when
the vehicle is powered off. Watch
out for high pressures and high
temperatures.
●Do not disassemble, move,
or alter high-voltage battery
Tow Eye
Halaman 176
CAUTION
components and connecting
cables as their connectors can
cause serious burns or electric
shock and may result in personal
injury or death. The orange cables
are part of high-voltage wiring
harness. Users must not repair
the vehicle's high-voltage system
by themselves. If any repair is
required, it is recommended to
go to a BYD authorized dealer or
service provider for repair.
●The remote control key and high-
voltage components of the vehicle
may affect and harm people
carrying medical devices.
If the Vehicle Needs
Towing
If the vehicle needs towing, it is
recommended to contact a BYD
authorized dealer or service provider,
a professional towing service, or the
organization you joined for roadside
assistance.
CAUTION
●Do not allow other vehicles to pull
your car with only ropes or chains.
Recommended towing methods:
●Flatbed device
●If the vehicle fails and needs towing,
a flatbed is the best choice. Towing
the vehicle on front or rear wheels
alone may damage high-voltage
components.
CAUTION
●When using a flatbed device,
make sure the vehicle is securely
fastened to prevent it from sliding.
Tow Eye
●The installation point of vehicle tow
eye is shown in the illustration.
●If the vehicle needs rescue, it is
recommended to call a professional
rescue or the customer service
number.
●In emergency rescue situations where
the vehicle needs to be towed, observe
the following to avoid vehicle damage
or personal injuries:
●The towing vehicle must be in good
conditions and the towed vehicle in
Neutral; the tow speed must be no
more than 5km/h.
●Never use jerking actions to pull the
vehicle.
●The towed vehicle must not carry any
person except for the driver.
●Both towing and towed vehicles must
have their hazard warning lights on.
●Only the in-vehicle tow eye can be
used, to avoid damages to the vehicle.
●The distance between the towing and
towed vehicles must be more than 4
meters but less than 10 meters.
In-Vehicle Tools
Halaman 177
●The width and weight of the towed
vehicle must not greater than those of
the towing vehicle.
●When towing the vehicle, ensure its
surroundings are unobstructed and
have enough space and no person is
close to the towing device.
●When freeing the vehicle, control to
make it travel in the direction of tow
force. Dragging the vehicle from the
side or vertically is prohibited.
●The towed vehicle must be controlled
by a driver inside the cabin, with
the steering and braking systems in
normal conditions.
WARNING
●Rescuing a stuck or high-centered
vehicle by using the tow eye
is prohibited. Instead, calling
a professional rescue or the
customer service number is
recommended.
●If the steering or braking system
of the towed vehicle fails, contact
a professional rescue or the
customer service number. Do not
tow the vehicle in such cases.
If a Tire Goes Flat
●Maintain the lane position and
gradually slow down the vehicle. Drive
the vehicle off the busy road to a safe
place. Park on solid, flat ground and
avoid highway forks. Park on solid, flat
ground and avoid motorway forks.
●Engage the EPB and press the "P"
button.
●Power off the vehicle and turn on the
hazard warning light.
●Be sure to have all passengers get off
the vehicle and ask them to go to a
safe place away from crowded traffic.
●To prevent slipping, secure the vehicle
by wedging the tire diagonally against
the flat tire.
CAUTION
●Do not continue driving with a
flat tire. Even a short distance of
driving with flat tire can cause
irreparable damage.
In-Vehicle Tools
●In-vehicle tools are stored in a tool box
under the trunk cover flap.
●In-vehicle tools include warning
triangle, reflective vest, lug nut cap
removal clamp, tire repair kit, and tow
eye.
●In an emergency where you need to
service the vehicle yourself, you must
know how to use these in-vehicle tools
and their locations.
07
WHEN FAULTS OCCUR
Placing the Warning Triangle
REMINDER
●When parking for repair,
remember to place the red
triangle side facing oncoming
vehicles, 100-200 meters away
from the vehicle. After the repair,
recover the warning triangle for
future use.
The warning triangle is used to warn
vehicles coming from behind and to
avoid collisions due to high speed or late
braking.
How to use the warning triangle:
1. Take the warning triangle out of its
box.
Using Tire Repair Kit
Halaman 178
2. Attach the ends to form a triangle.
3. Mount the supports as shown.
Using Tire Repair Kit
●The tire repair kit is used to seal small
cuts, especially cuts in tread pattern. It
is just an emergency solution for you to
drive to the nearest service center, and
only for short emergency stretches,
even if the tire is not deflated.
●The tire repair kit is in the trunk and
can be taken out from the interior trim
panel.
●The tire repair kit includes: sealant,
inflator, and adhesive sticker with
marked maximum allowable speed
and instructions.
WARNING
●The tire repair kit is only suitable
for minor damages of tires. If a
wheel is damaged, tyre puncture
sealant kit is prohibited.
●Tire sealant is highly flammable
and harmful to health. Take
necessary precautions to prevent
fire and avoid contact with skin,
eyes, and clothing; keep away
from children; and do not inhale
its vapor.
In case of contact with tire sealant:
WARNING
●If tire sealant comes into contact
with the skin or gets into
the eyes, thoroughly flush the
affected body part immediately
with plenty of clean water.
●Change contaminated clothing
immediately.
●In case of an allergic
reaction, seek medical attention
immediately.
●If tire sealant is ingested by
accident, rinse mouth thoroughly
and drink plenty of water
immediately. Do not induce
vomiting, but seek medical
attention immediately.
How to Use
●Refer to labels on the inflator for usage
of the kit.
●If the inflator needs to be connected
to a power source, plug the inflator
into the vehicle's 12V socket, start the
vehicle, and turn on the inflator. The
tire sealant is then filled through the
inflator hose into the tire along with
air.
Using Tire Repair Kit
Halaman 179
REMINDER
●Make sure the inflator switch is off
when plugging the power supply
into the 12V socket in the vehicle.
●The inflator can only be turned on
for up to 10 minutes.
●Before using the power plug,
make sure that its voltage and
power do not exceed the 12V
and 120 W limits marked on the
backup power supply. Exceeding
these limits poses a safety hazard.
●Observe the tire pressure gauge
reading on the inflator.
●If the tire pressure does not reach 180
kPa within 10 minutes (red area shown
in the figure), turn off the inflator. You
are recommended to contact a BYD
authorized dealer or service provider.
●If the tire pressure reaches between
180 and 320 kPa (green and yellow
areas shown in the figure), remove
the kit as soon as possible and drive
at a speed below 80 km/h within
one minute, with the furthest driving
distance not exceeding 10 km, so that
the tire sealant is evenly distributed
within the tire.
●Pull over the vehicle and check the tire
pressure on the instrument cluster.
●If the tire pressure is greater than
220 kPa, drive to the nearest service
center at a speed below 80 km/h.
●If the tire pressure is between 130
and 220 kPa, repeat the process
to fill the tire sealant into the tire
and observe the tire pressure gauge
reading on the inflator.
●If the tire pressure does not reach 130
kPa, it is recommended to contact
a BYD authorized dealer or service
provider.
07
WHEN FAULTS OCCUR
REMINDER
●Using tire repair device on
damaged tires is only an
emergency solution. Please
change the tires at a professional
repair center as soon as possible.
It is recommended that you
contact a BYD authorized dealer
or service provider and inform the
maintenance technician that the
tires contain tire sealant.
●Avoid hard acceleration and high-
speed turns.
●Abide by the maximum vehicle
speed limit of 80 km/h. Do not
continue driving if any strong
vibration, driving instability, or
noise occurs while the vehicle is
running.
Using Tire Repair Kit
Halaman 180
REMINDER
●When the tire sealant is about
to expire (see the label on the
canister for exact date), replace it
with a new one.
●After using the tire repair device,
it is recommended that you
purchase new tire sealant at a
BYD authorized dealer or service
provider.
Technical Data
Halaman 181
# 08 TECHNICAL DATA
* Vehicle Data...................................................... 182
* Information........................................................ 185
* Declarations of Conformity............................ 187
Vehicle Data
Halaman 182
# Vehicle Data
## Vehicle Data
### Dimensions
| Item | Parameter |
| :--- | :--- |
| Length (mm) | 4710 |
| Width (mm, excluding side mirrors) | 1810 |
| Height (mm) | 1690 |
| Wheelbase (mm) | 2800 |
| Front track (mm) | 1540 |
| Rear track (mm) | 1530 |
| Front overhang (mm) | 960 |
| Rear overhang (mm) | 950 |
| Approach angle (°) | 15 |
| Departure angle (°) | 17 |
### Vehicle mass
| Item | Parameter |
| :--- | :--- |
| Curb weight (kg) | 1780/1800;1895/1915 |
| Front axle load (kg) | 945/950;965/970 |
| Rear axle load (kg) | 835/850;930/945 |
| Max allowable total mass (kg) | 2279/2374;2394/2489 |
| Front axle load at max. allowable total mass (kg) | 1073/1083;1093/1103 |
| Rear axle load at max. allowable total mass (kg) | 1026/1291;1301/1386 |
| Number of occupants (persons) | 6/7 |
### Drive motor
| Item | Parameter | | |
| :--- | :--- | :--- | :--- |
| Model | TZ200XSAK | TZ200XSAN | TZ200XSQ |
<br>
182
Vehicle Data
Halaman 183
Item
Parameter
Type
Permanent magnet synchronous motor
Drive type
Front-wheel drive
Rated power/speed/
torque (kW/rpm/Nm)
65/4433/140
Peak power/speed/
torque (kW/rpm/Nm)
100/16000/250
120/16000/310
150/16000/310
Vehicle power performance and
economic efficiency
Item
Parameter
Max. design speed (km/h)
180
Max gradeability (%)
31
Power consumption per 100 km
under comprehensive working conditions
(kWh/100 km)
Wheels and tires
Item
Parameter
Tire Specification
225/55 R17
Tire pressure (kPa)
250
Wheel dynamic balance requirement (g)
≤10
Wheel alignment values (at curb
weight)
Item
Parameter
Front camber (°)
-0.82-0.68
Front toe-in (°)
0-0.36
Kingpin inclination angle (°)
10.97-12.47
Kingpin caster angle (°)
4.78-6.28
Rear camber (°)
-1.5-0
Rear toe-in (°)
0.08-0.4
15.7/16
08
TECHNICAL DATA
Vehicle Data
Halaman 184
Braking system
Item
Parameter
Free stroke of brake pedal (mm)
≤5
Front brake disc thickness (mm)
28
Rear brake disc thickness (mm)
12
Front friction plate thickness (mm)
8
Rear friction plate thickness (mm)
6.5
High-voltage battery
Item
Parameter
Type
Lithium iron phosphate battery
Rated capacity (Ah)
170
Seats
Item
Parameter
The design position is the end of slide
rail and 210 mm forward is the foremost
position.
Forward and backward moving spaces for
front seat (seat cushion depth measured)
Seatback angle of front seats (cushion
depth measured)
23°
27.5° forward and 45° backward from
designed position, slide rail 210 mm forward
and 0 mm backward from designed position;
slide rail inclination: 4.5°
Normal service conditions of front
seatbacks
Forward and
backward moving
spaces for second-row
seats (seat cushion
depth measured)
Seven seaters
270 mm forward from the farthest slide rail
stroke
Six seaters
Seatback angle of
second-row seats
(cushion depth
measured)
Seven seaters
23°
Six seaters
Normal service
conditions of second-
row seatbacks
5.6° backward and 16.9° forward from the
designed position, forward 250 mm and
backward 20 mm on the horizontal guide rail
Seven seaters
Vehicle Identification Number (VIN)
Halaman 185
Item
Parameter
Six seaters
Forward and backward moving spaces
for third row seat (seat cushion depth
measured)
Seatback angle of the third row seats
(cushion depth measured)
27°
Normal service conditions of the third-row
seatbacks
18.75° forward from the designed position
Fluid
Item
Parameter
Gear transmission oil type
Gear transmission oil amount (L)
0.6 ± 0.05
Brake fluid type
HZY6
Brake fluid amount (ml)
1100±100
Motor coolant type
Long-acting antifreeze
Motor coolant amount (L)
4.9 ± 0.5
Information
Vehicle Identification
Vehicle Identification Number (VIN)
① Attached to the upper end of the front
crossbeam
② Attached to the parallel sheet metal
edge to the left front of the hood sheet
metal
③ Attached to the transmission housing
④ Attached to the lower left of the front
windshield
17° backward and 40° forward from the
designed position, forward 250 mm and
backward 20 mm on the horizontal guide rail
Immovable
Castrol BOT384
EV POWER EV2.0
08
TECHNICAL DATA
⑤ Engraved under the driver's seat
⑥ Attached to the lower part of the left
front door lock screw
⑦ Attached to the left rear door sill
⑧ Attached to the left rear wheel
envelope
Warning Labels
Halaman 186
⑨ Attached to the upper part of the inner
panel of the trunk lid
Note: After connecting the VDS, the VIN
can be found in the upper right corner of
the screen for the corresponding model.
For details, please refer to the VDS
operation manual.
Vehicle Nameplate
① The vehicle nameplate is located at
the lower sheet metal sink of the right
B-pillar.
Model and Serial Number of Drive
Motor
① Engraved in the middle of the front
part of the drive motor housing.
② Attached to the front end of the hood.
Warning Labels
The airbag warning label is printed on the
sun visor.
The refrigerant refill and cooling fan
labels are attached near the hood lock
ring.
The tire pressure indication label is
attached below the right B-pillar.
Declarations of Conformity
Halaman 187
Side airbag labels are attached on the
lower part of the left and right B-pillars.
The battery position indication label is
attached near the hood lock ring.
The child protection lock labels are
attached on the metal sheet right below
the child protection locks on the left and
right rear doors.
The charging warning label is attached
inside the charge port door.
08
TECHNICAL DATA
Declarations of Conformity
Halaman 188
# Declarations of Conformity
## Declarations of Conformity
### MmWave Radar Certification
| Country | Model | Certification Mark |
| :--- | :--- | :--- |
| **Singapore** | 77V12FLR<br>77V13CRN | Complies with<br>IMDA Standards<br>DA109029 |
| **Indonesia** | 77V12FLR | 95034/SDPPI/2023<br>[QR Code] 14743 |
| | 77V13CRN | 94874/SDPPI/2023<br>[QR Code] 14743 |
| **Pakistan** | 77V12FLR | Approved by PTA<br>TAC NO: 9.9390/2019<br>**PTA**<br>_Pakistan Telecommunication Authority_ |
| | 77V13CRN | Approved by PTA<br>9.1030/2020<br>**PTA**<br>_Pakistan Telecommunication Authority_ |
---
188
Declarations of Conformity
Halaman 189
Numerics
12V Auxiliary Power...................... 143
A
A/C Buttons................................... 132
A/C Control Panel, Car Speakers,
Dashboard, Control Panel and
Switches........................................ 157
About BYD App.............................. 139
Account Registration.................... 139
Acoustic Vehicle Alerting System
(AVAS)............................................ 125
Adaptive Cruise Control (ACC)*.... 100
Adjusting Front Seat with Power*.. 50
Adjusting Front Seats Manually*.... 50
Adjusting Head Supports............... 53
Adjusting Rear Seats....................... 52
Adjusting Second-Row Seats.......... 51
Adjusting the Steering Wheel......... 54
Air Purification System* Overview....
135
Airbag Overview.............................. 15
Airbag Triggering Conditions and
Precautions..................................... 17
Anti-theft Alarm System................. 26
Automatic Vehicle Hold (AVH)........ 97
Automatic Vehicle Washing.......... 156
B
Bill Box........................................... 141
Blind Spot Assist (BSA)*................ 114
Bluetooth Call............................... 131
Break-in Period............................... 87
BYD Assistant................................ 131
C
Carpet............................................ 157
Carrying Luggage............................ 89
Charge Port Anti-theft Lock............ 82
Charging Precautions..................... 70
Charging Safety Warnings..............
Child Protection Lock..................... 48
Child Restraint System Classification
......................................................... 21
Cooling System............................. 161
Cruise Control System*.................. 99
D
Declarations of Conformity.......... 187
Discharging Device*........................ 80
Door Bins....................................... 141
Doors and Windows...................... 157
Driver and Front Passenger Airbags
......................................................... 16
Driver Assistance Switches............. 64
Driving Precautions........................ 98
Driving Safety Precautions............. 87
Driving Safety Systems................. 121
E
Electronic Parking Brake (EPB)...... 95
Electronic Smart Key...................... 40
Emergency Lane Keeping Assist
(ELKA)*.......................................... 113
Emergency Unlocking of the Charge
Port.................................................. 82
Emergency Vehicle Locking with
Mechanical Key............................... 46
Engaging EPB Manually.................. 95
Event Data Recorder System.......... 27
Exterior Cleaning........................... 155
F
Fire Prevention............................... 90
Forward Collision Warning (FCW)* &
Automatic Emergency Braking (AEB)*
....................................................... 106
Front A/C Operation Interface...... 133
Front Center Console Cubby........ 141
Front Interior Lights Switches........ 66
Front Seat Cup Holder.................. 141
Declarations of Conformity
Halaman 190
Front Seat Side Airbags..................
Front-Row USB Ports.................... 143
Function Definition....................... 136
Fuses.............................................. 167
G
Gear Shift Controls......................... 94
General Charging Troubleshooting 73
Gestures and Responses.............. 131
Glove Box...................................... 140
Grab Handles................................ 142
H
Hazard Warning Light Switch......... 65
High Beam Assist (HMA)*.............. 110
High-Voltage Battery...................... 83
I
Indicators and Warning Lights....... 31
Individual Center and Vehicle
Management................................. 140
Infotainment Touchscreen........... 130
Installing Child Restraint Systems. 22
Instrument Cluster View................. 30
Intelligent Charging........................ 81
Intelligent Cruise Control (ICC)*... 104
Interior Cleaning........................... 156
K
Keys................................................. 40
L
Leather.......................................... 157
Light Switches................................. 59
Locking/Unlocking the Trunk........ 44
Locking/Unlocking with Mechanical
Key................................................... 42
Locking/Unlocking with Smart Key
......................................................... 42
Low-Voltage Battery....................... 85
M
Maintenance Plan......................... 148
Manual Vehicle Washing............... 156
Mechanical Key............................... 41
Mode Switches................................ 65
N
Navigation Bar.............................. 131
O
Odometer Switch............................ 65
Opening the Hood........................ 161
P
Paint Maintenance Tips................ 155
Panoramic View System............... 116
Parking Assist System................... 118
Power Window Switches................ 62
Push-Type Storage Box................. 141
R
Recycling the High-Voltage Battery
......................................................... 85
Regular Maintenance.................... 153
S
Saving Energy and Extending Vehicle
Service Life...................................... 89
Scheduled Charging....................... 79
SD Card Slot*................................. 144
Seat Belt Overview......................... 12
Declarations of Conformity
Halaman 191
Seat Belts....................................... 157
Seat Precautions........................... 49
Self-Maintenance Precautions...... 158
Side Curtain Airbags..................... 17
Side Vents...................................... 138
Snow Chains\*................................ 128
Steering Wheel Switches............... 54
Sun Visor....................................... 142
T
Tire Pressure Monitoring System. 124
Traffic Sign Recognition (TSR)\*.... 109
Trailer Towing.............................. 87
U
Usage Precautions.......................... 138
Using AC Charging Piles\*............... 76
Using Mode 2 Charging Cable\*..... 74
Using Seat Belts............................. 13
V
Vehicle Corrosion Prevention........ 154
Vehicle Data................................... 182
Vehicle Identification.................... 185
Vehicle Use Suggestions................ 88
Vehicle Wading into Water............ 91
W
Warning Labels............................. 186
Warning Lights/Indicators
Description................................. 32
Winter Driving Precautions........... 99
Wiper Switches............................. 61
Wipers........................................... 127
Wireless Phone Charger\*.............. 144
191
Declarations of Conformity
Halaman 192
192
Abbreviations
Halaman 193
Abbreviations
Abbreviation
Terminology
Abbreviation
Terminology
ELR
Emergency Locking Retractor
SRS
Supplemental Restraint System
EDR
Event Data Recorder
FCW
Forward Collision Warning
ICC
Intelligent Cruise Control
ACC
Adaptive Cruise Control
IHBC
Intelligent High Beam Control
AEB
Automatic Emergency Braking
TSR
Traffic Sign Recognition
LDA
Lane Departure Assist
LDW
Lane Departure Warning
LDP
Lane Departure Prevention
ELKA
Emergency Lane Keeping Assist
BSD
Blind Spot Detection
DOW
Door Open Warning
RCW
Rear Collision Warning
RCTA
Rear Collision Traffic Alert
RCTB
Rear Cross Traffic Braking
VDC
Vehicle Dynamics Control
TCS
Traction Control System
HHC
Hill Hold Control
HBA
Hydraulic Brake Assit
CDP
Controlled Deceleration for
Parking Brake
ESC
Electronic Stability Controller
ABS
Antilock Braking System
EPB
Electronic Parking Brake
AVH
Auto Vehicle Hold
ECU
Electronic Control Unit
PM2.5
Particulate Matter 2.5
TPMS
Tire Pressure Monitoring System
AVAS
Acoustic Vehicle Alerting System
VIN
Vehicle Identification Number
Abbreviations
Halaman 194
194